Step 4: Track & Manage with Ease
This step helps you track and manage orders with ease. You’ll learn how to review and update participant answers, apply and manage payments, assign partners, add internal comments, and move registrations through different statuses — all in one place.
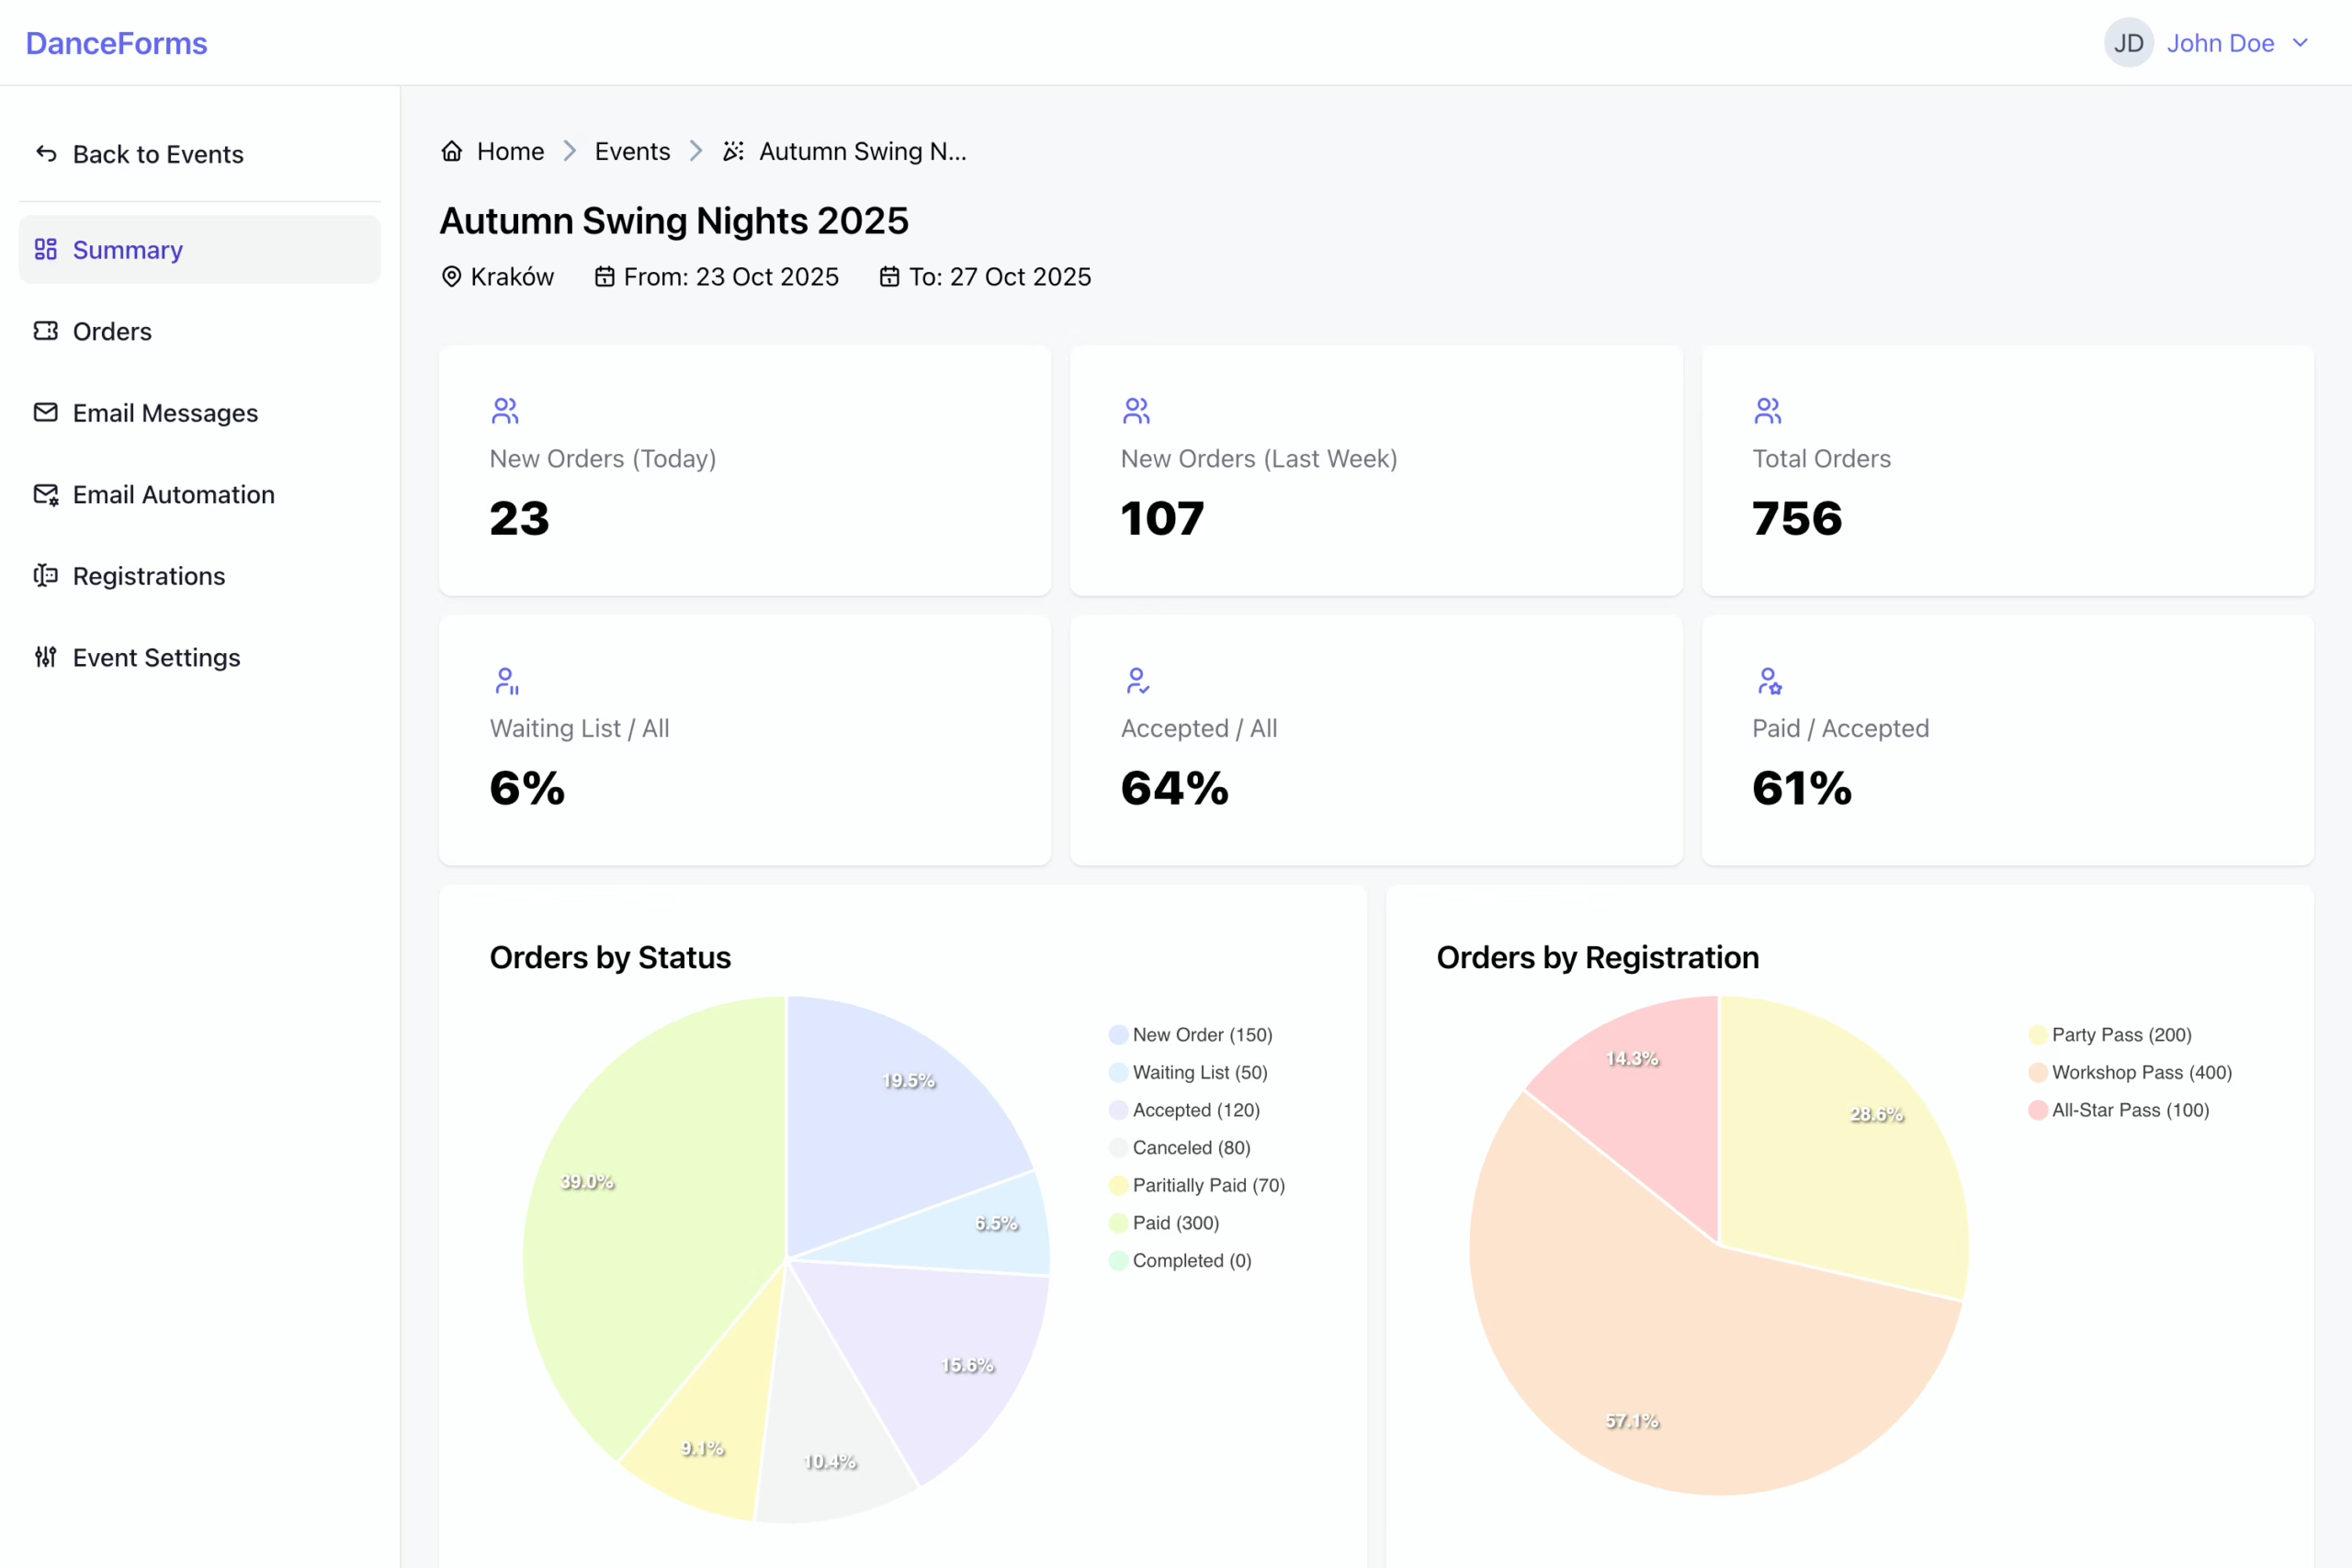
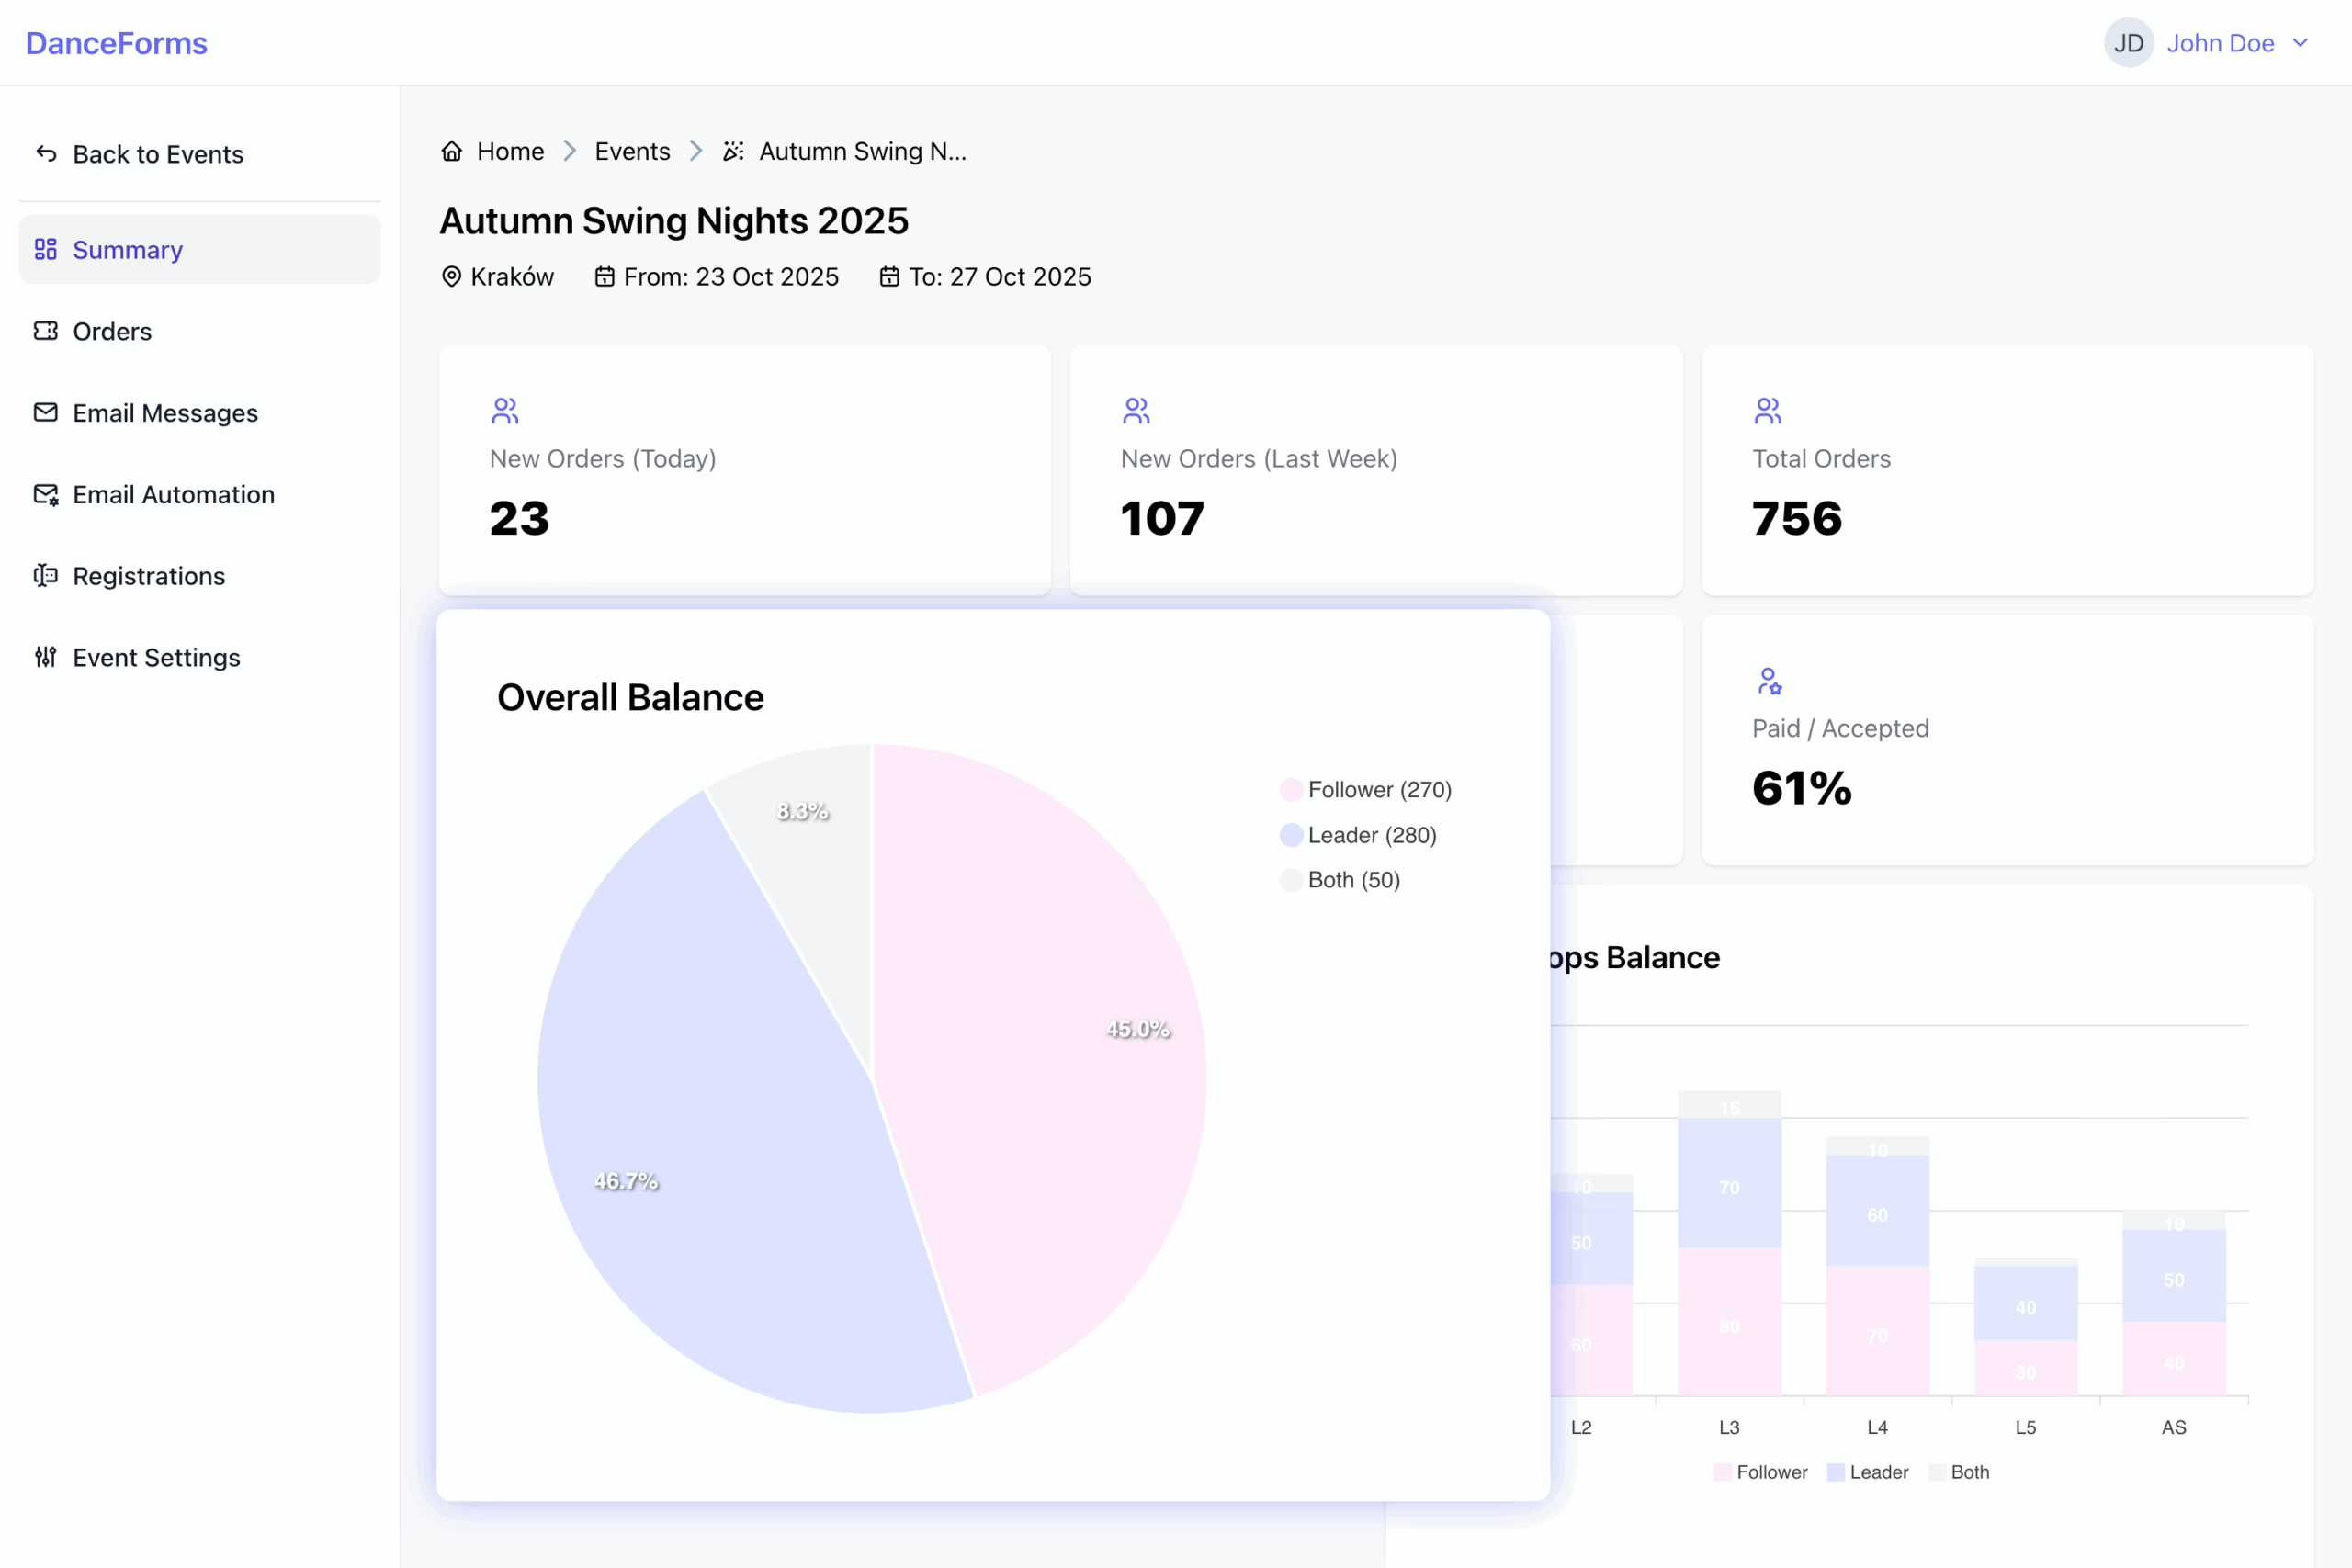
Go to the Event Dashboard to review key metrics and charts that give you an overview of your event’s performance:
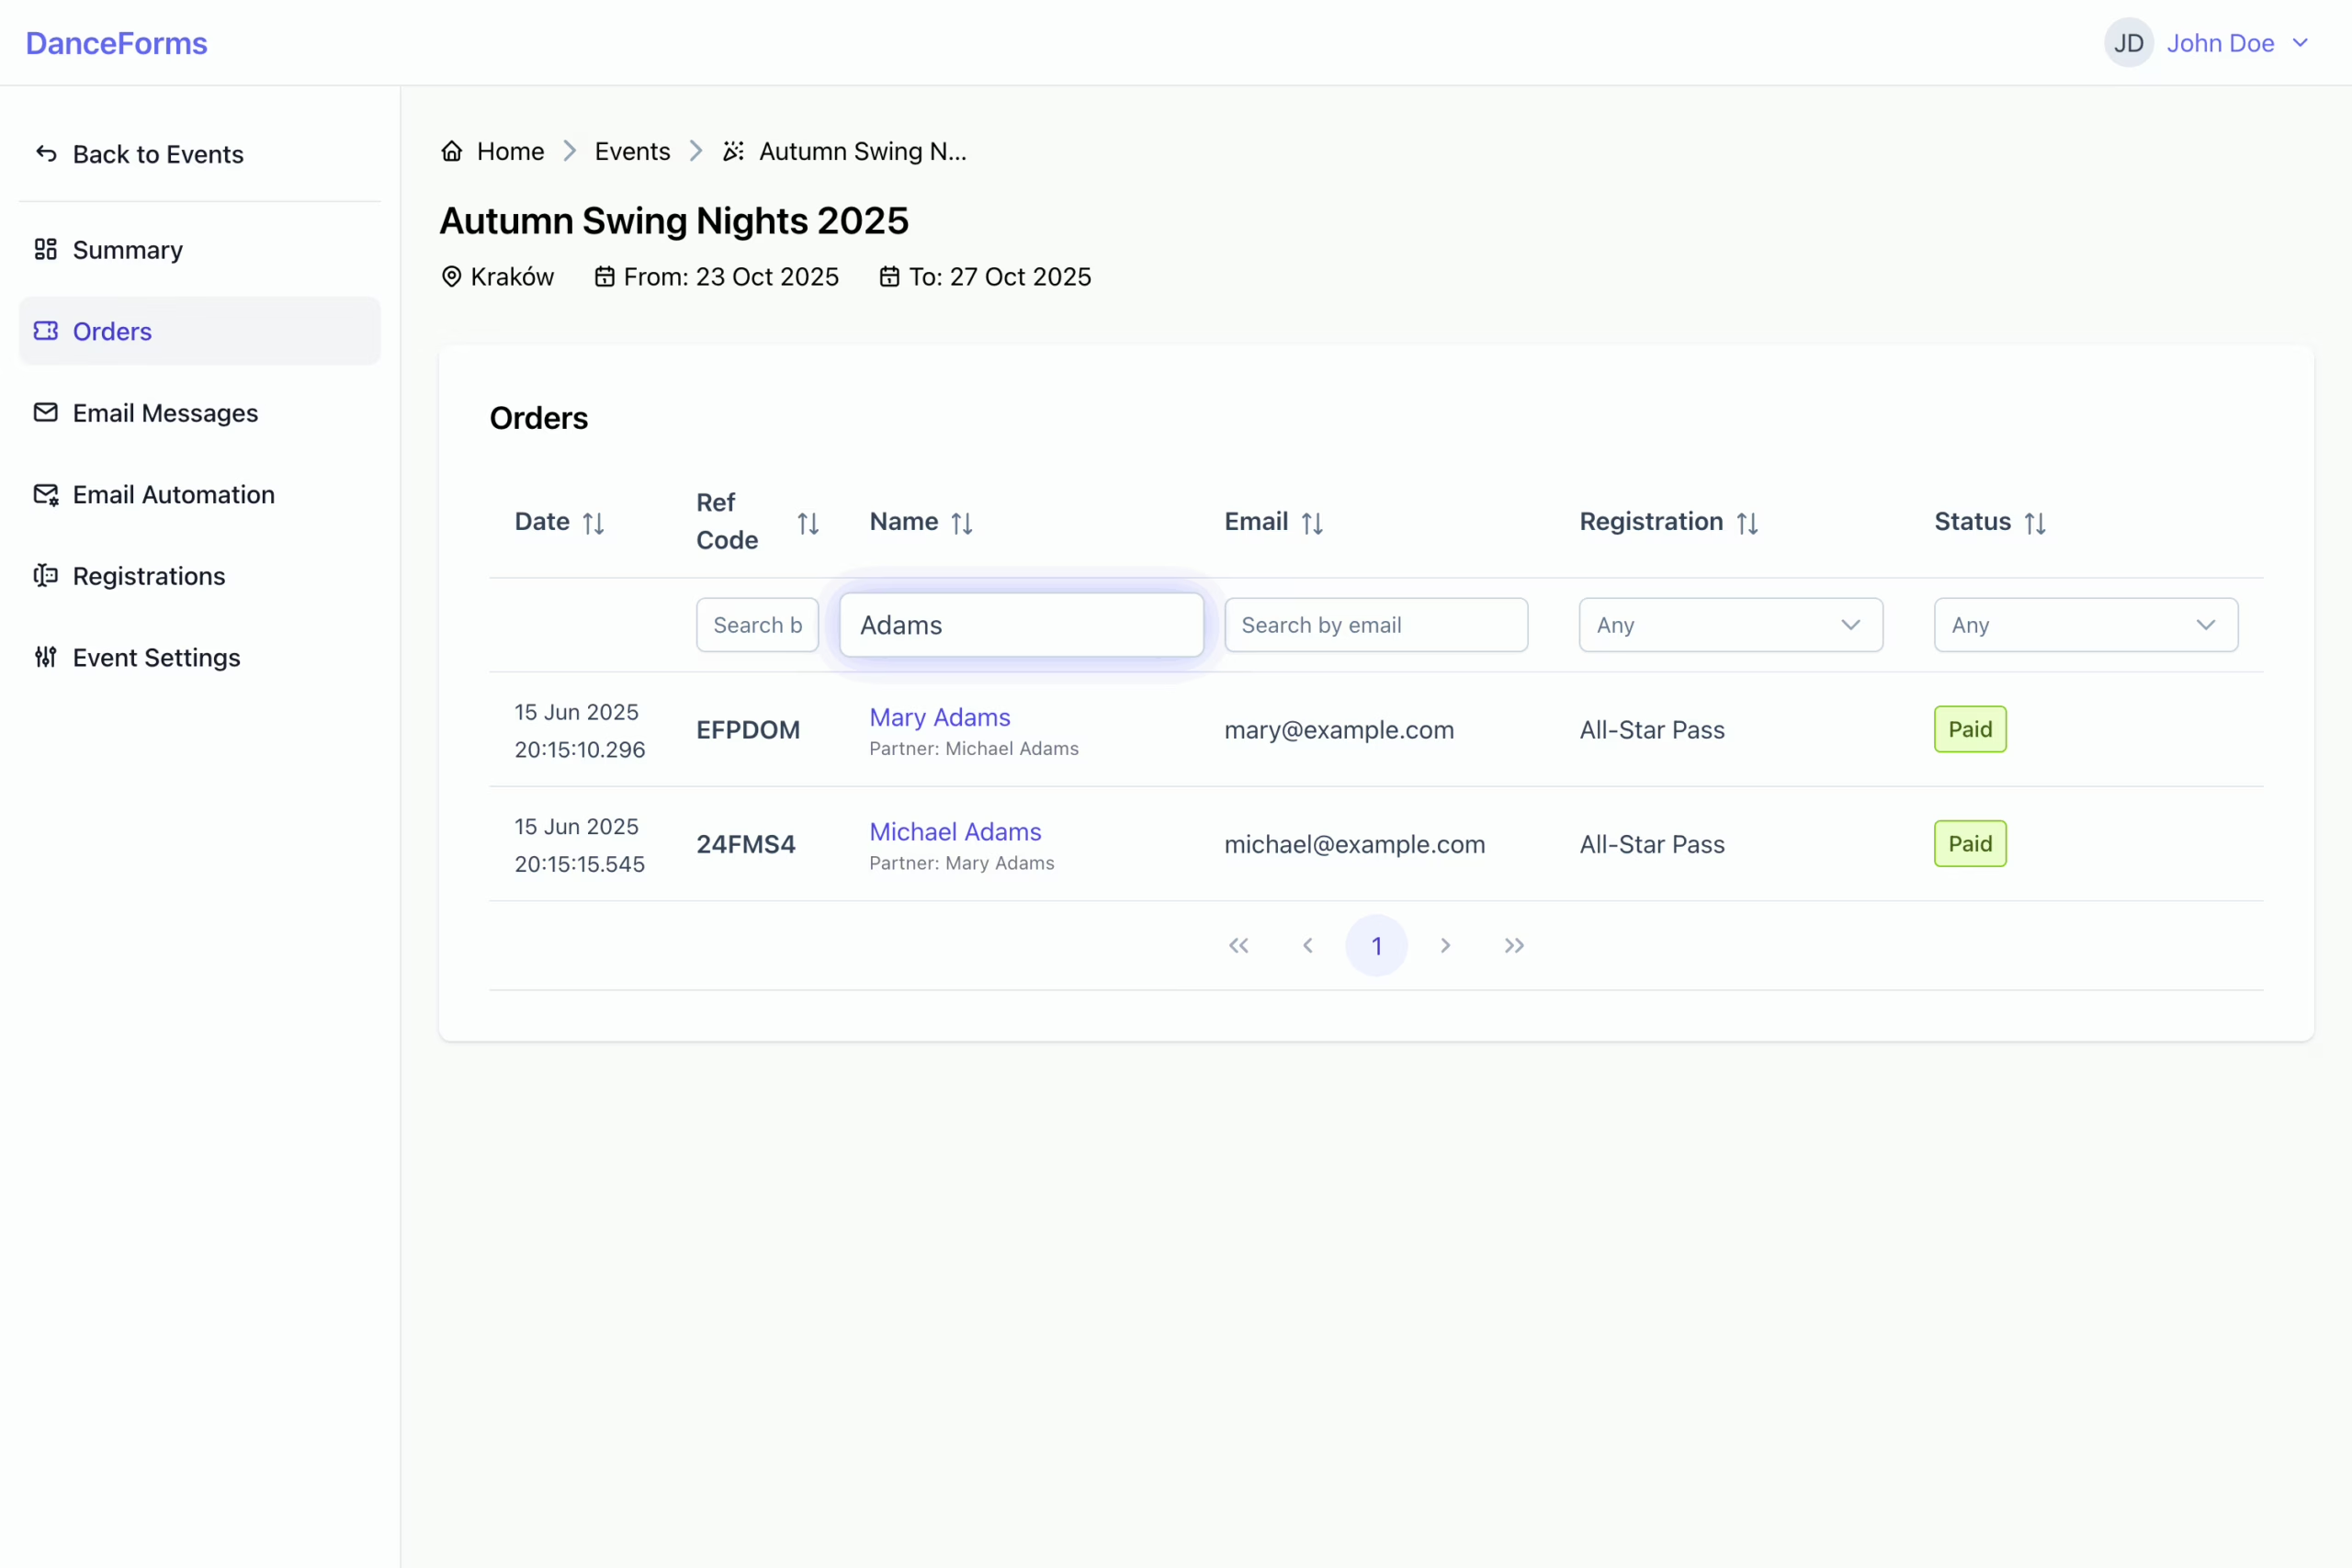
You can quickly find and manage orders by using search and filtering options to narrow down orders based on status, registration type, or participant details.
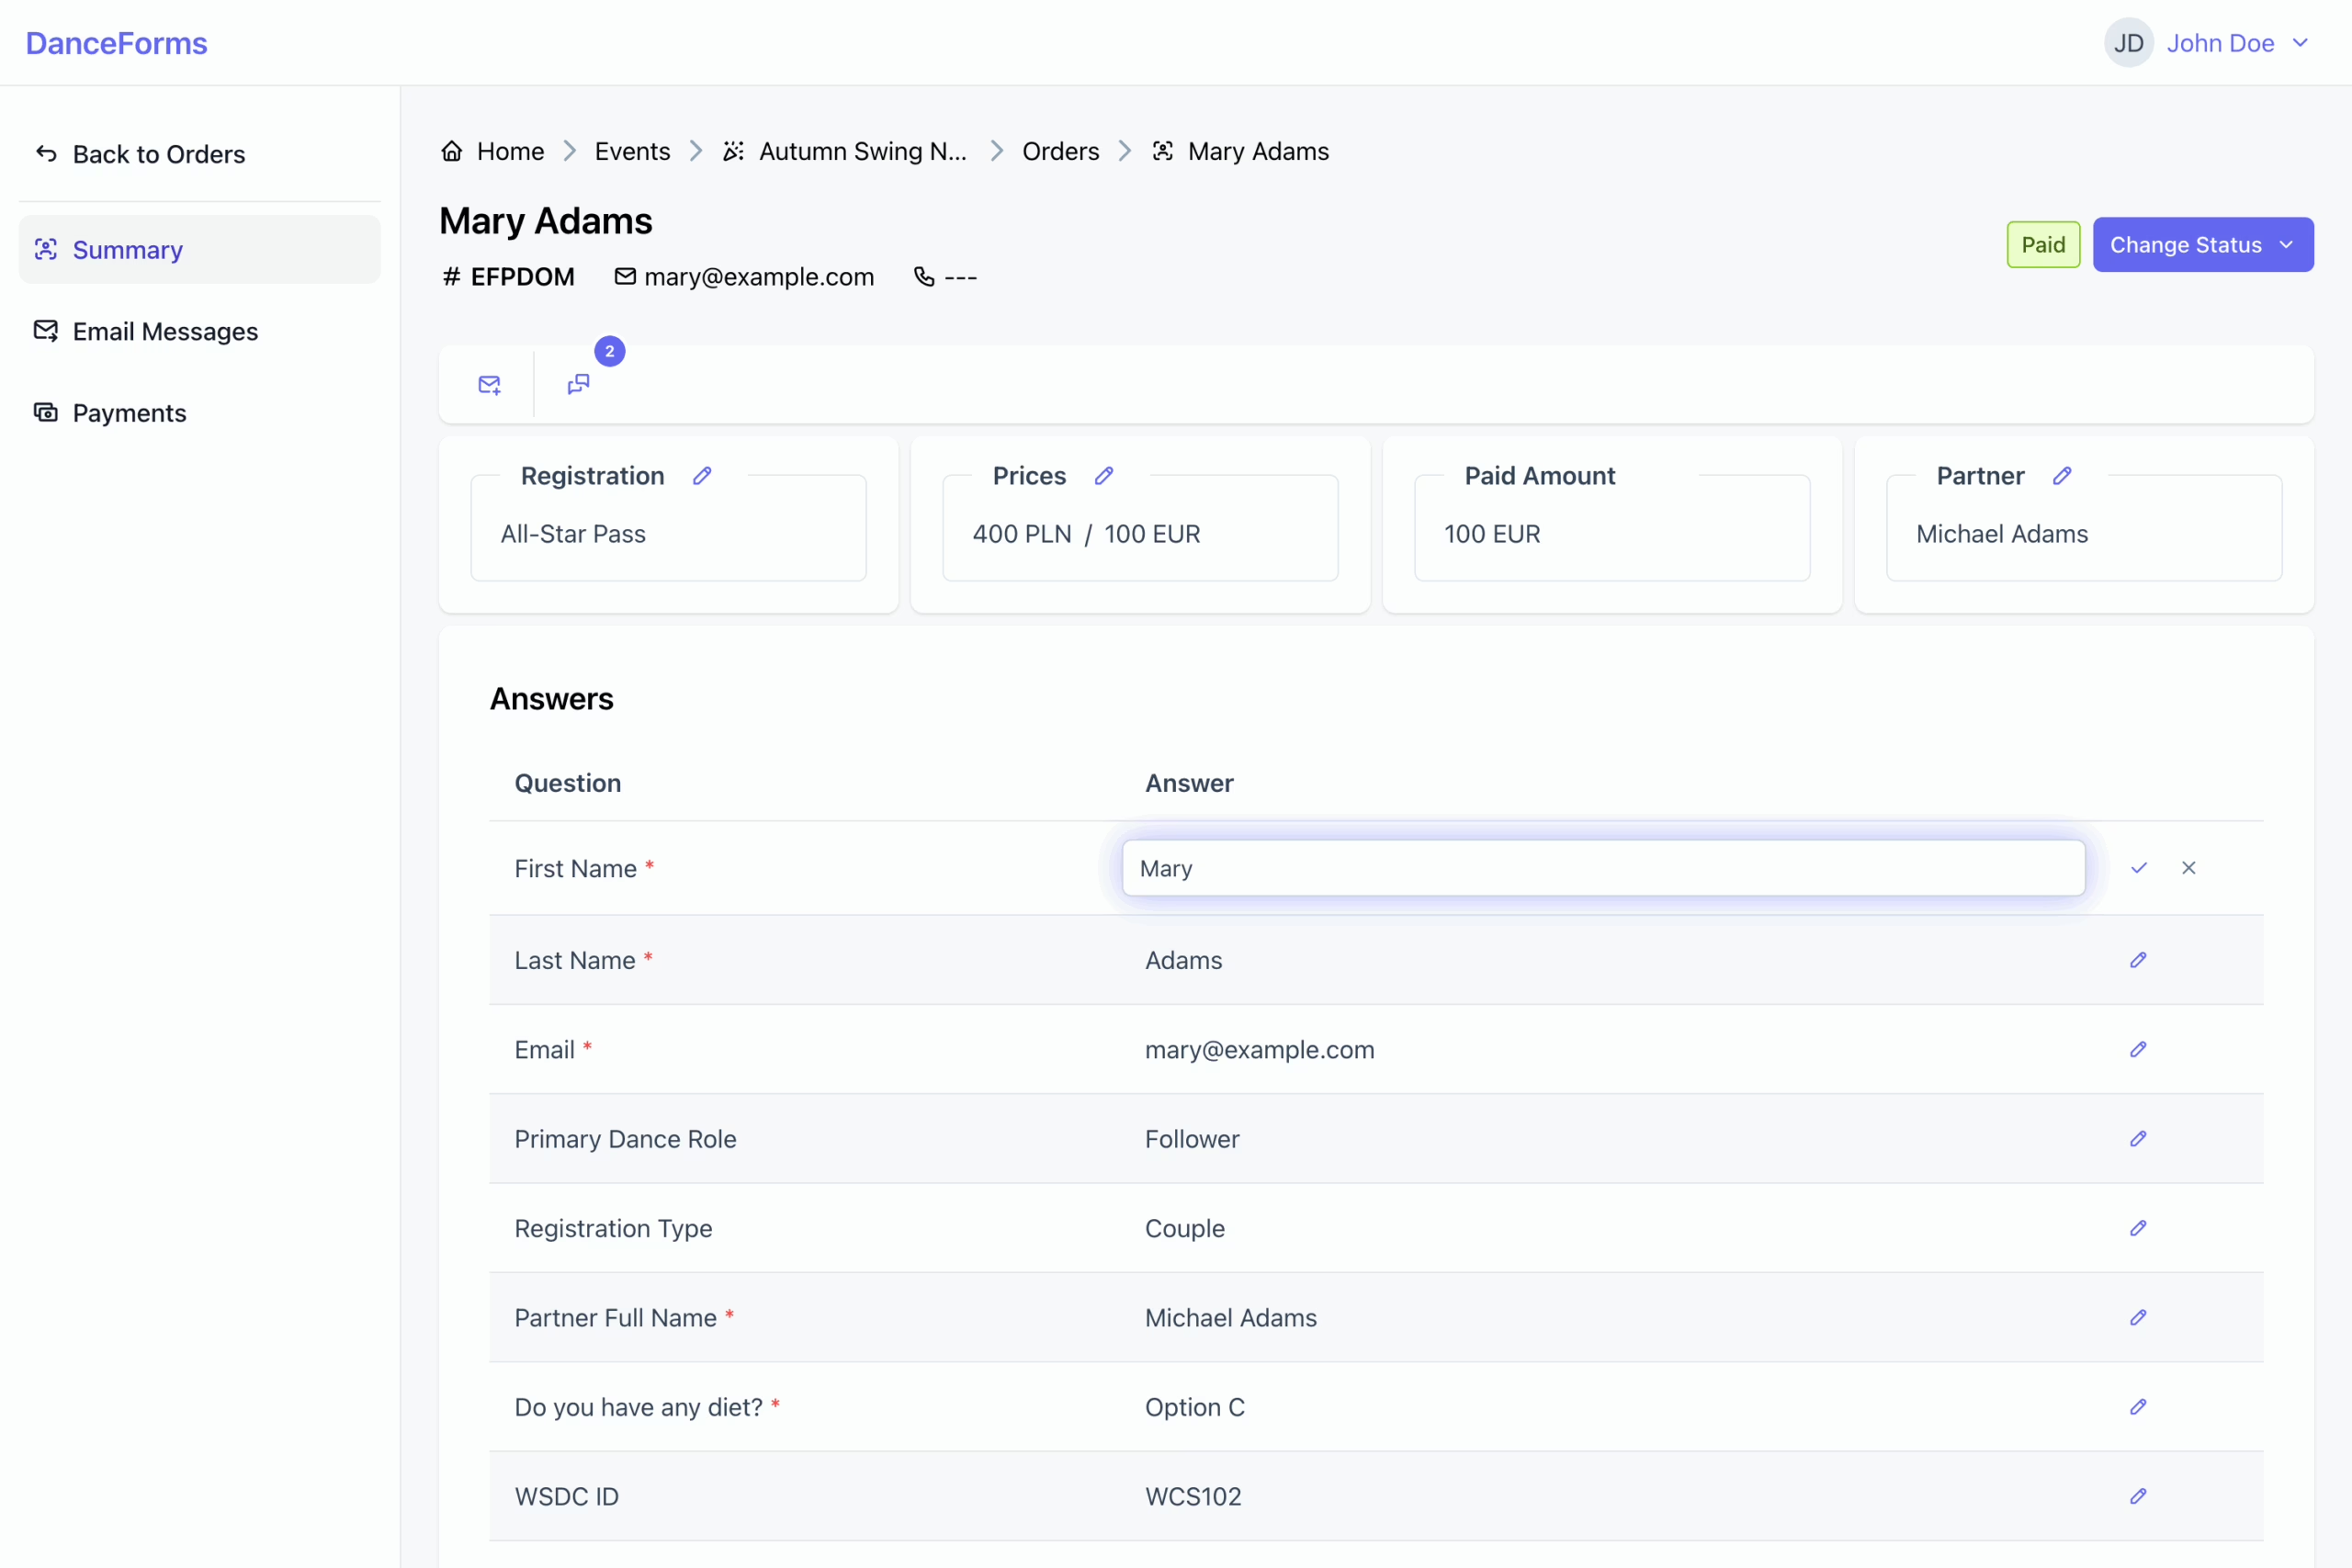
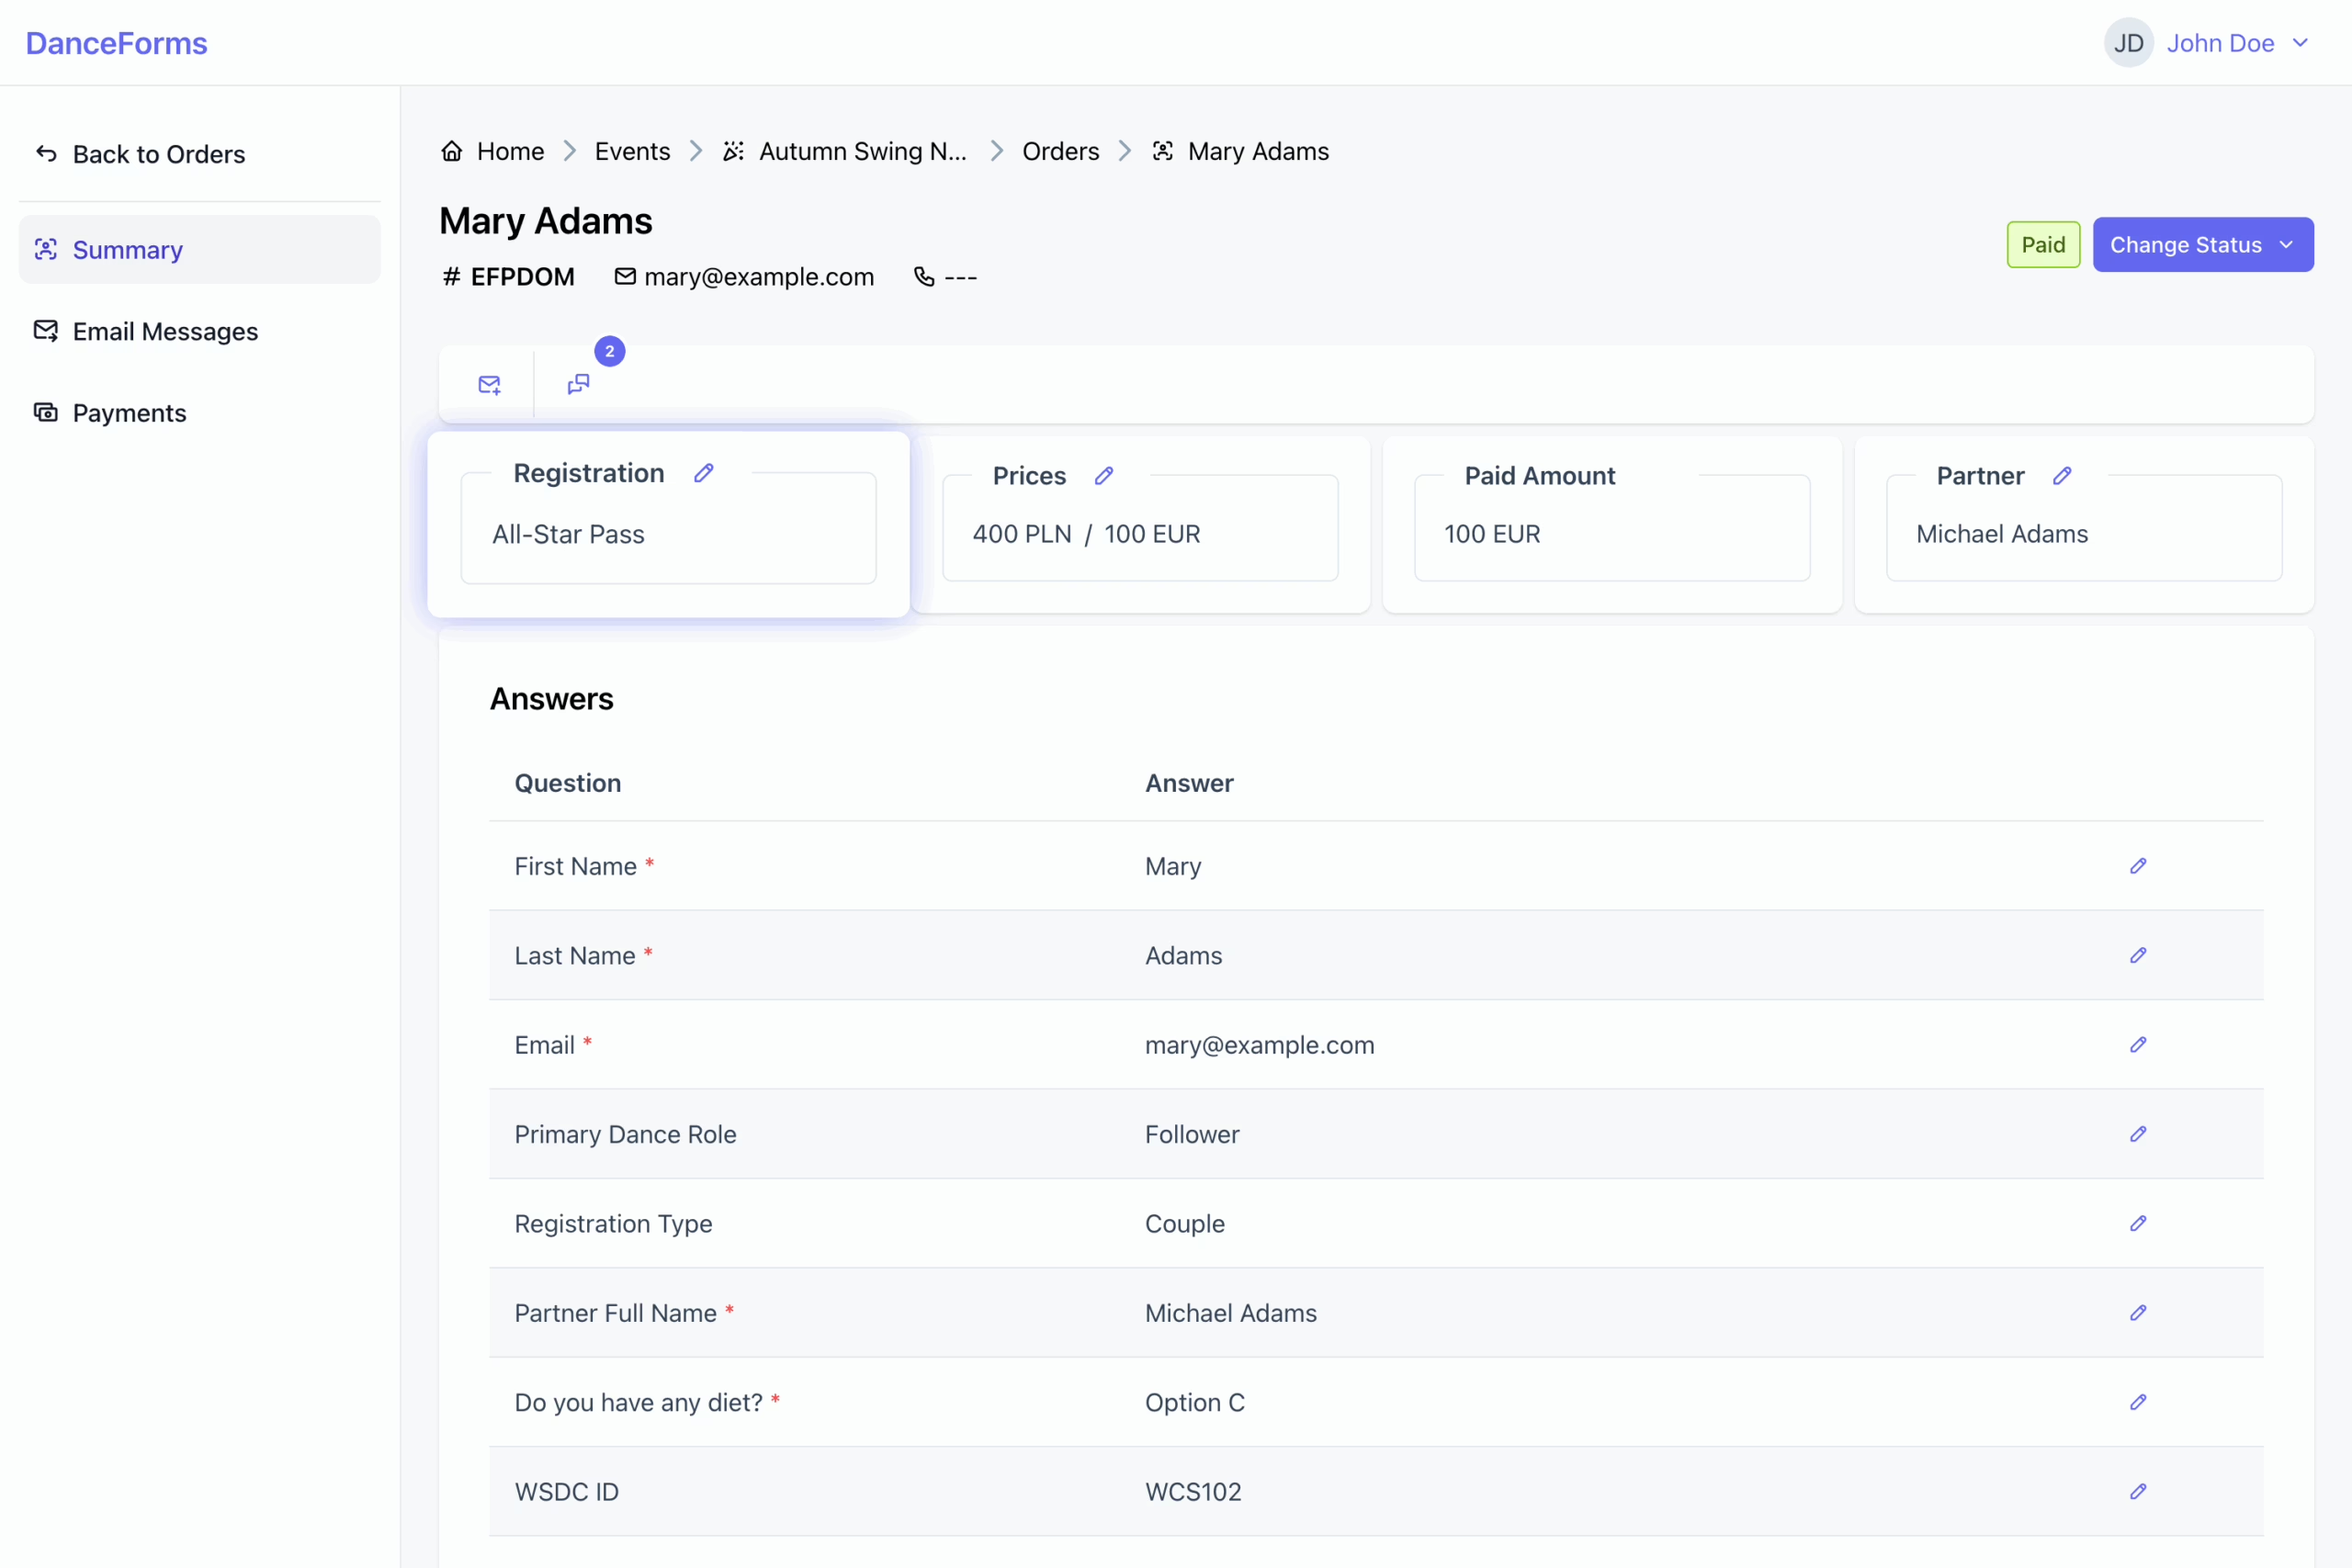
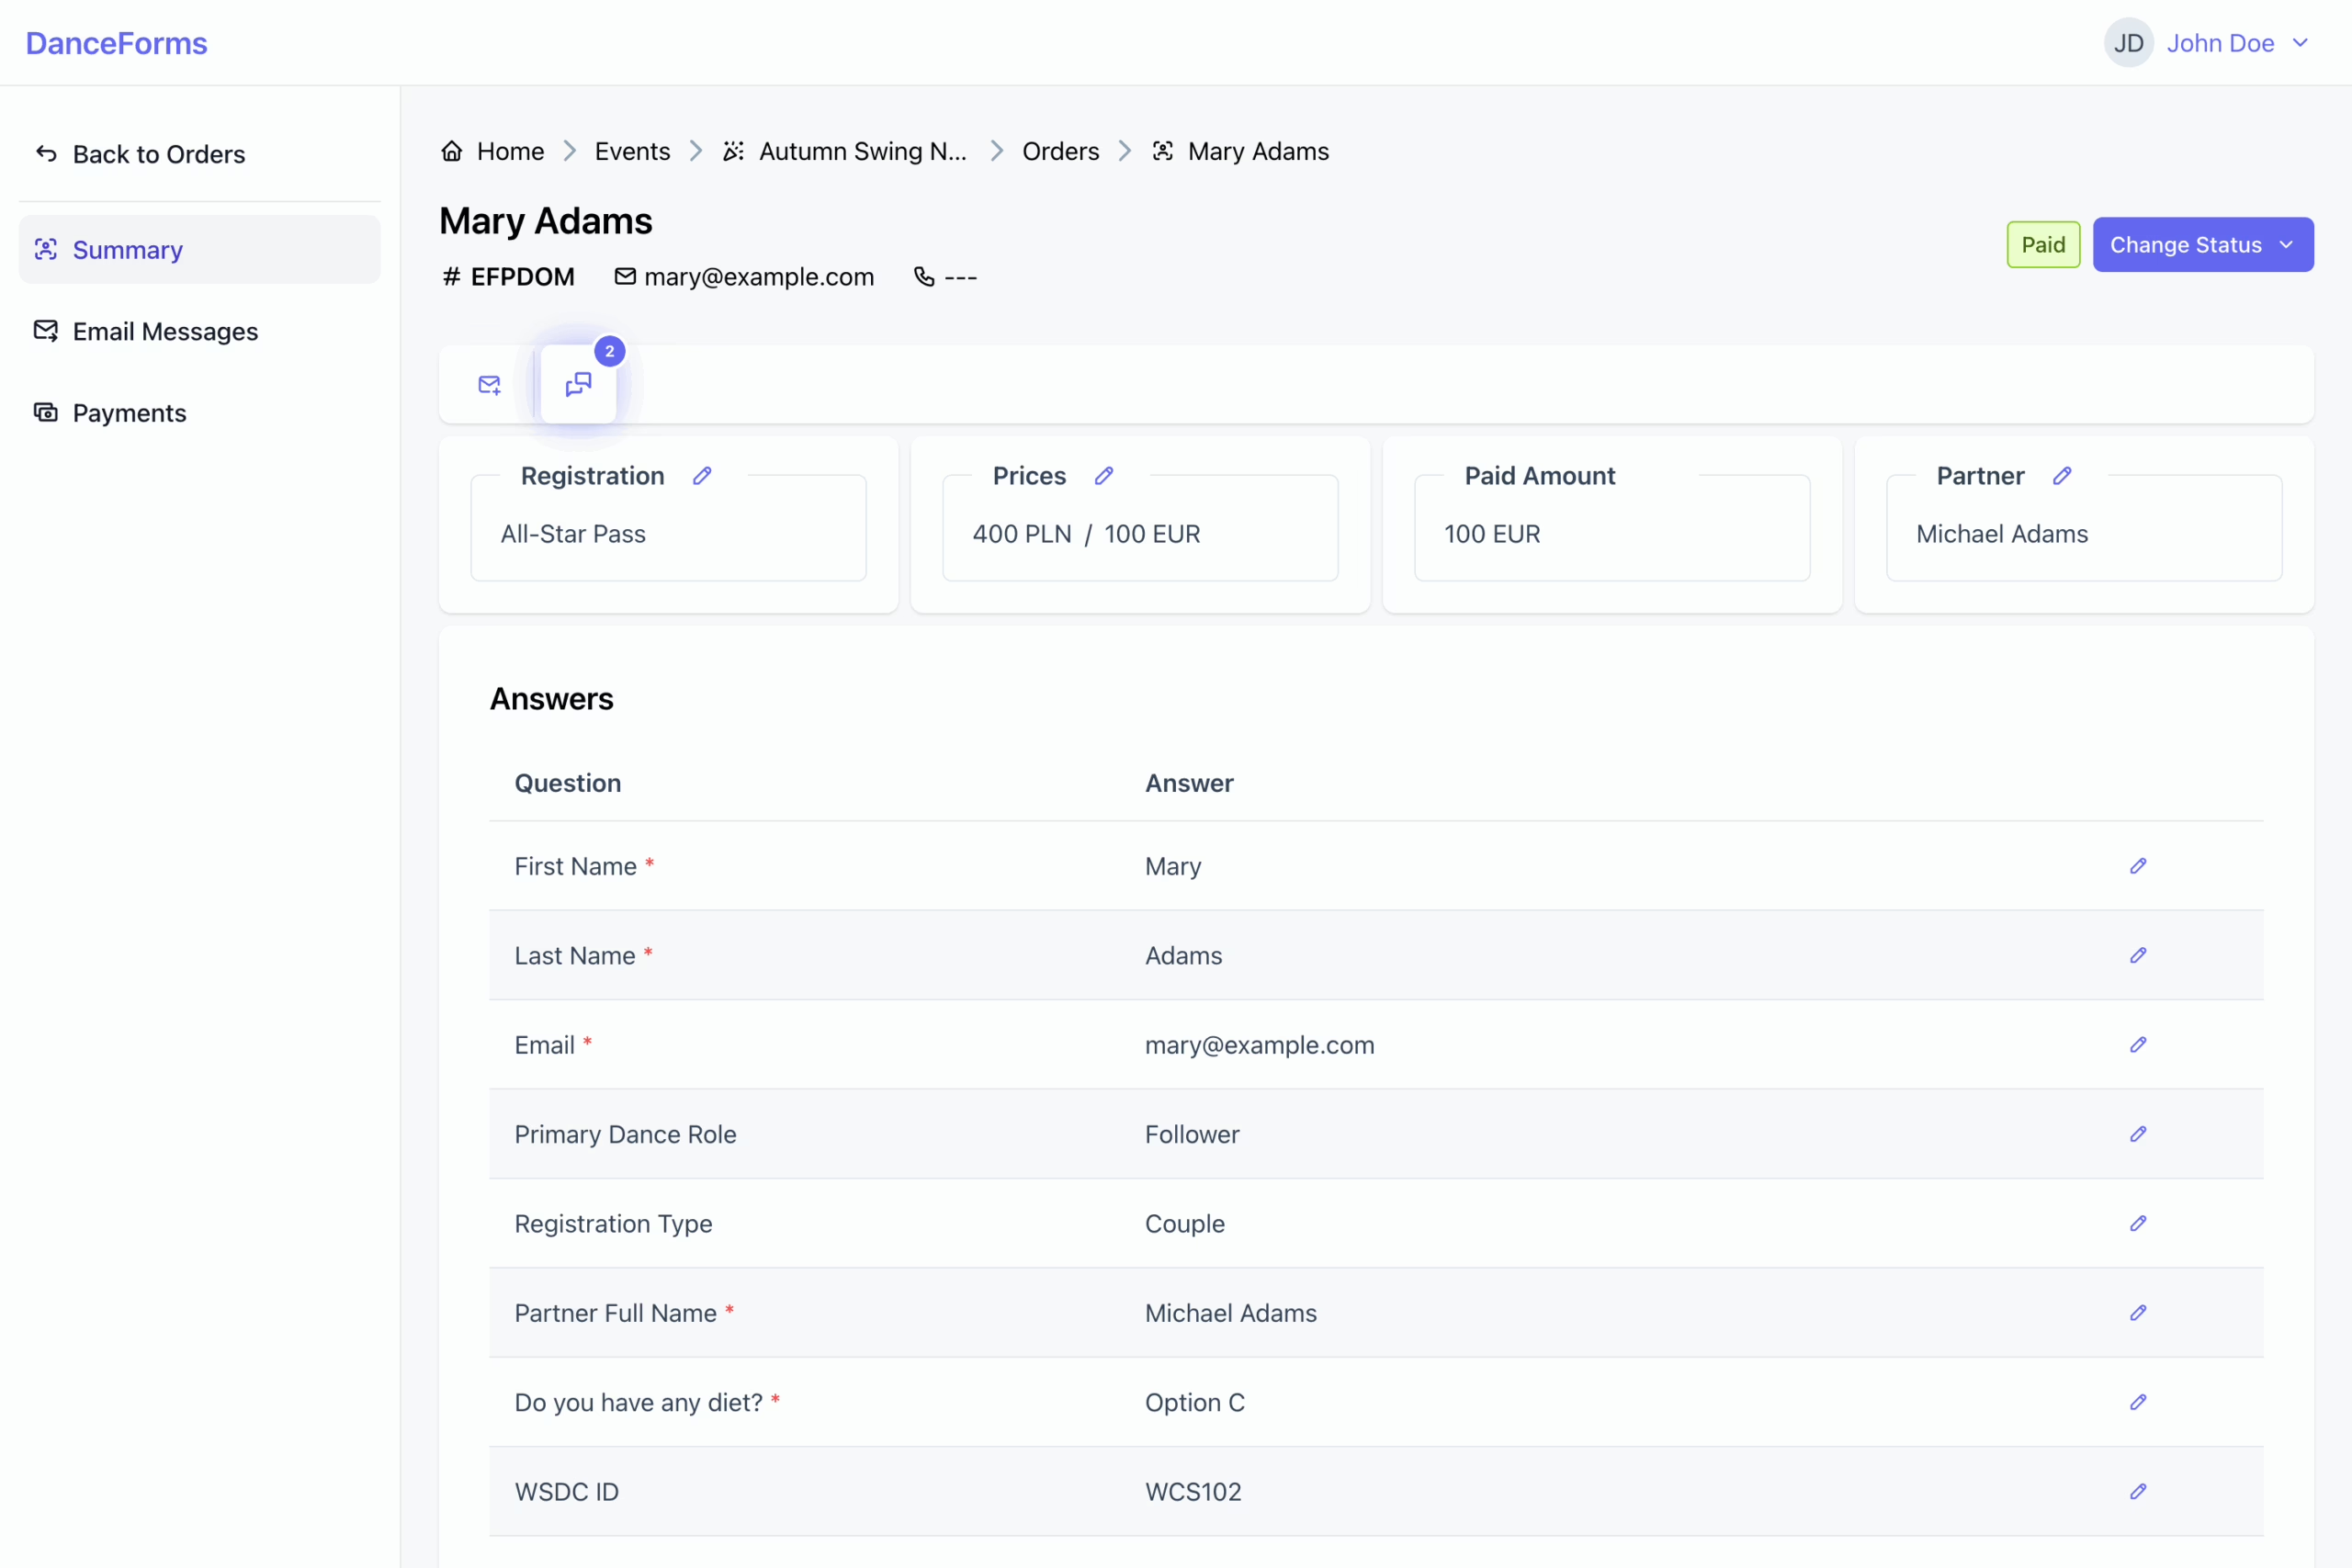
You can review responses, make corrections when needed, and keep registration data accurate and up to date.
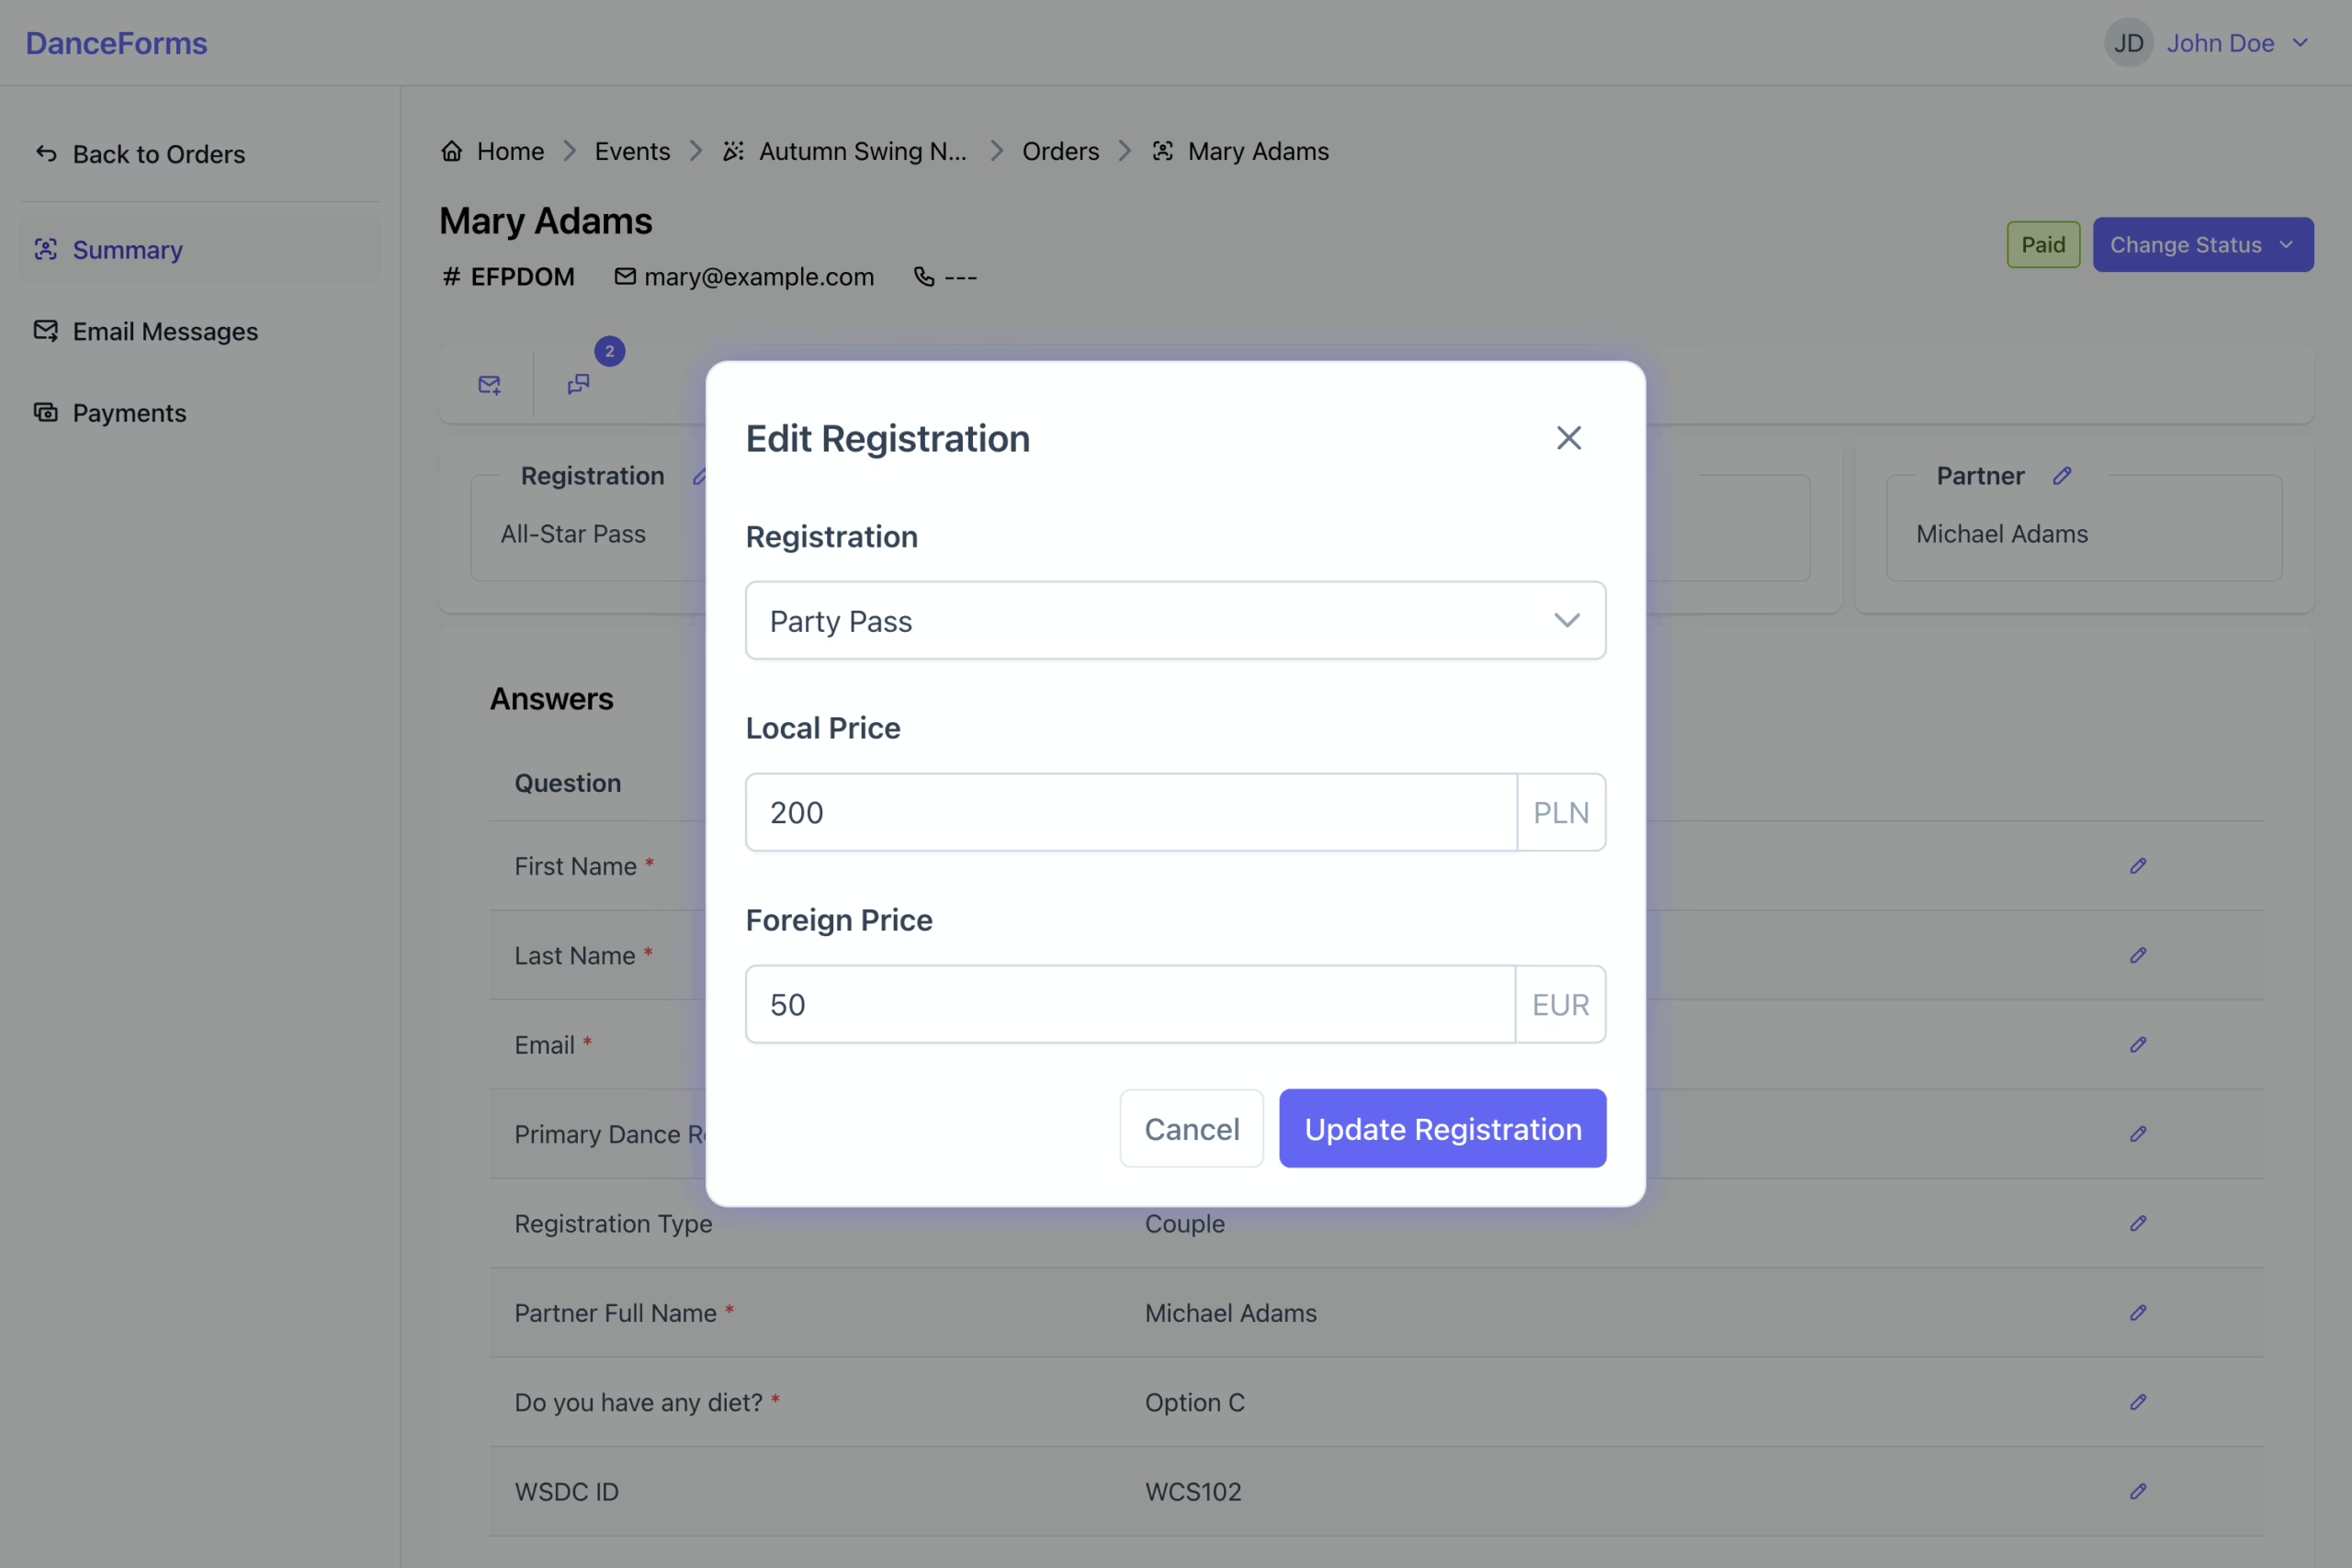
Use this option to change a participant’s registration when needed, for example when upgrading or switching passes.
To change a registration:
- Click the Edit icon on the Registration card to open the dialog.
- Select some other registration from the list.
- Review and update prices if needed.
- Click Update Registration to apply the changes.
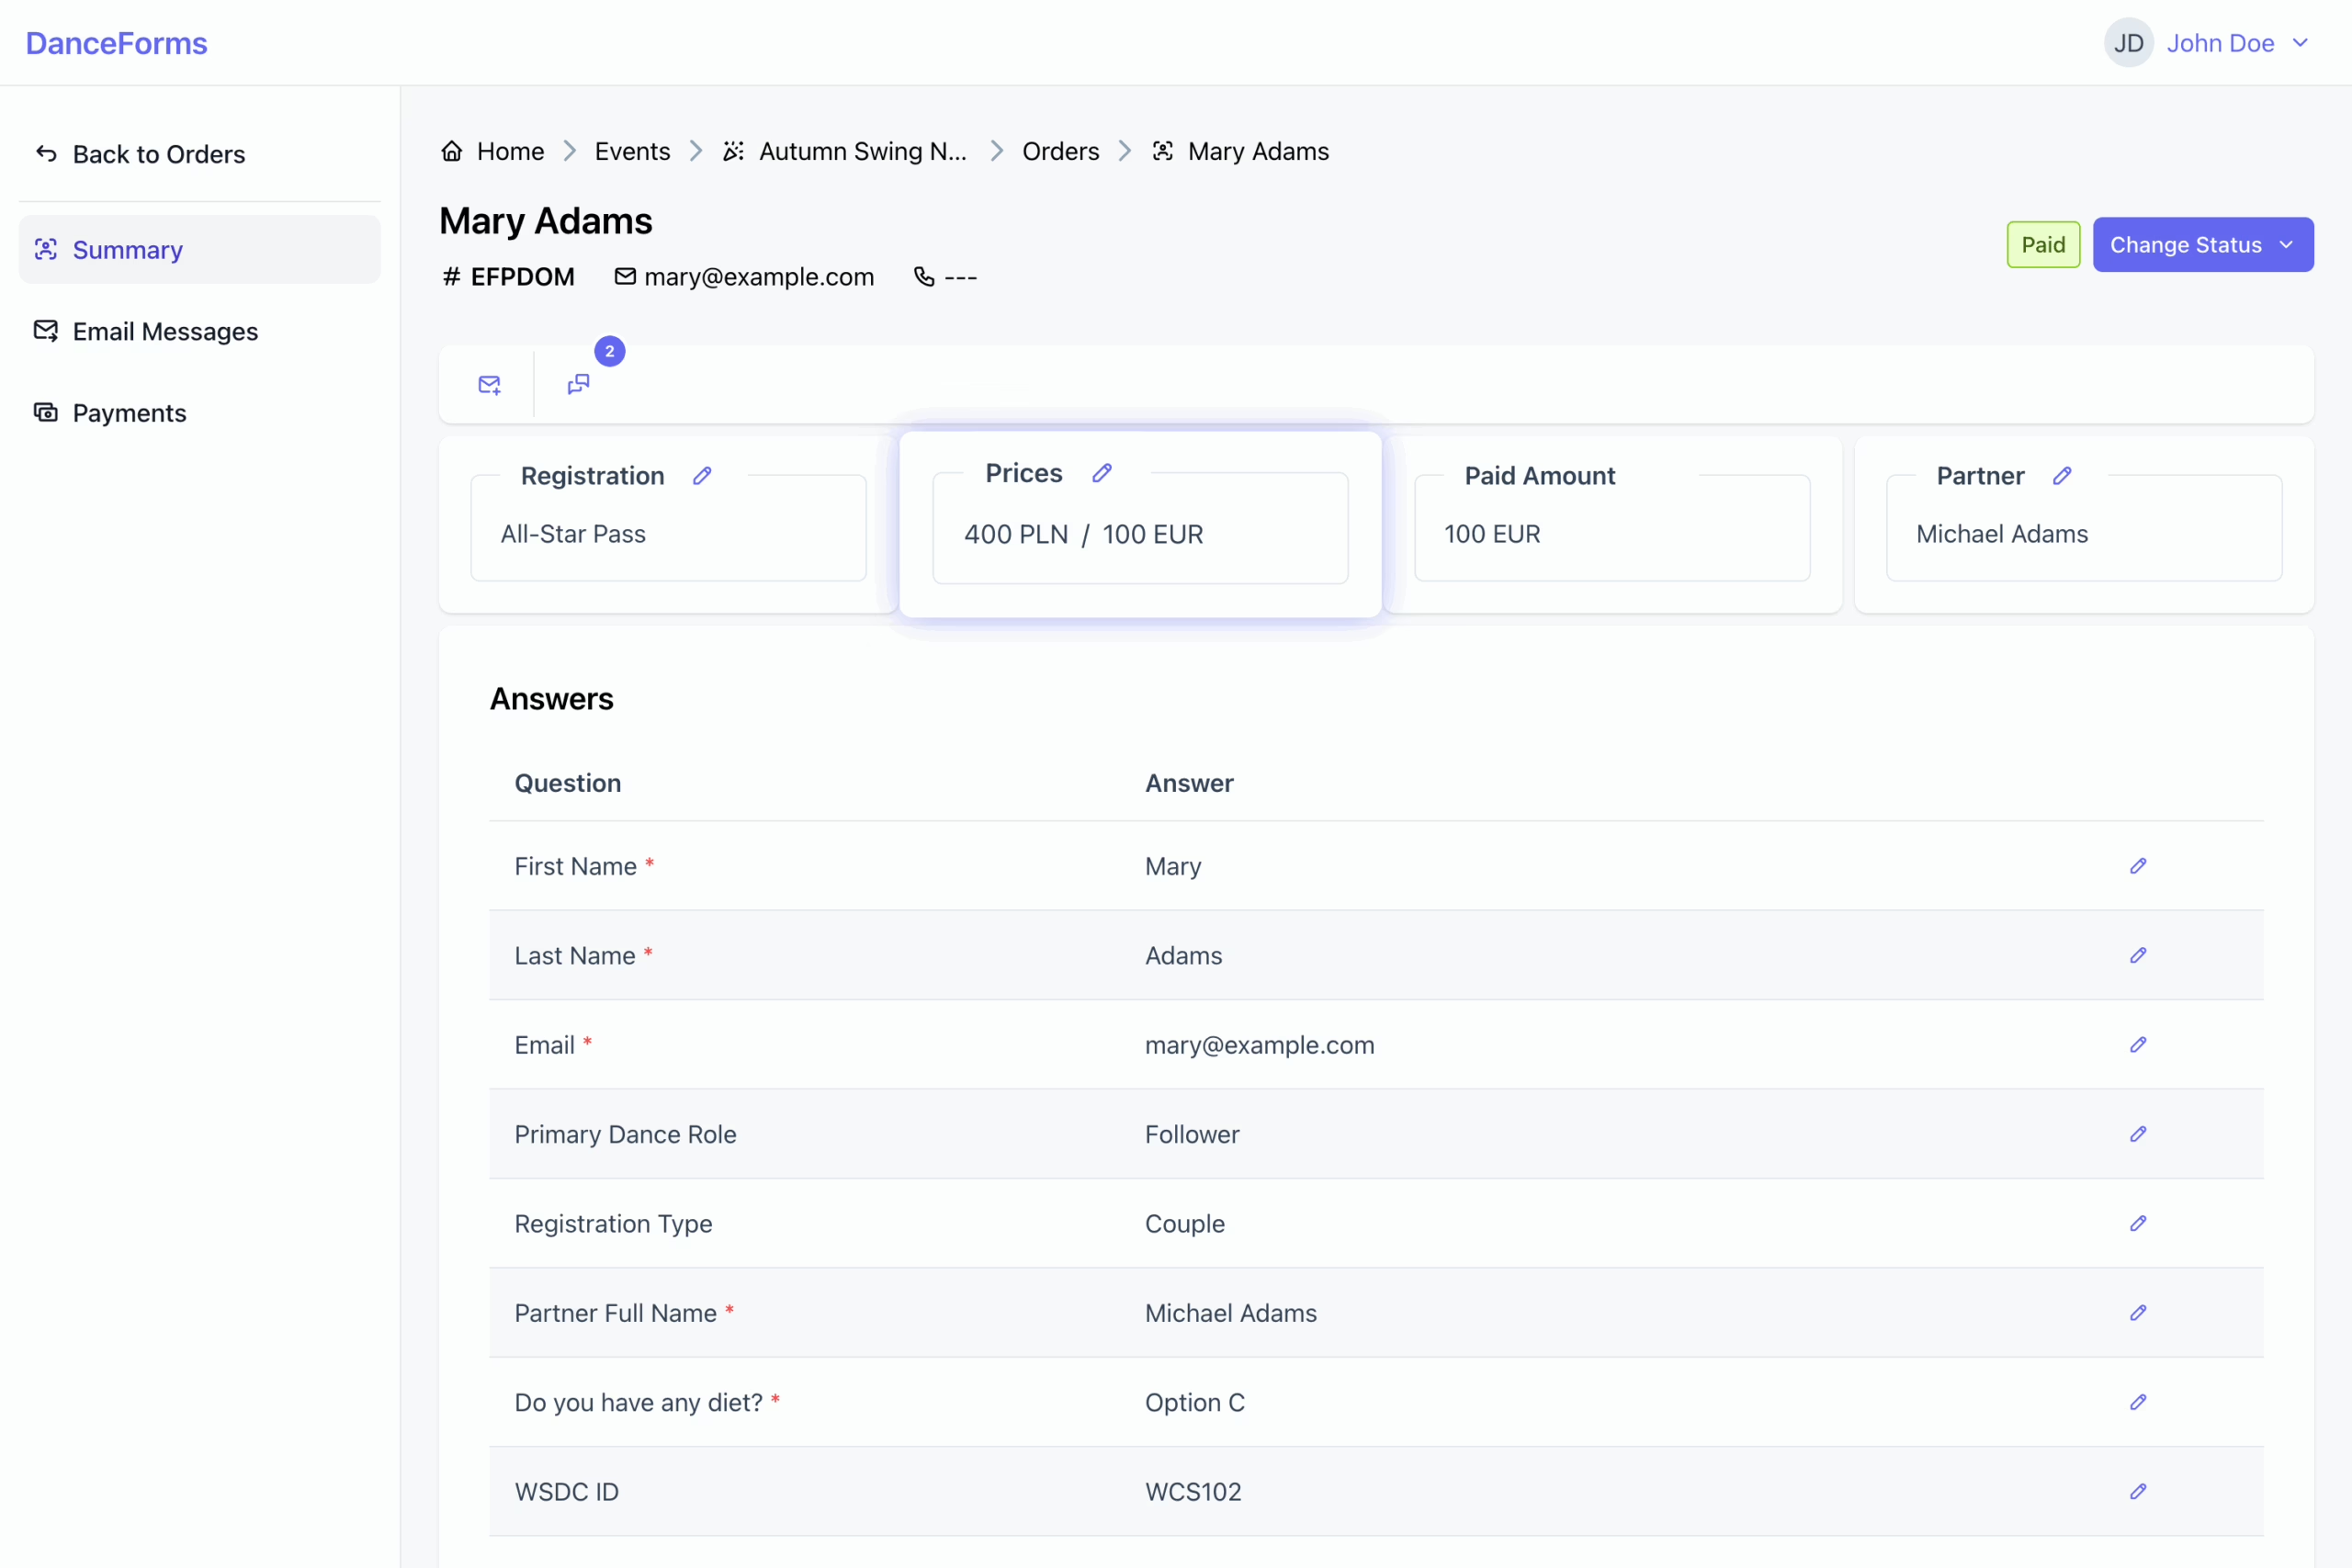
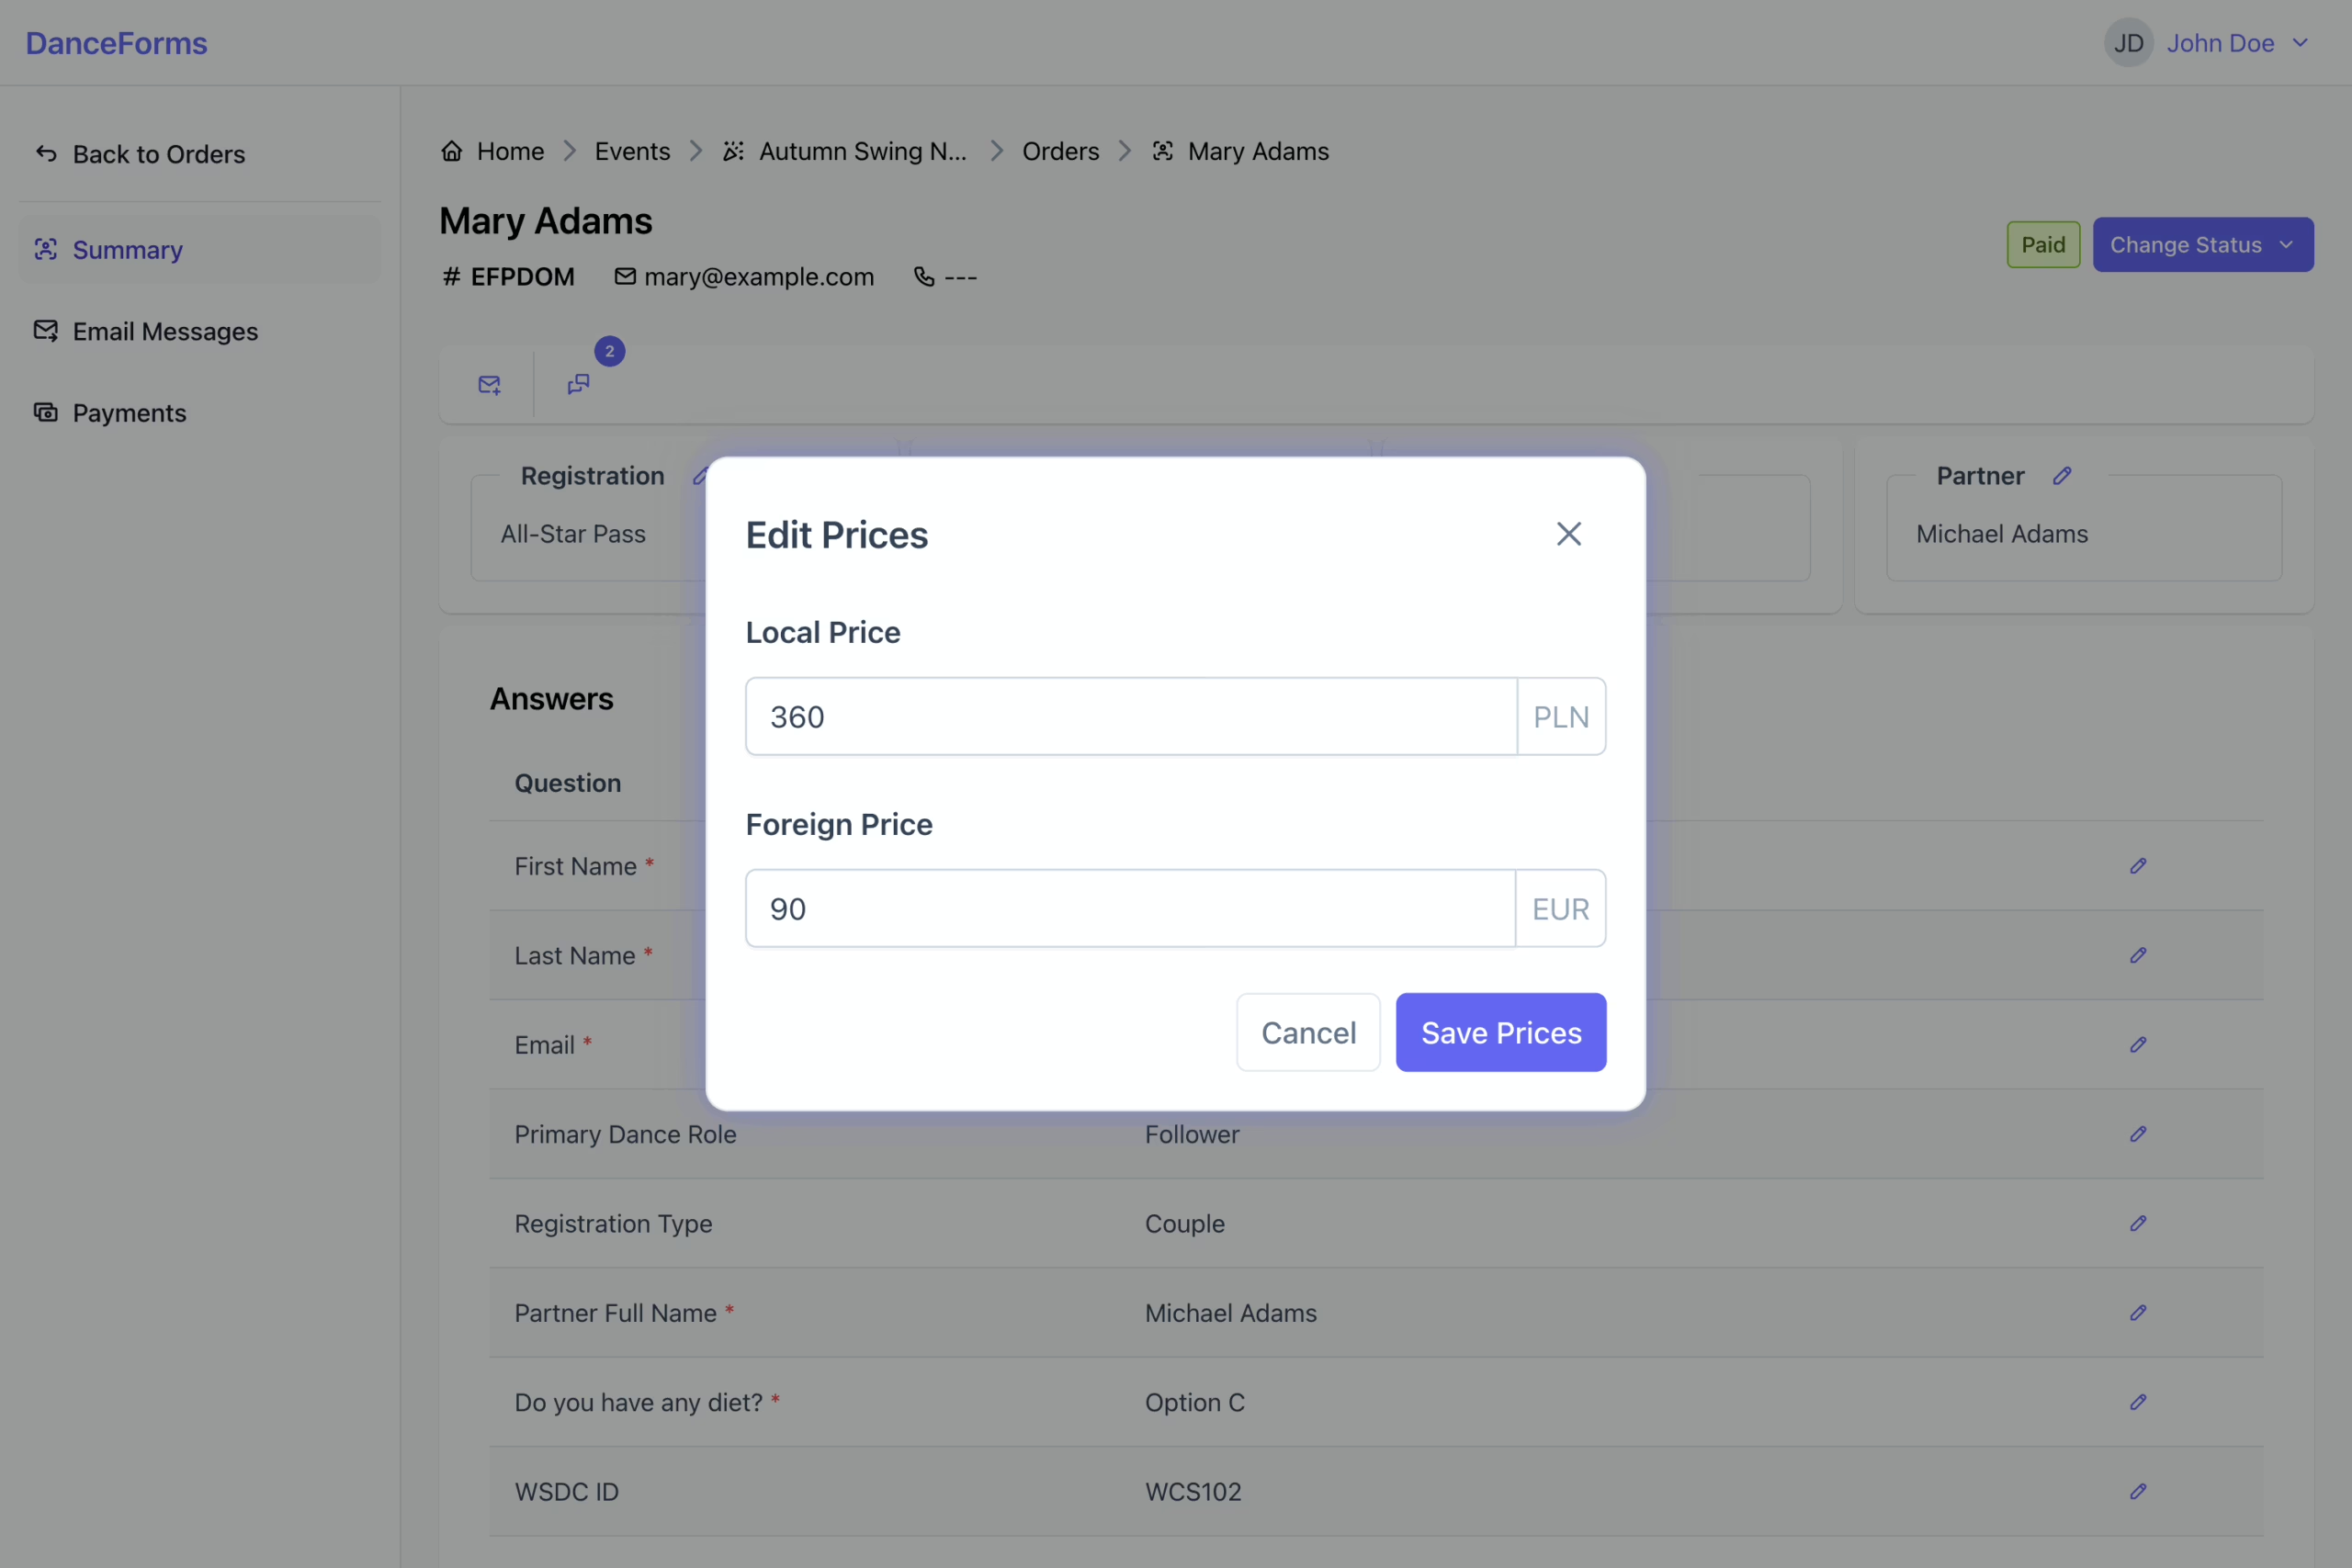
This section explains how to update prices for an existing order when adjustments are required.
To change prices:
- Click the Edit icon on the Prices card to open the dialog.
- Enter the new values.
- Click Save Prices to apply the changes.
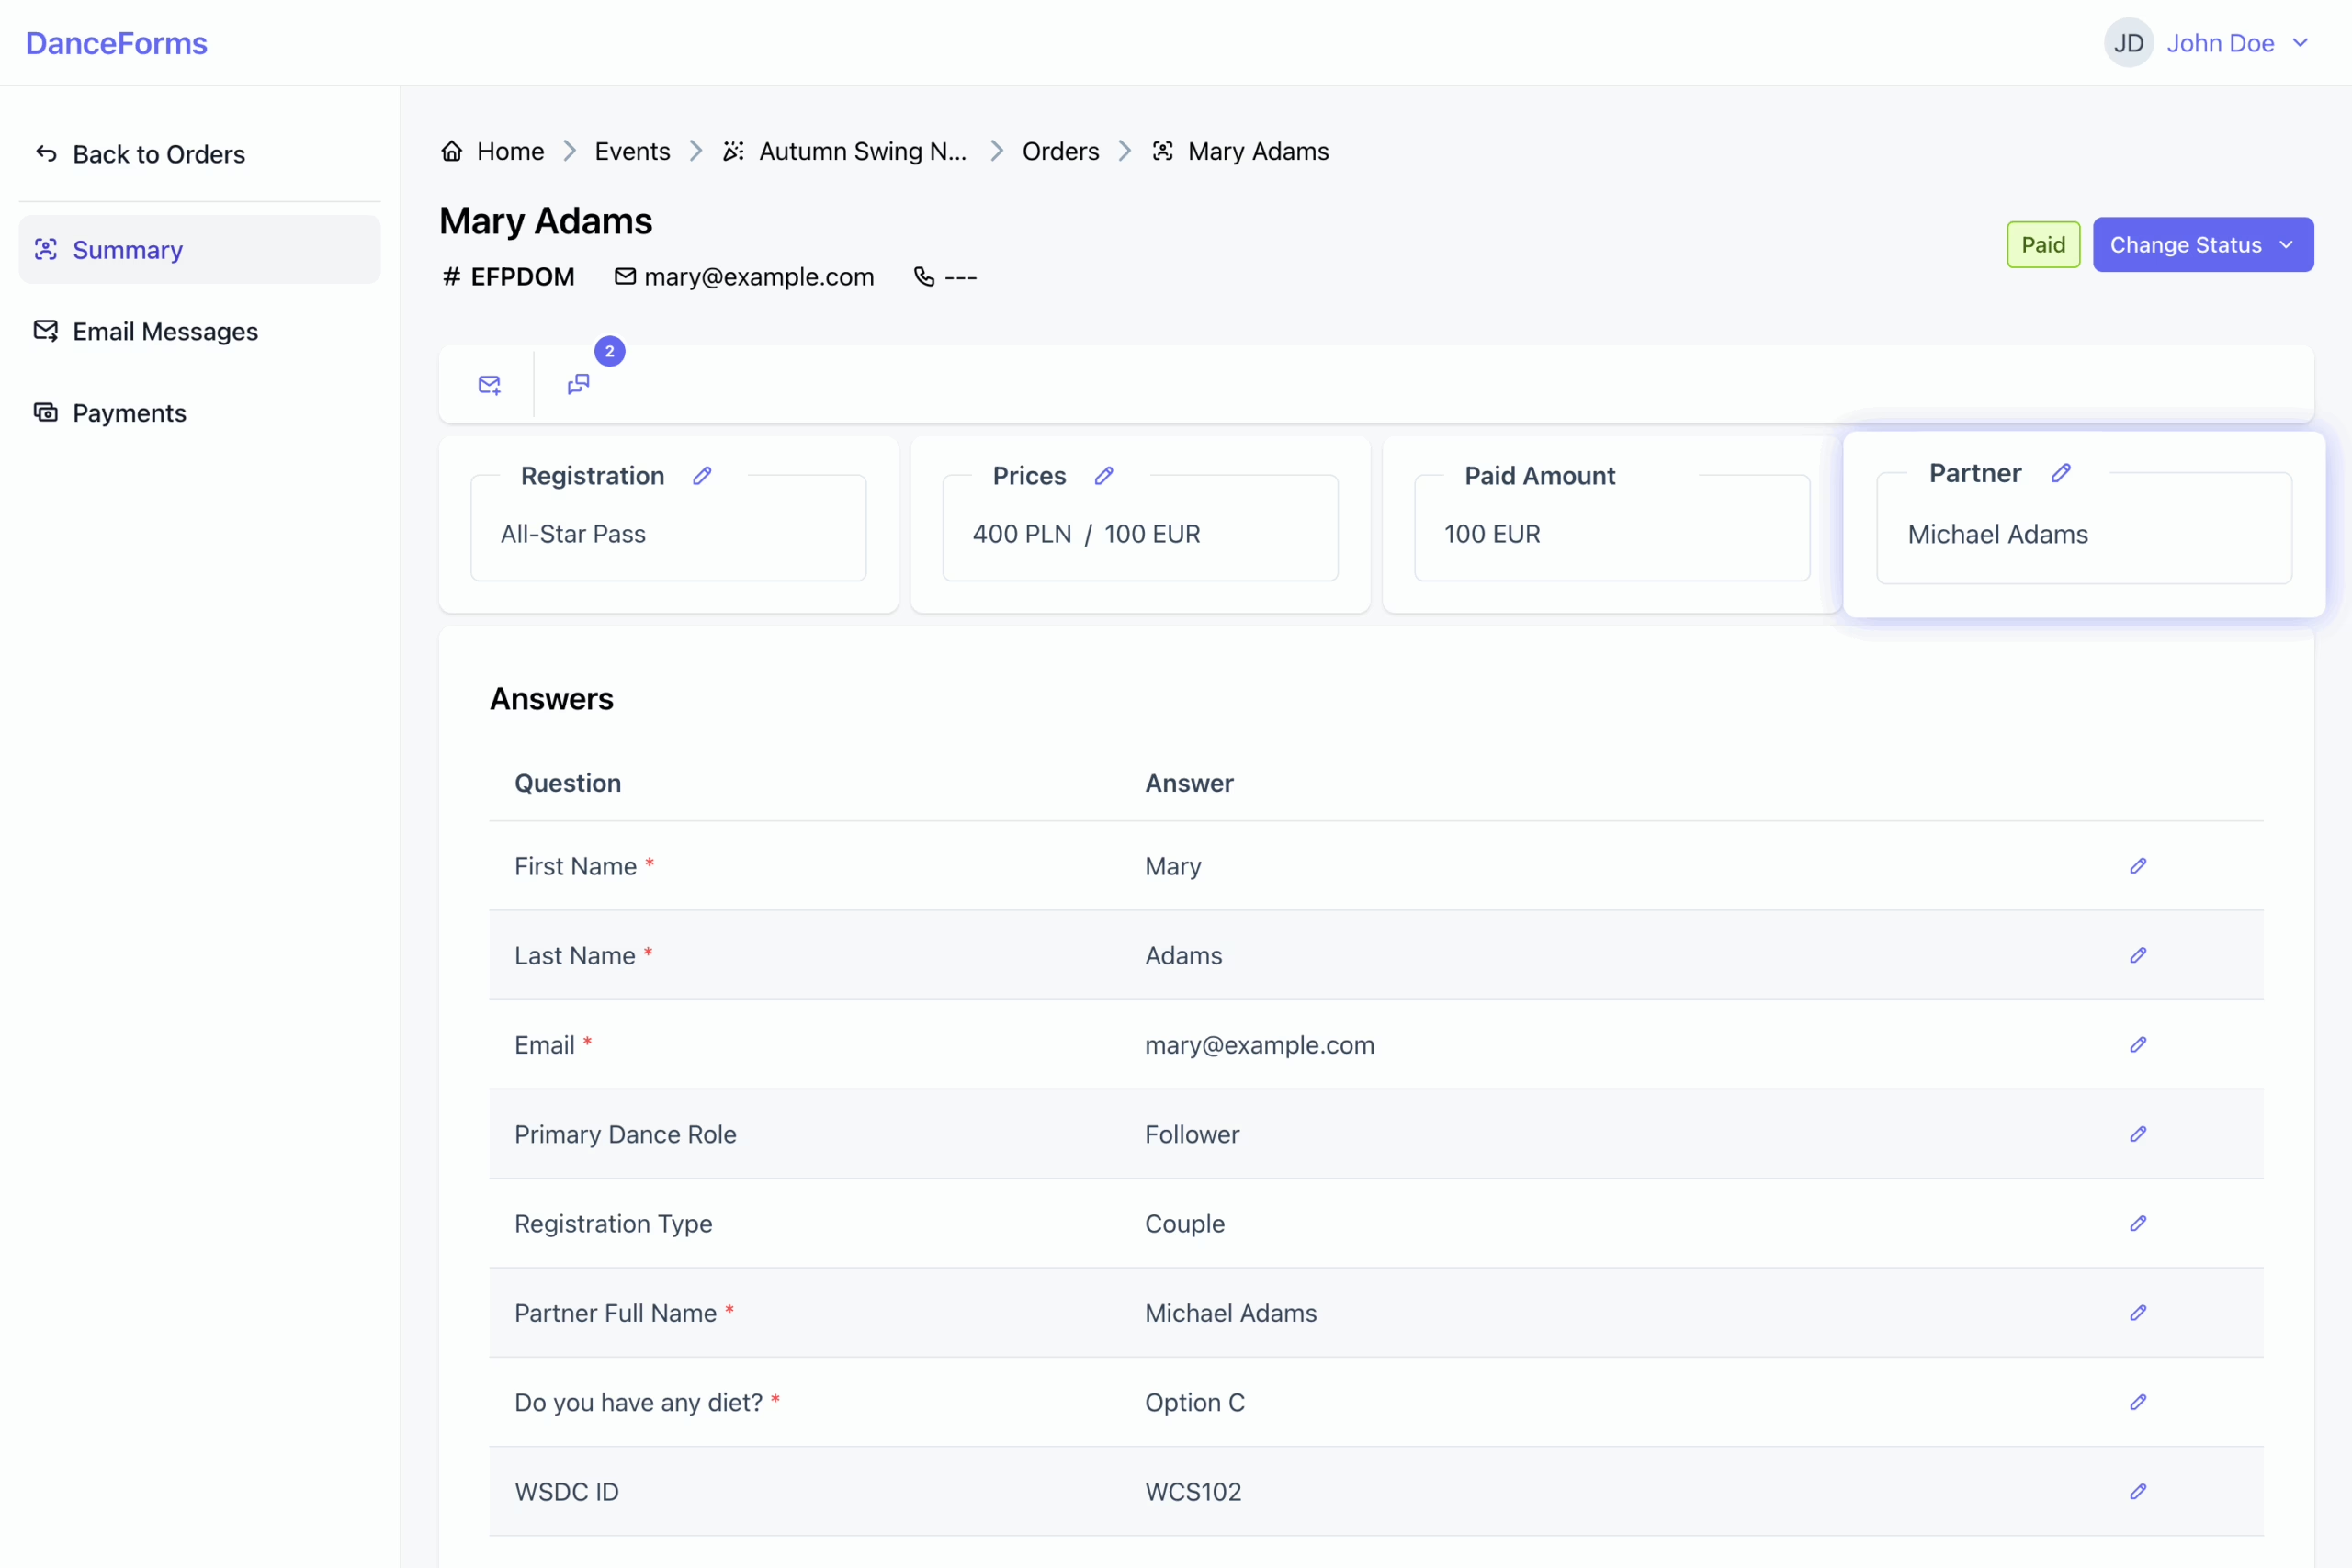
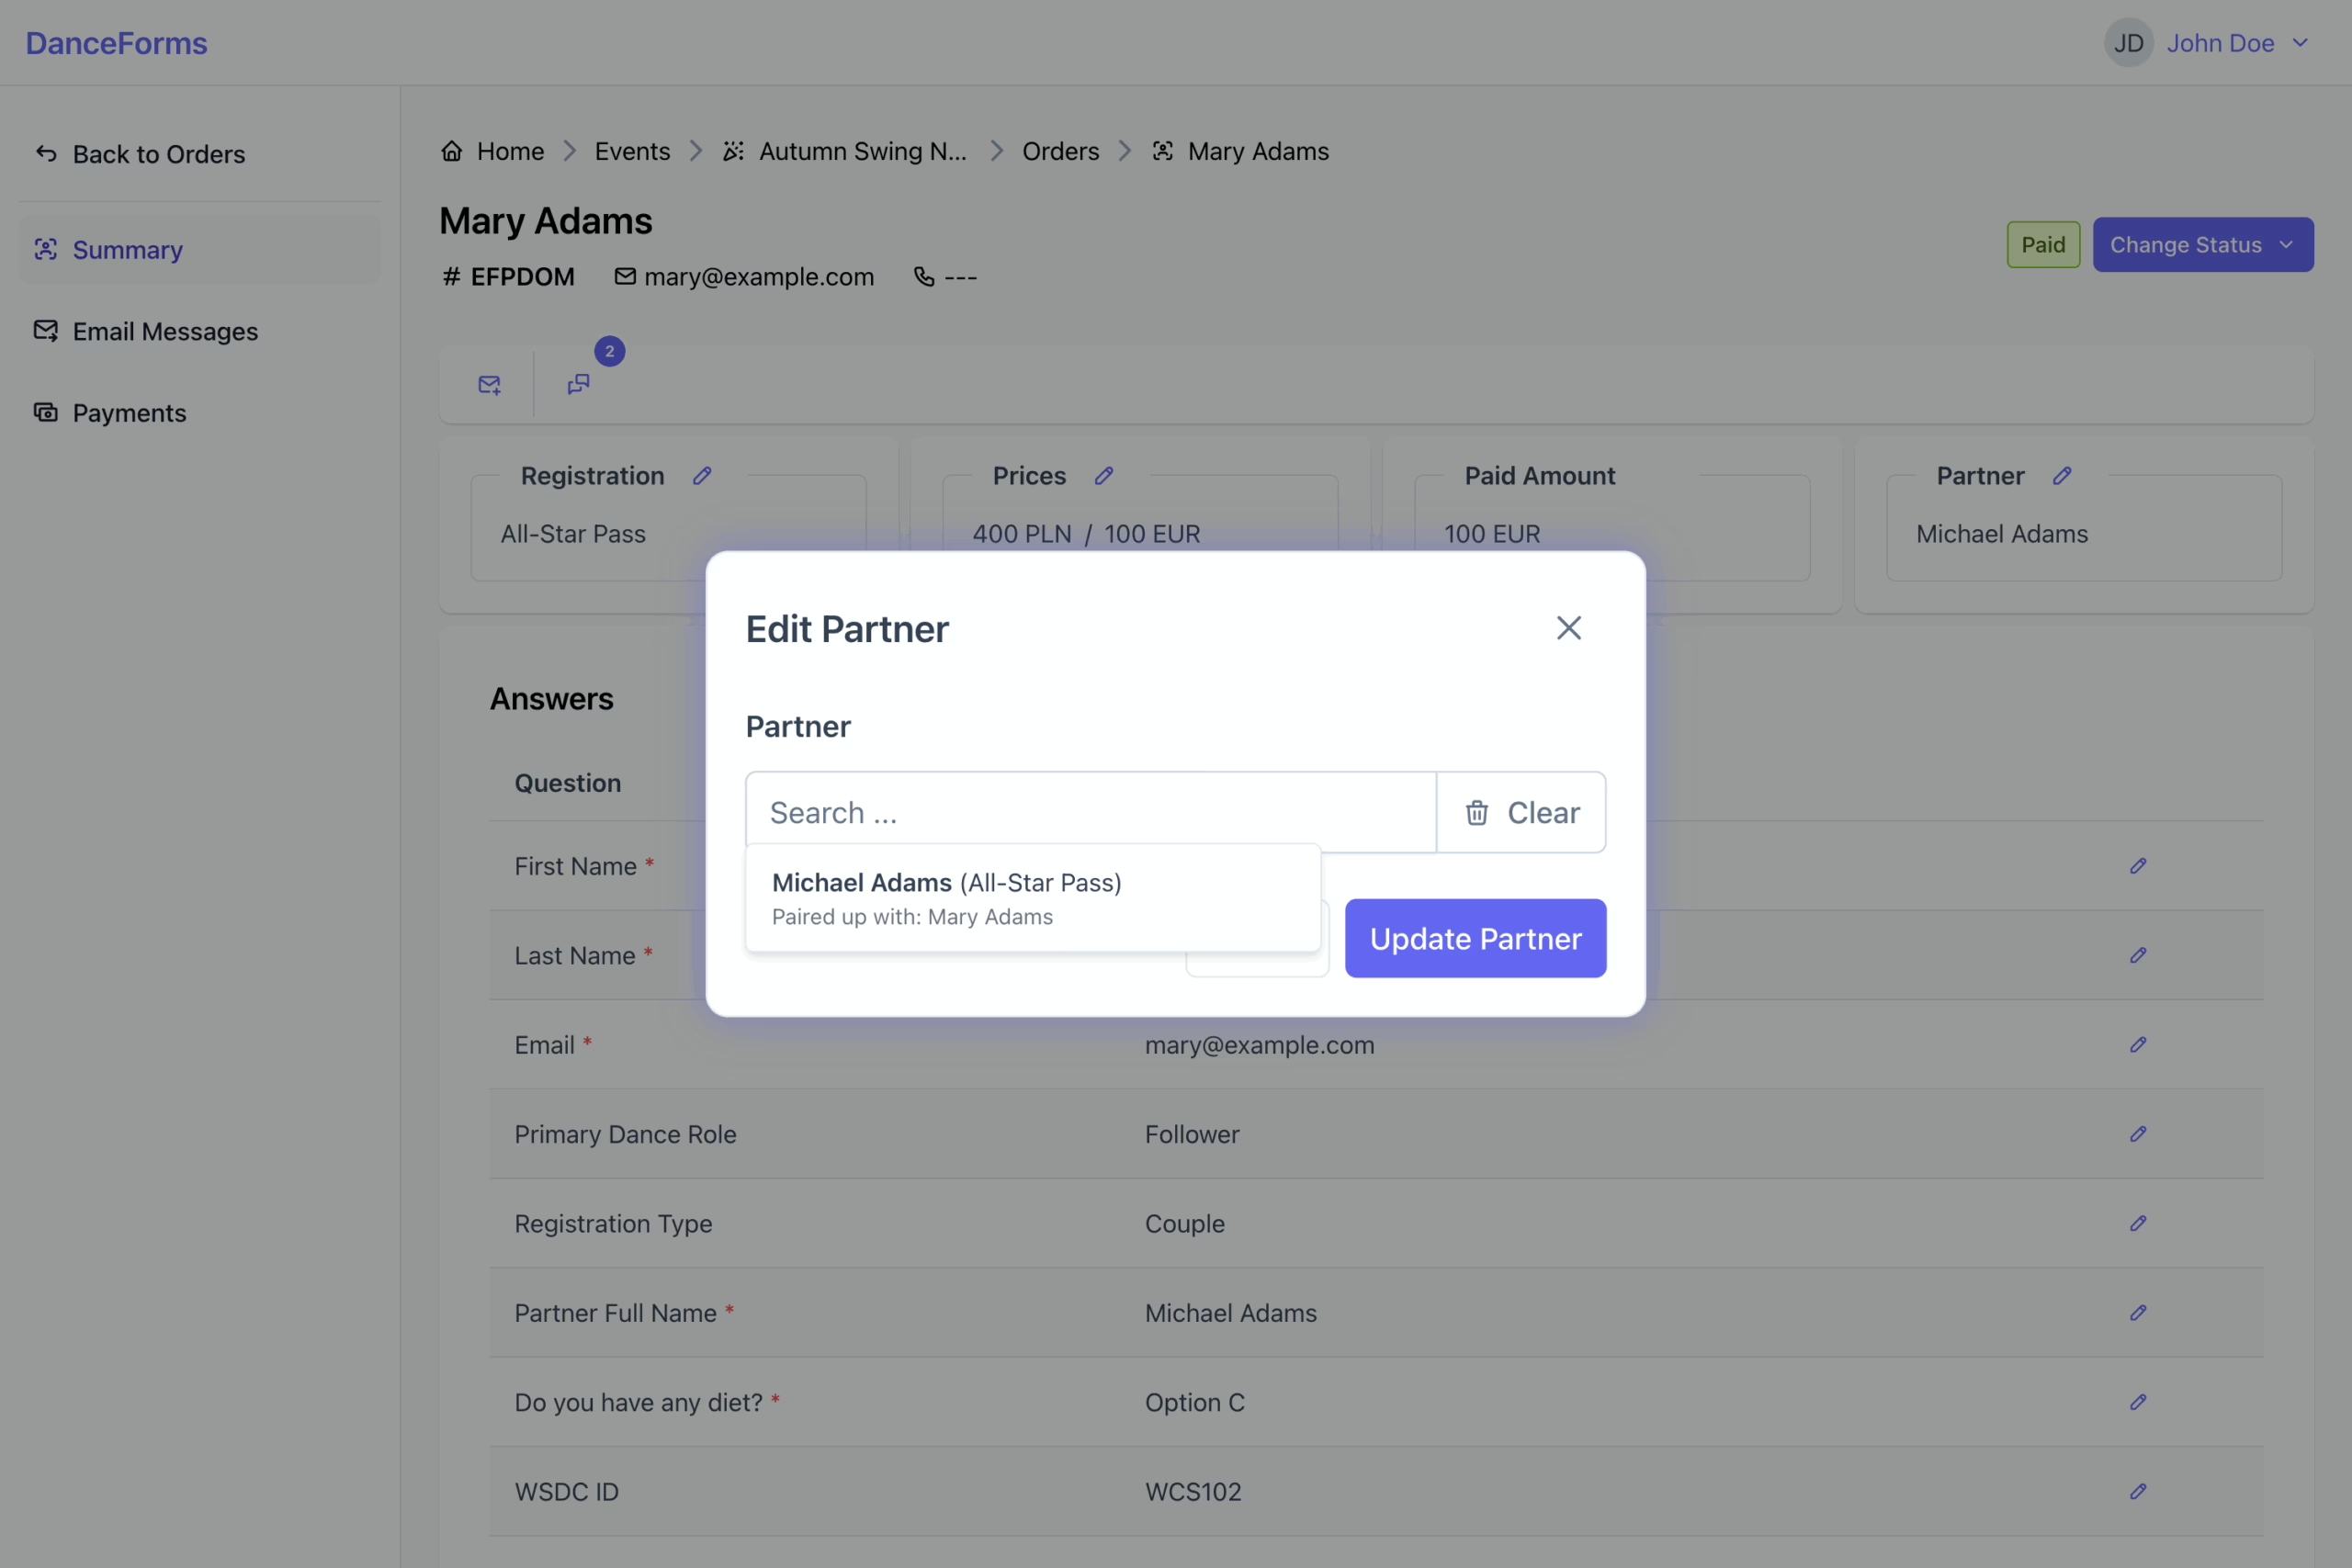
Use this option to link two participants as partners for the event.
To assign a partner:
- Click the Edit icon on the Partner card to open the dialog.
- Start typing to search for another order by name.
- Select the partner from the list if found.
- Clear the partner if needed.
- Click Update Partner to apply the changes.
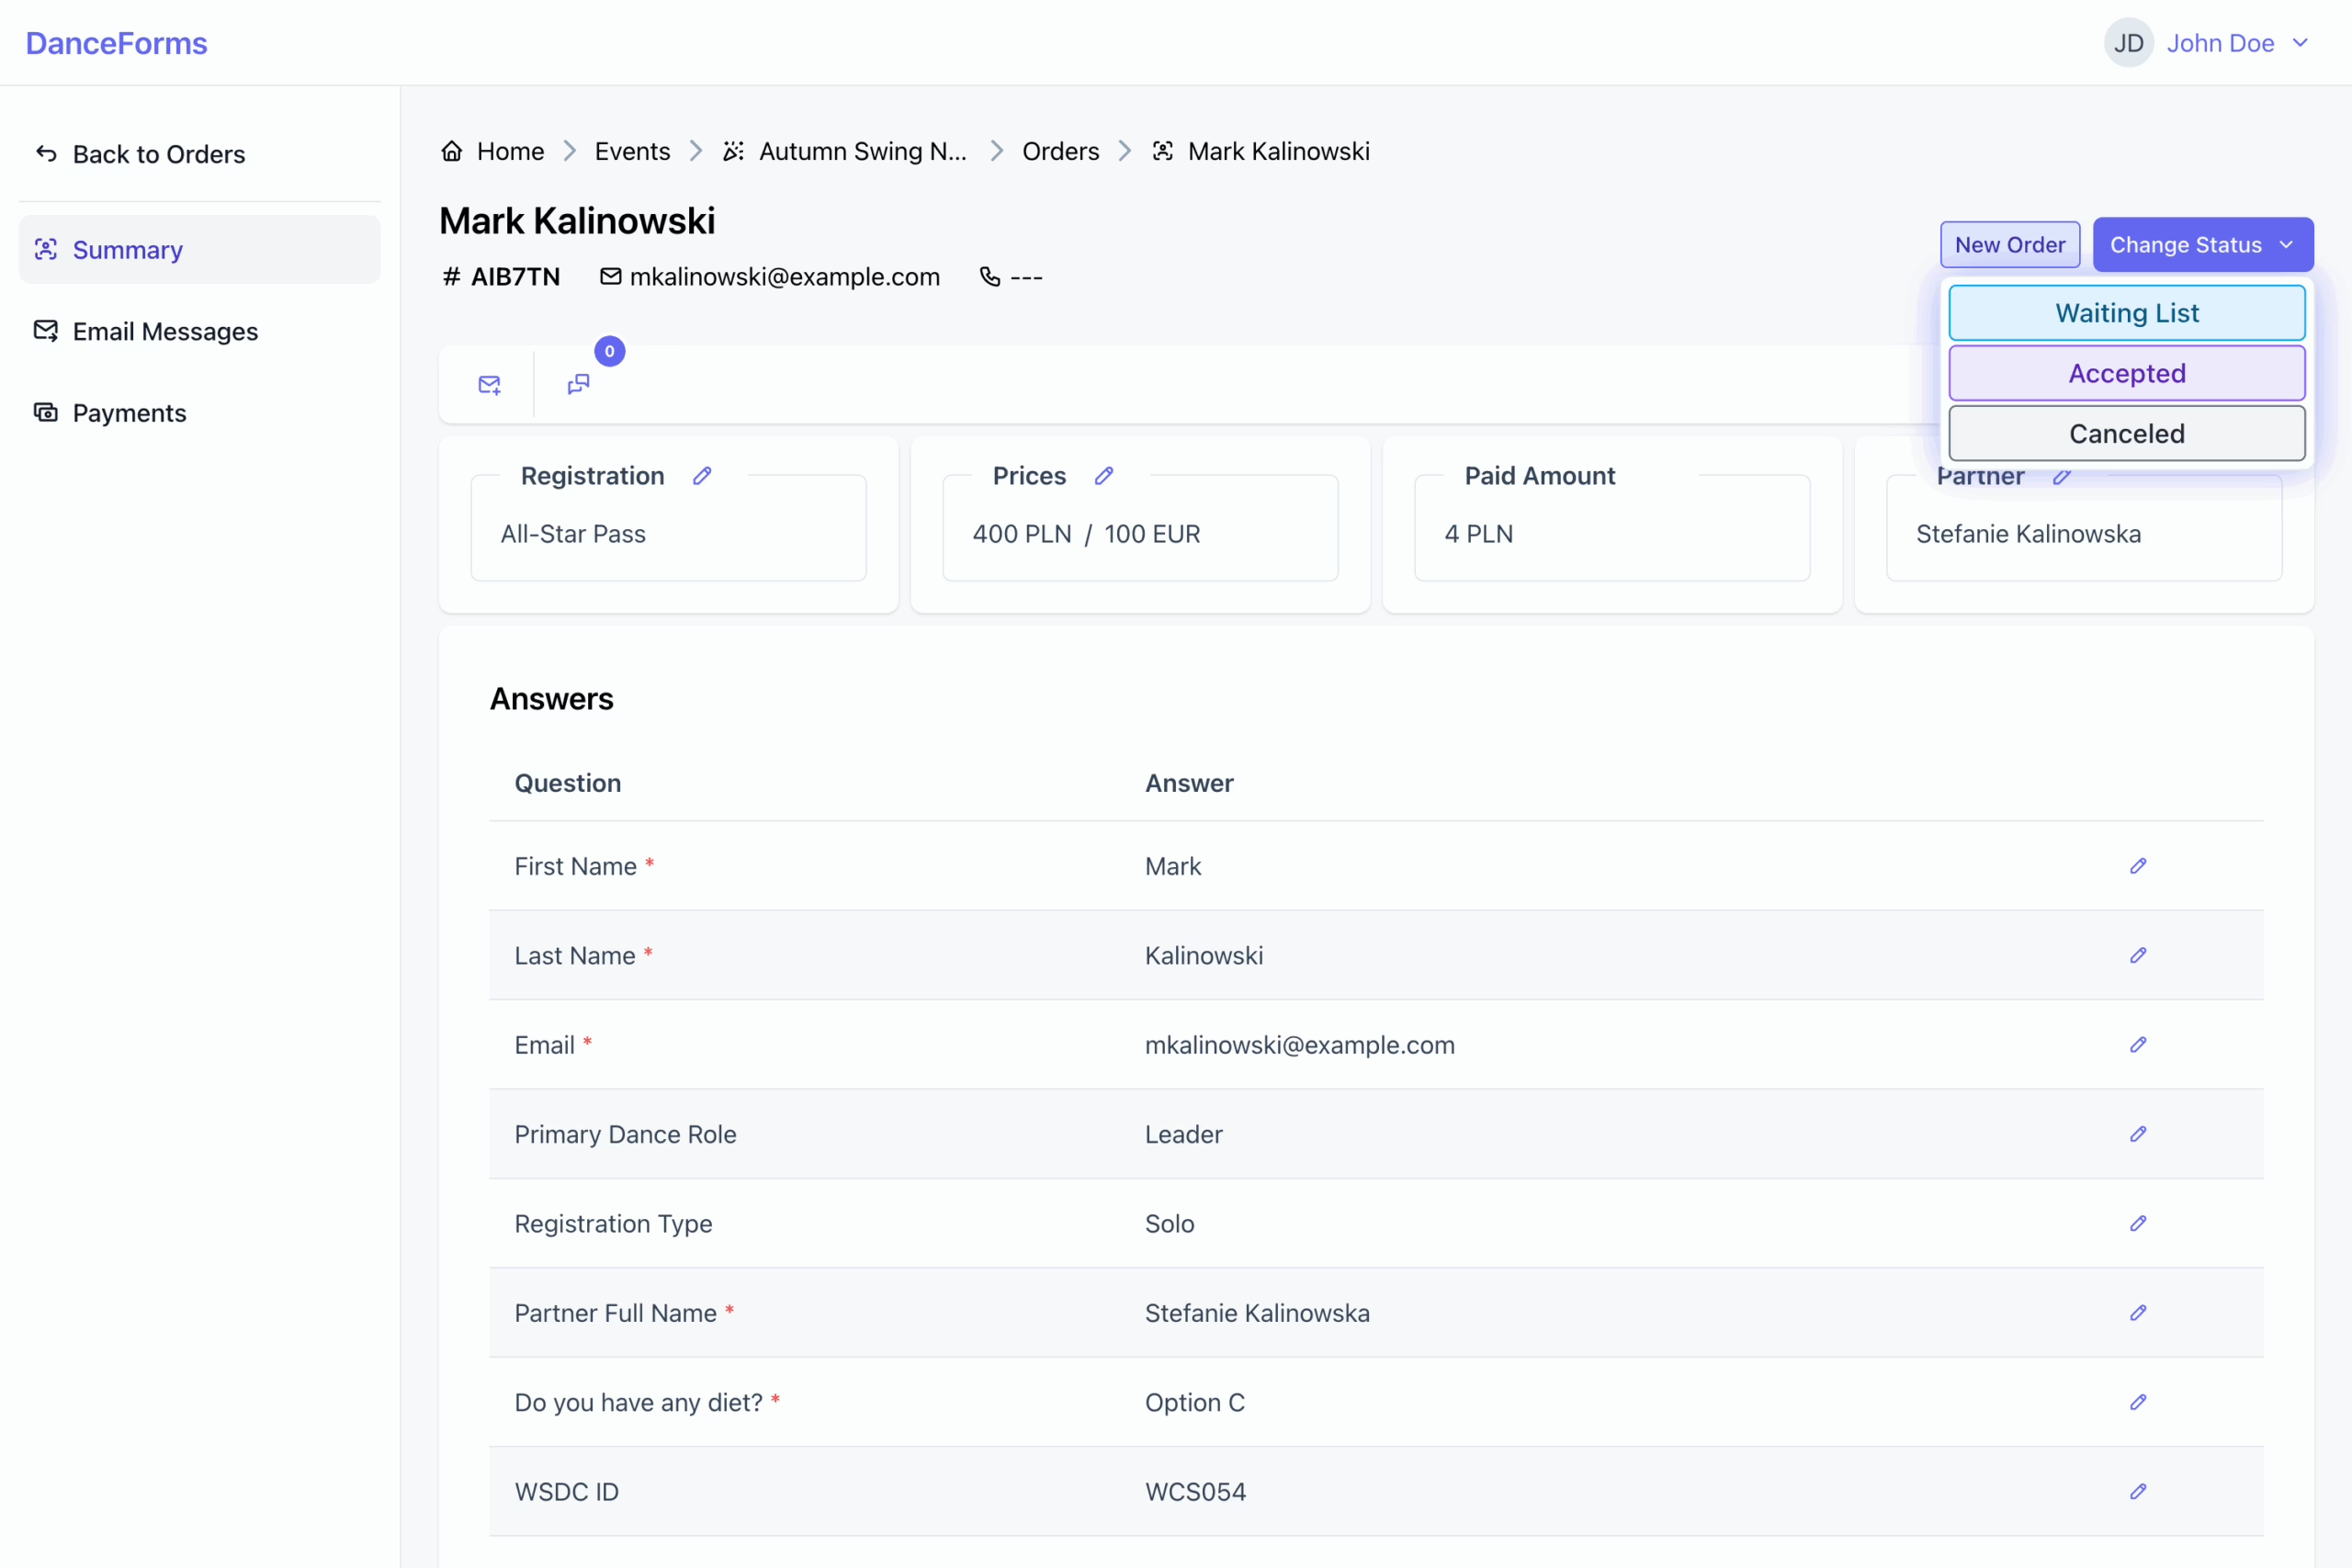
This section explains how to update the status of an order as it moves through the registration process.
To change the status:
- Click the Change Status button to open the list of available options.
- Select a status to apply the change.
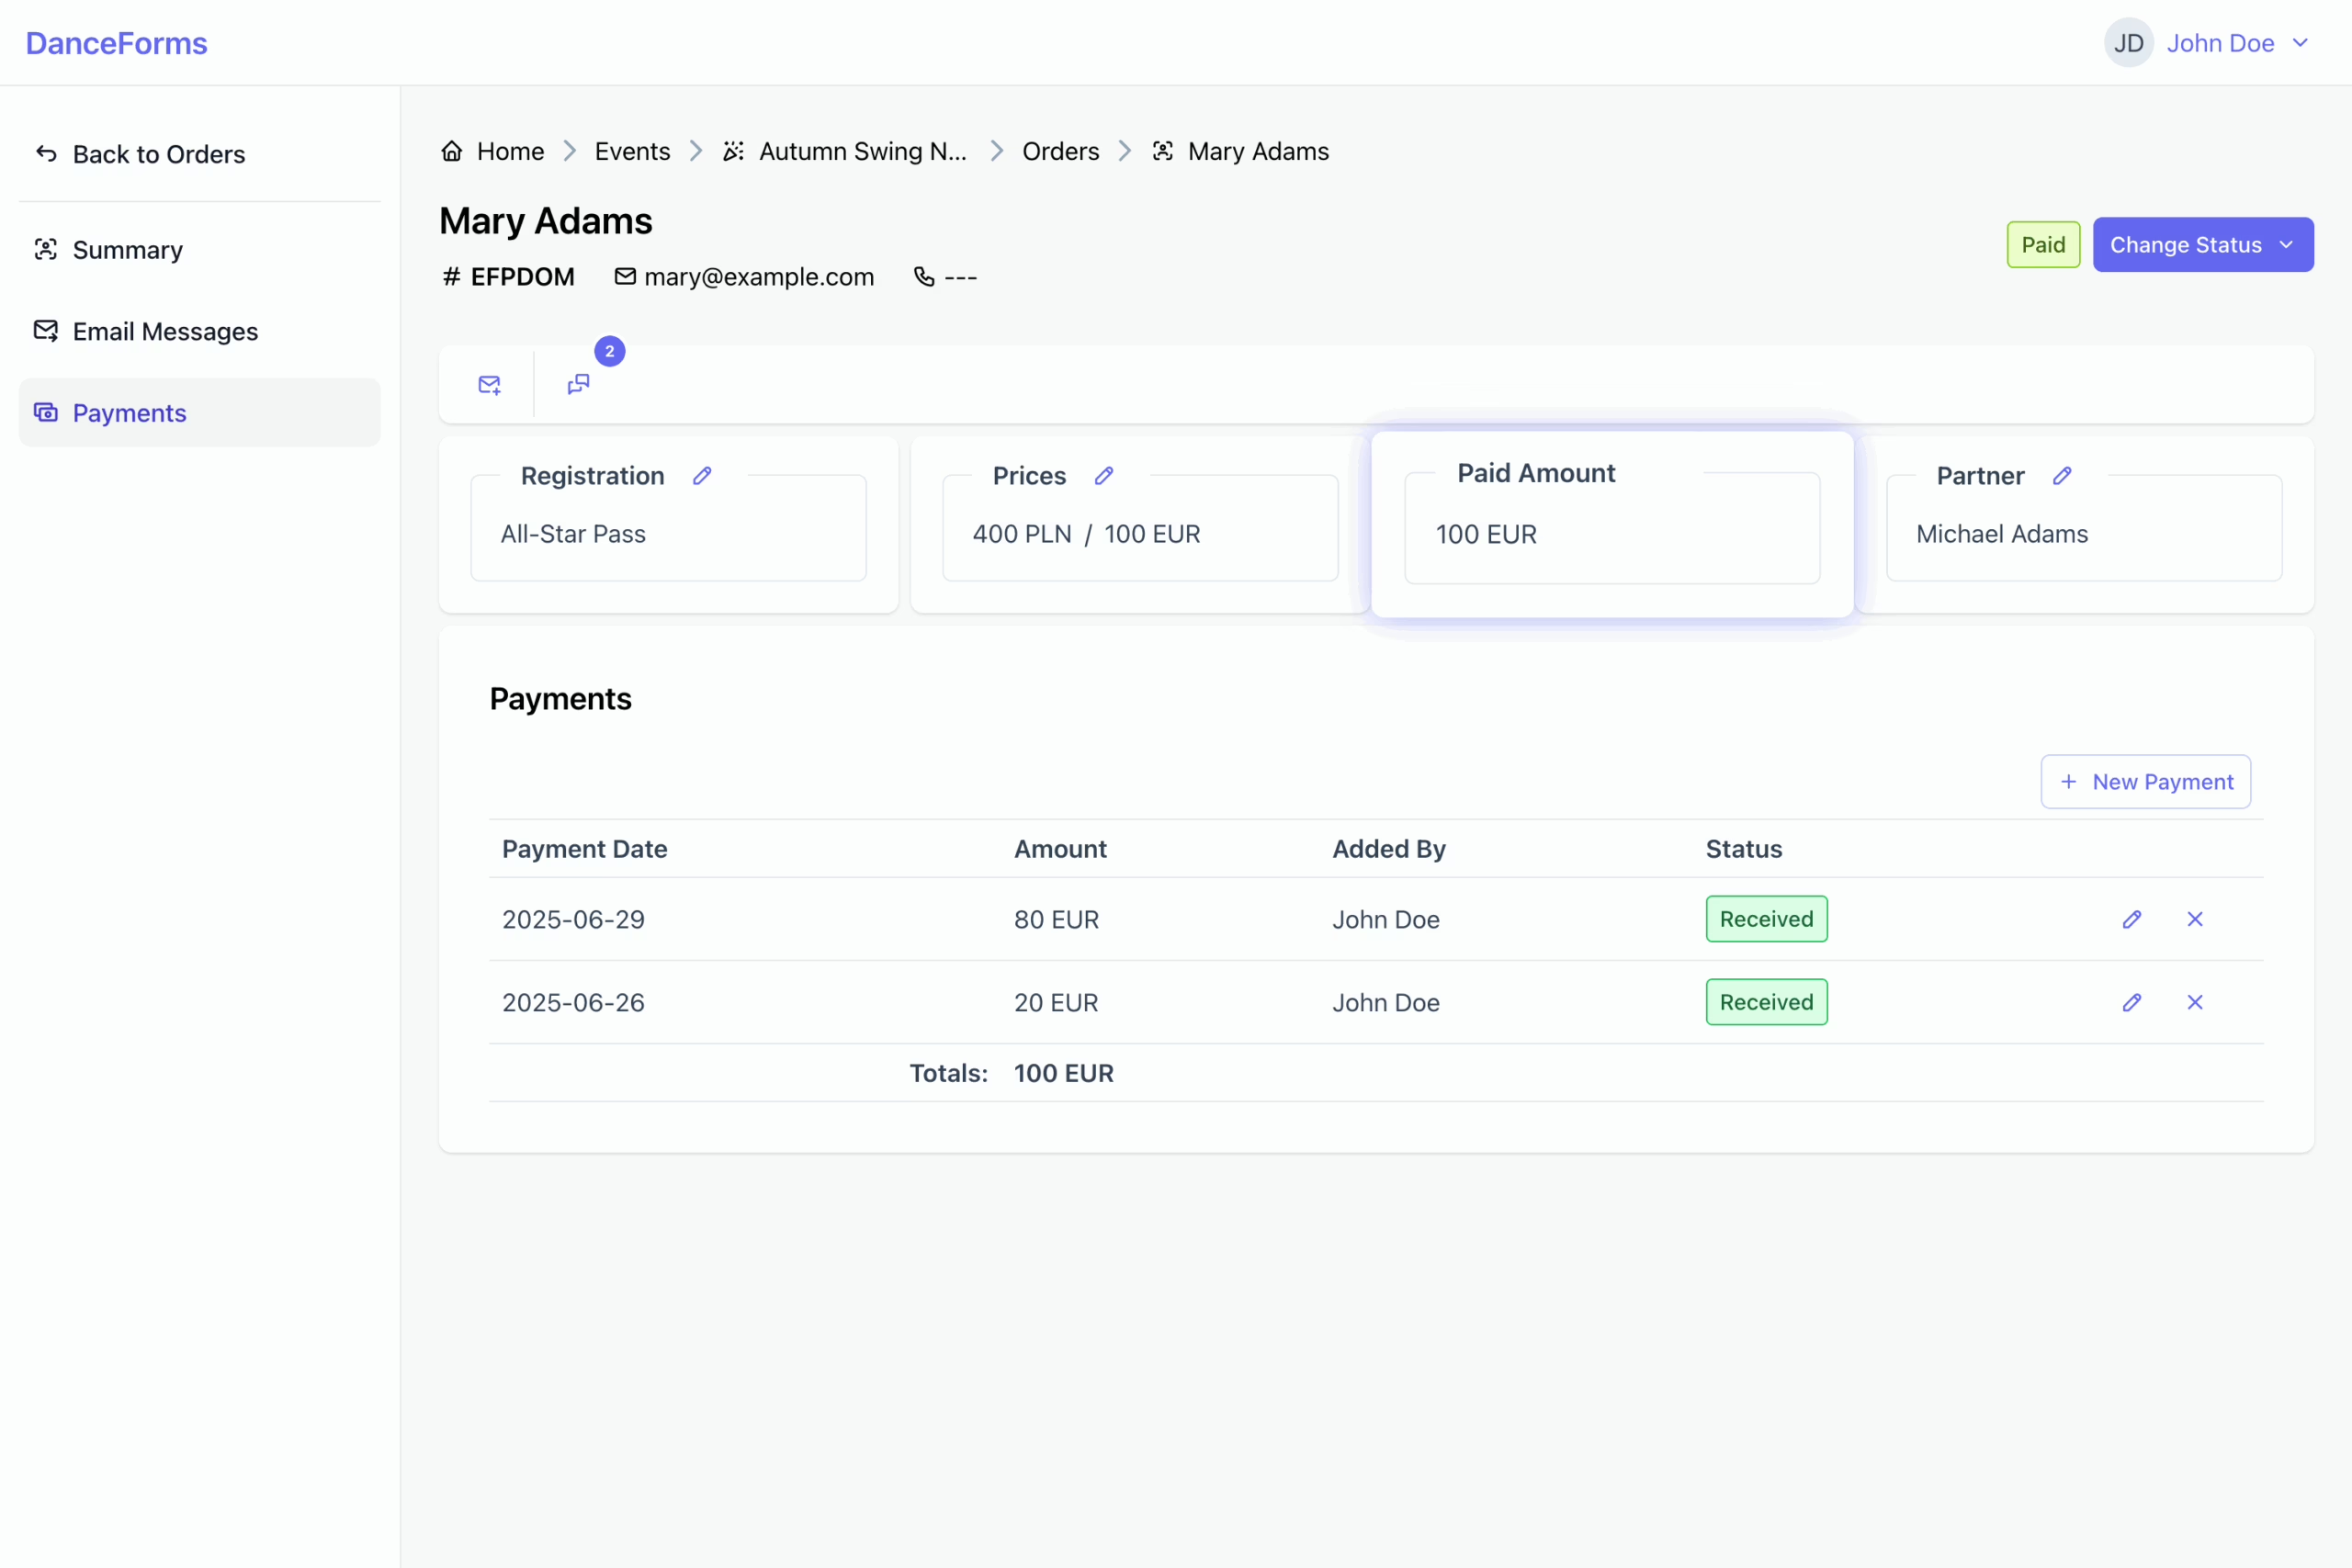
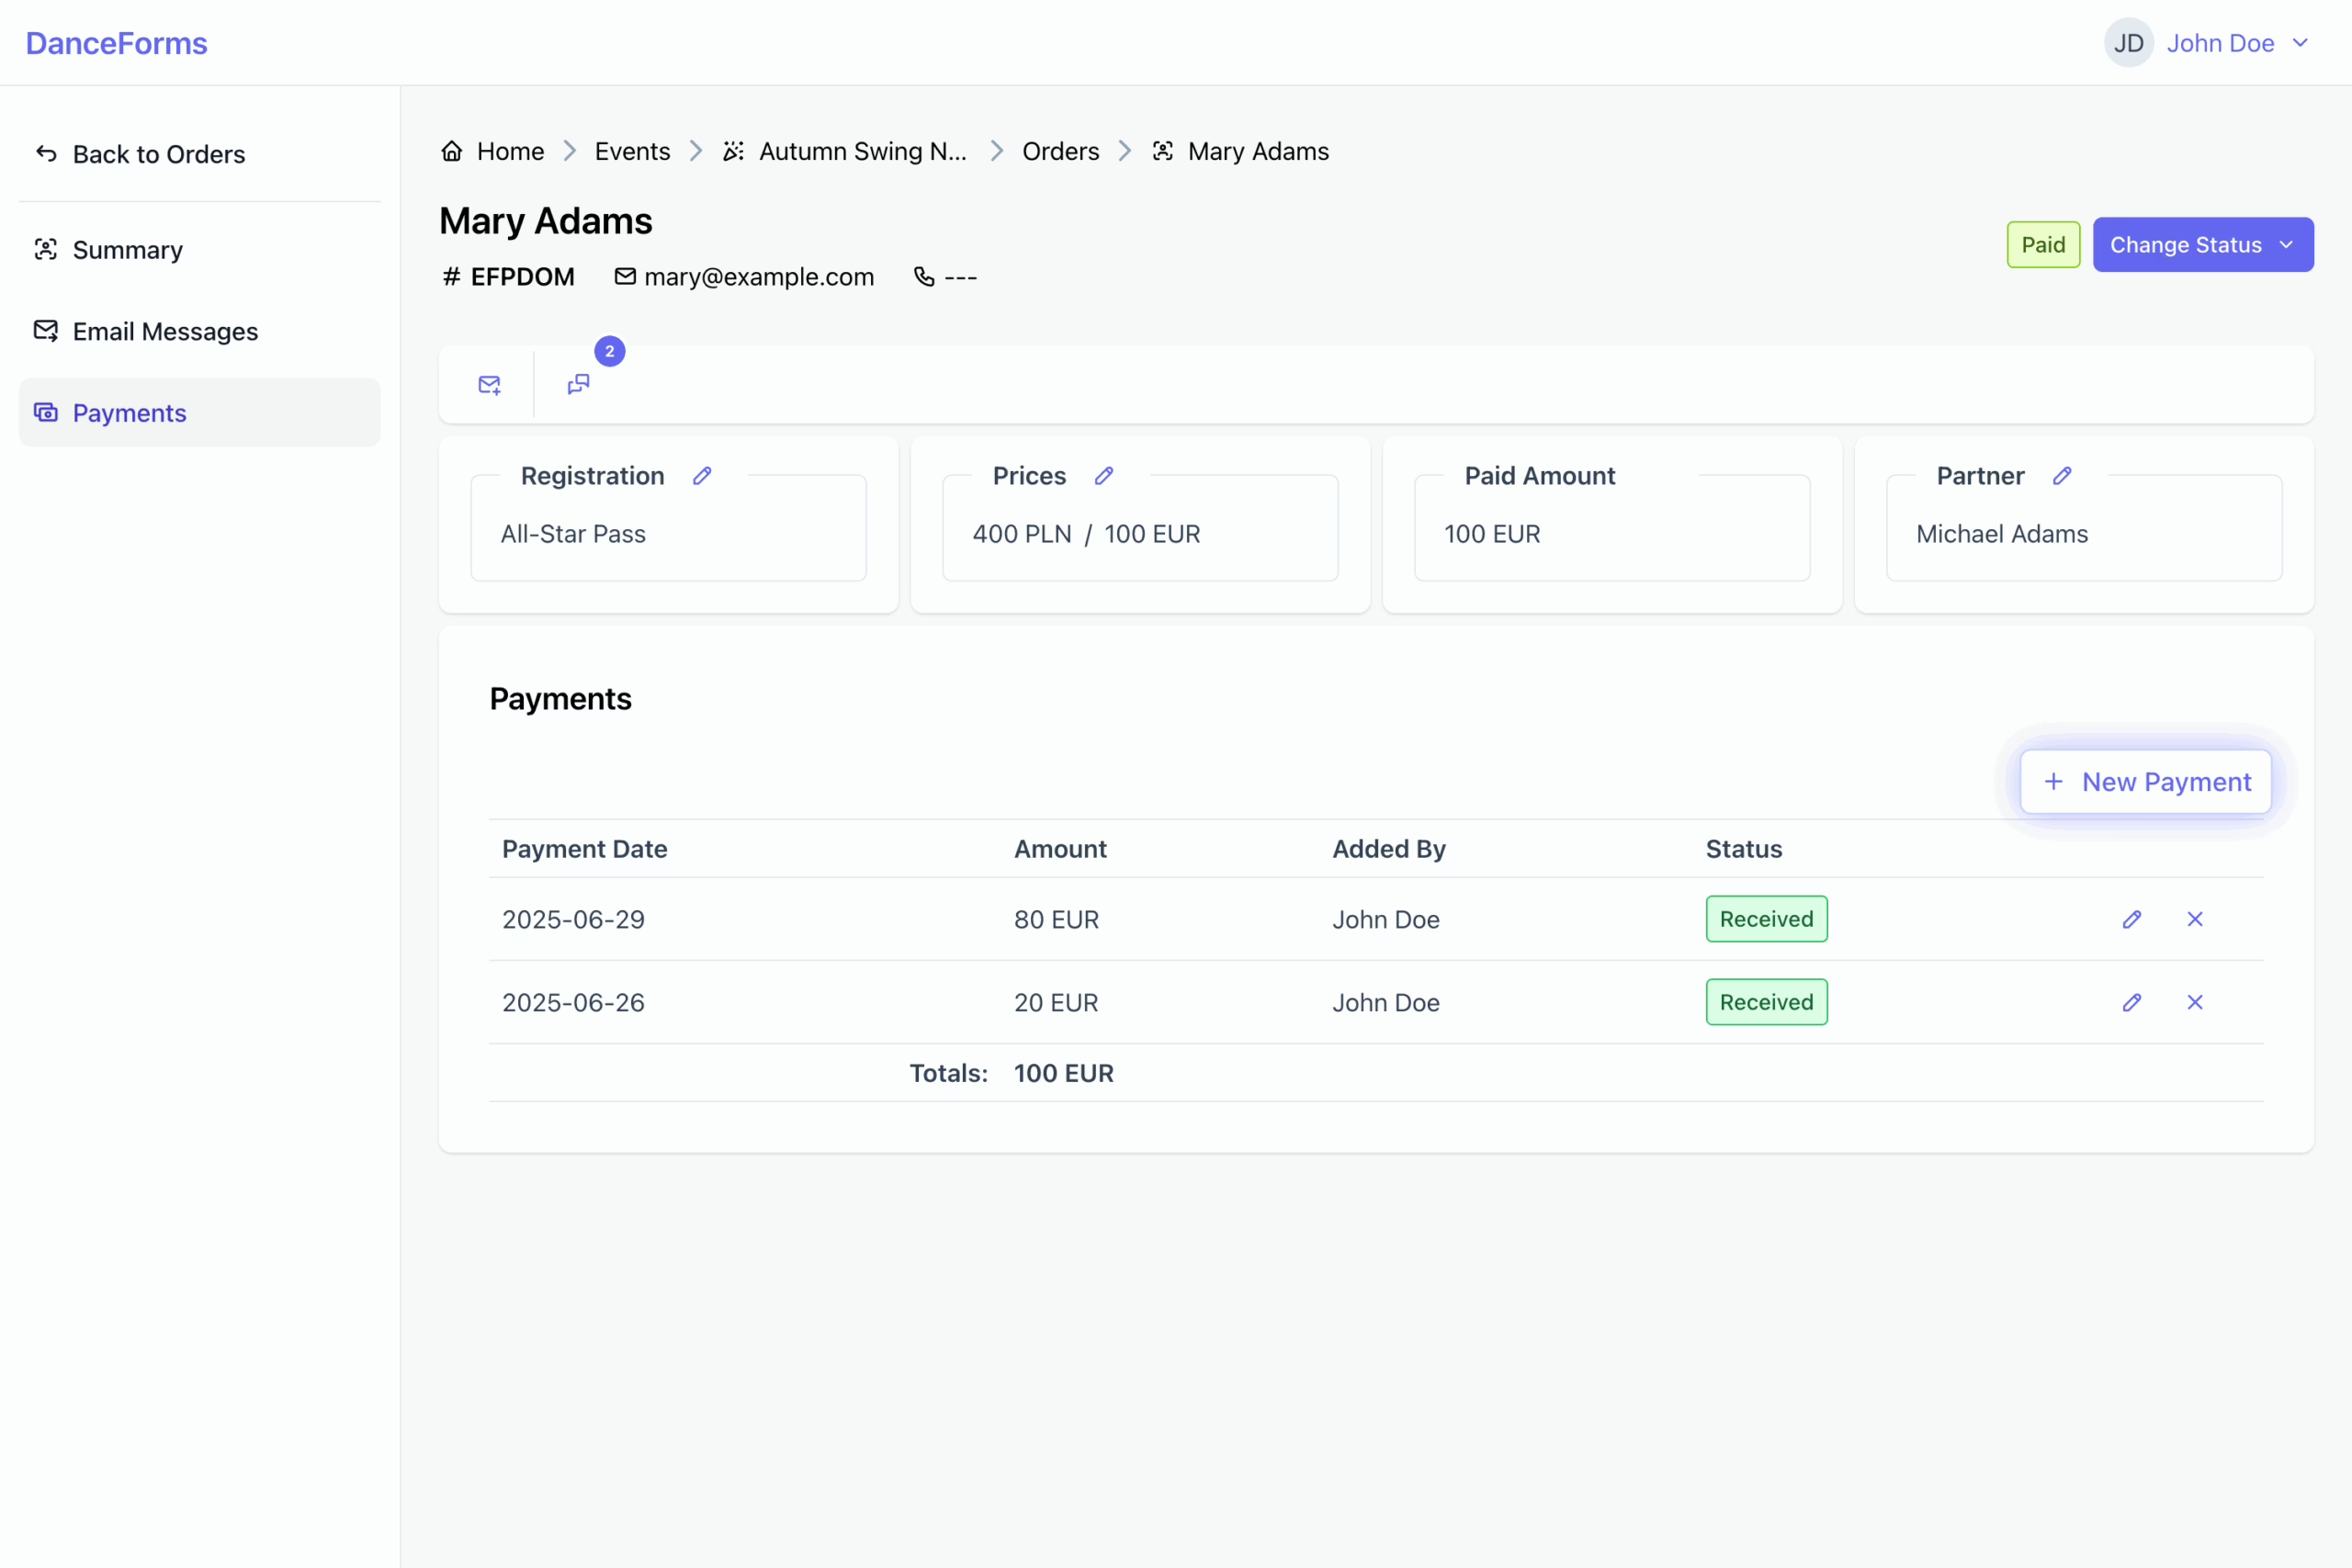
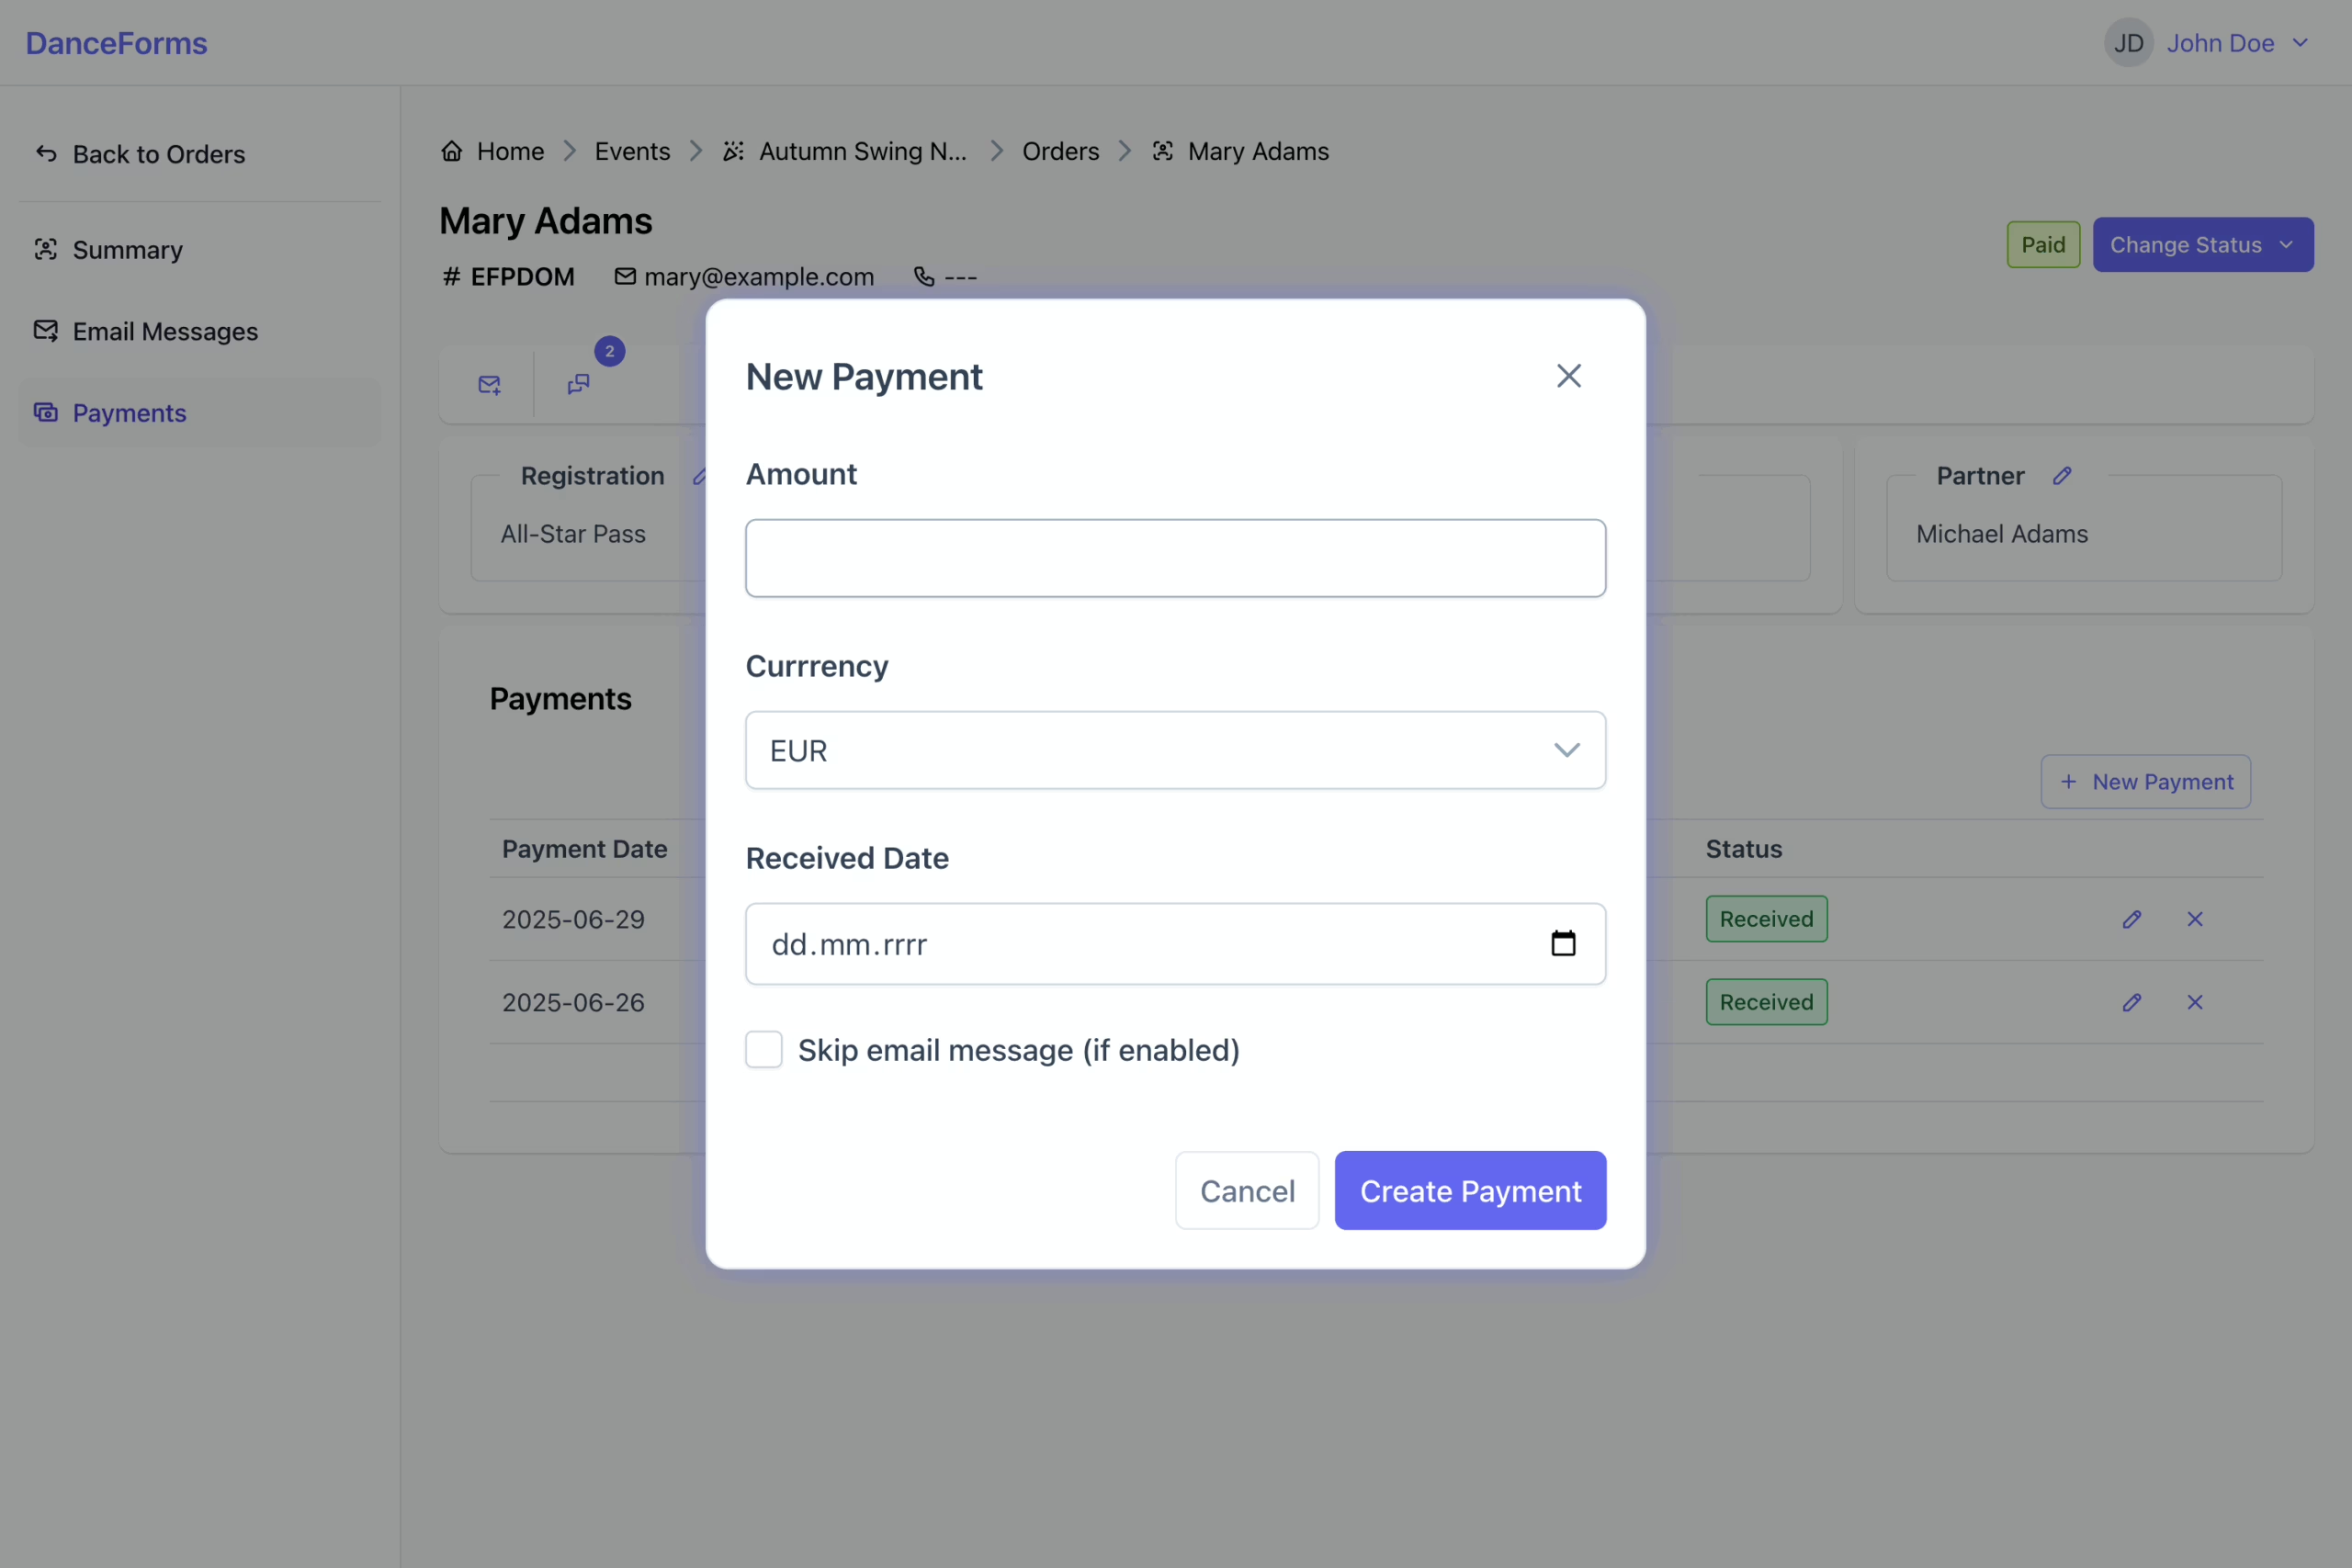
Use this section to add, update, or cancel payments associated with an order.
To add a payment:
- Navigate to the Payments view.
- Click New Payment to open the payment form.
- Enter the amount, currency, and payment date.
- Click Create Payment to complete the process.
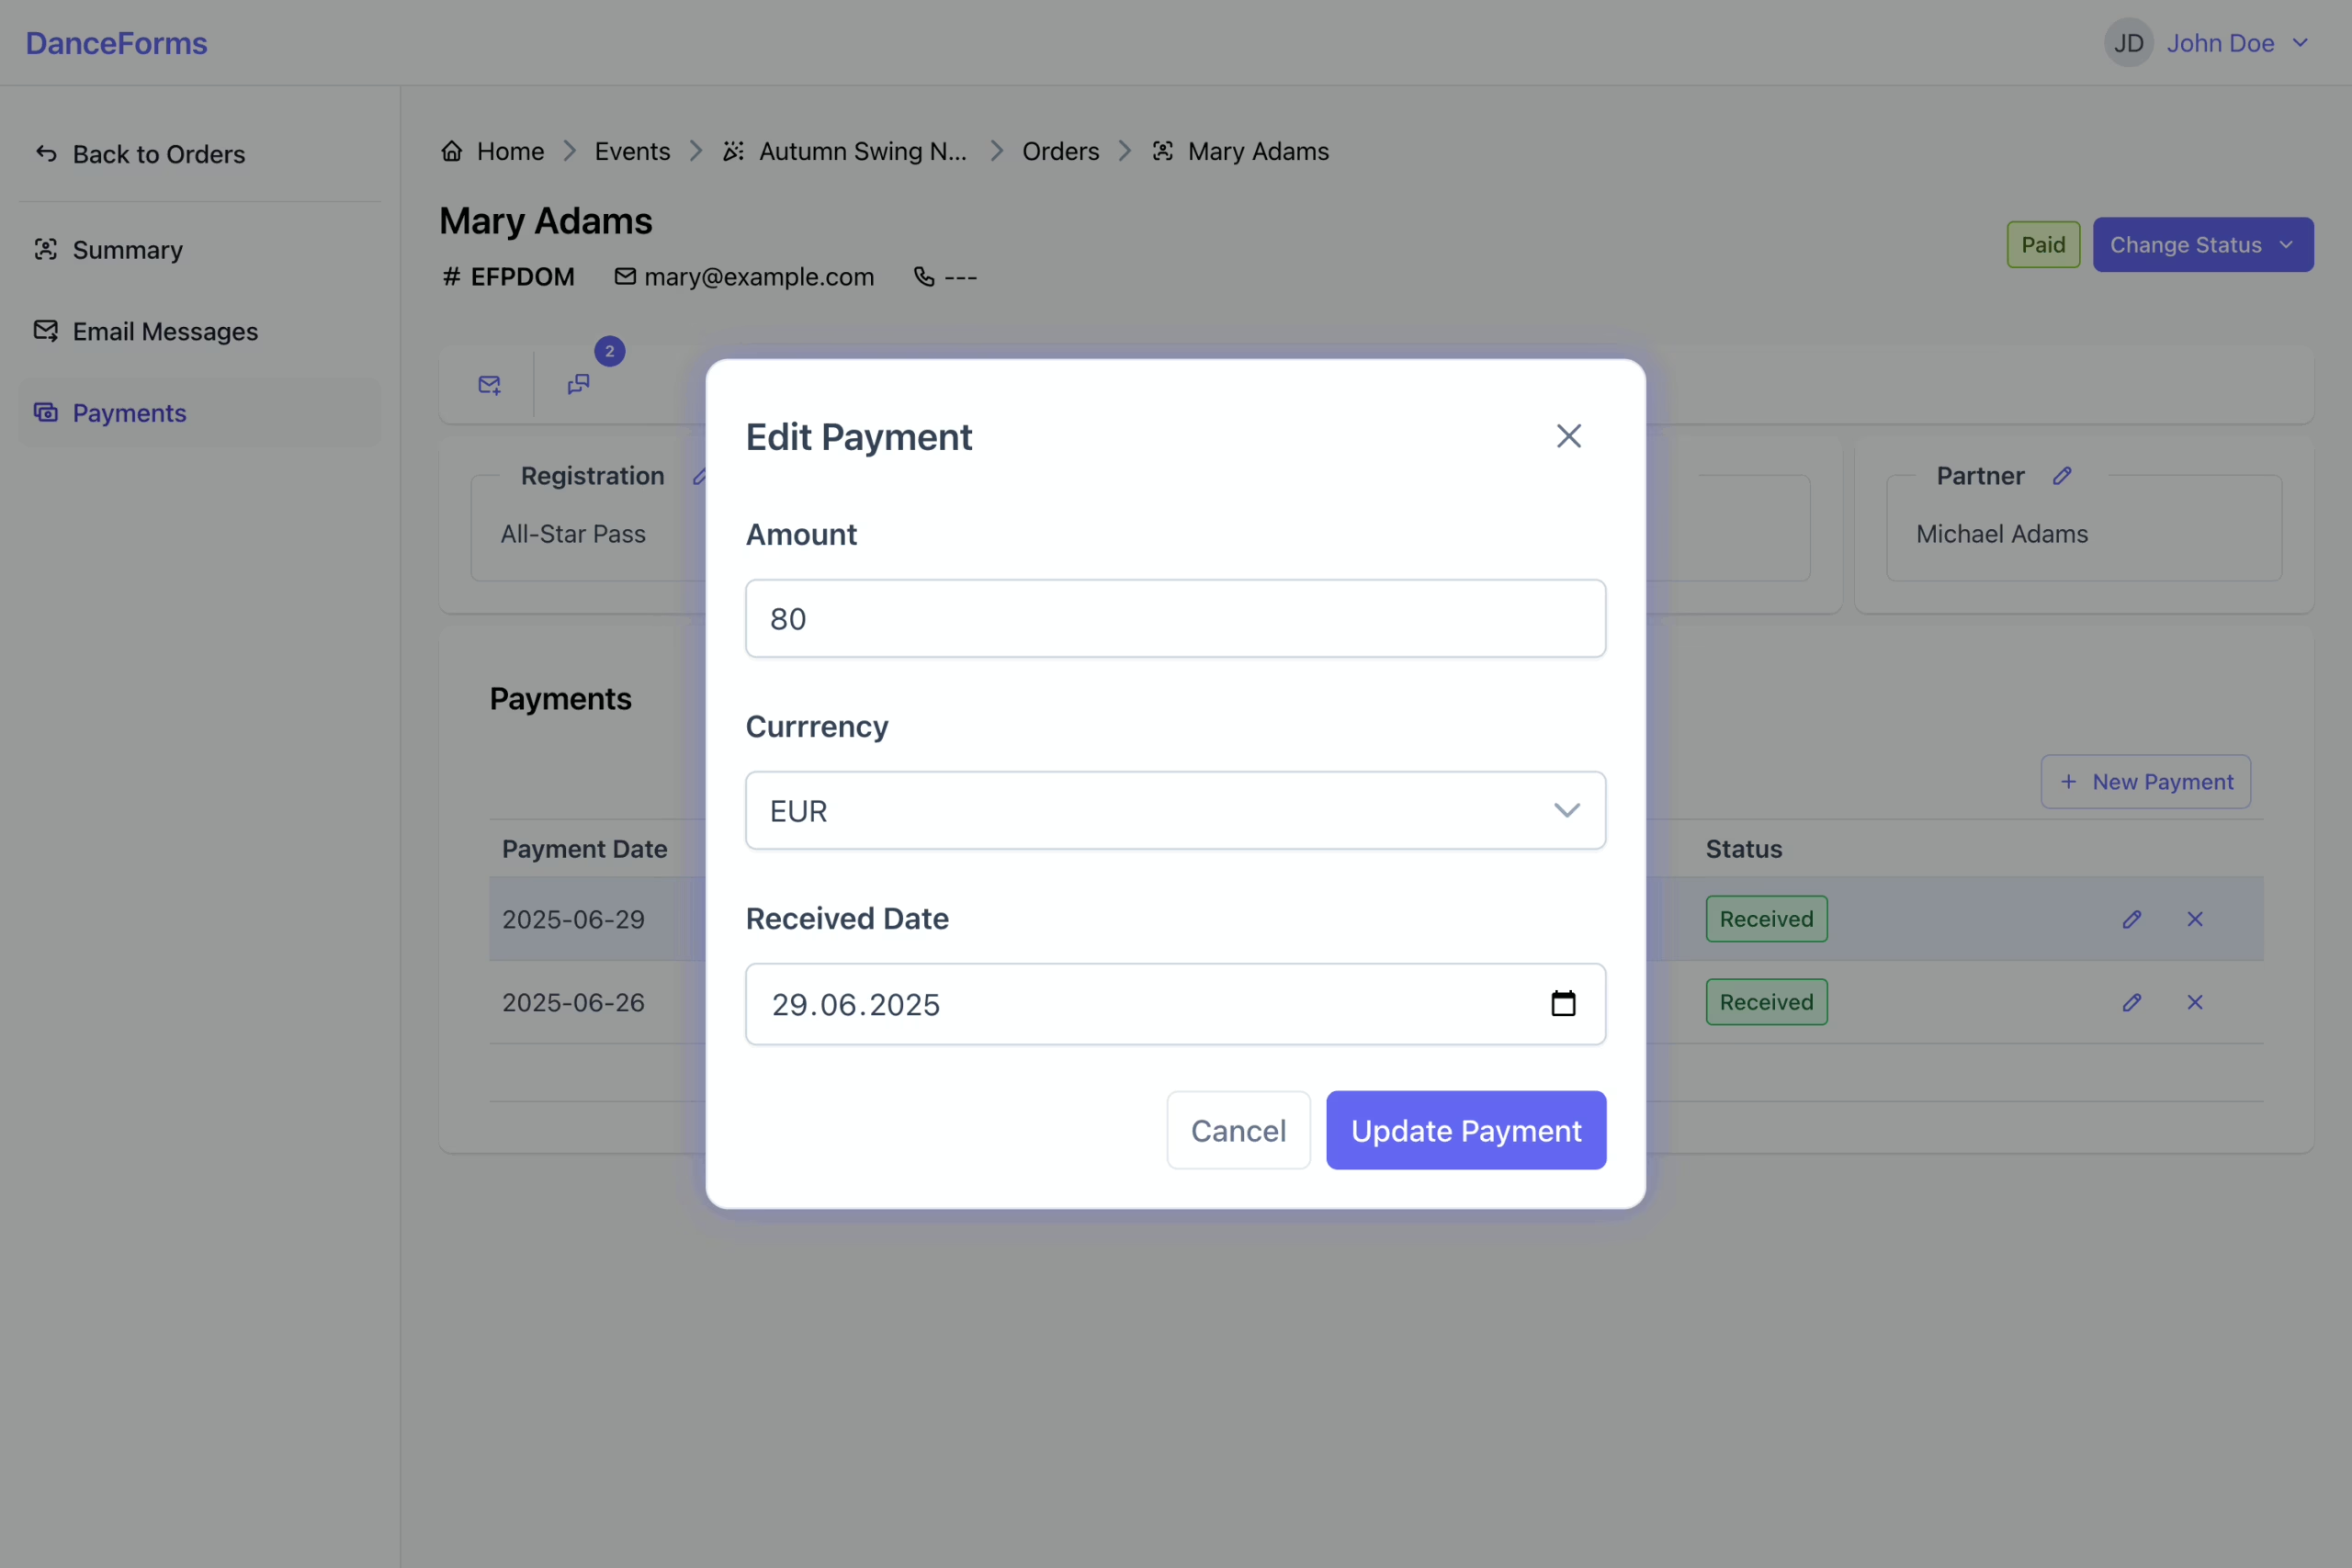
To edit a payment:
- Click the Edit icon in the payment row.
- Update the payment details.
- Click Update Payment to save the changes.
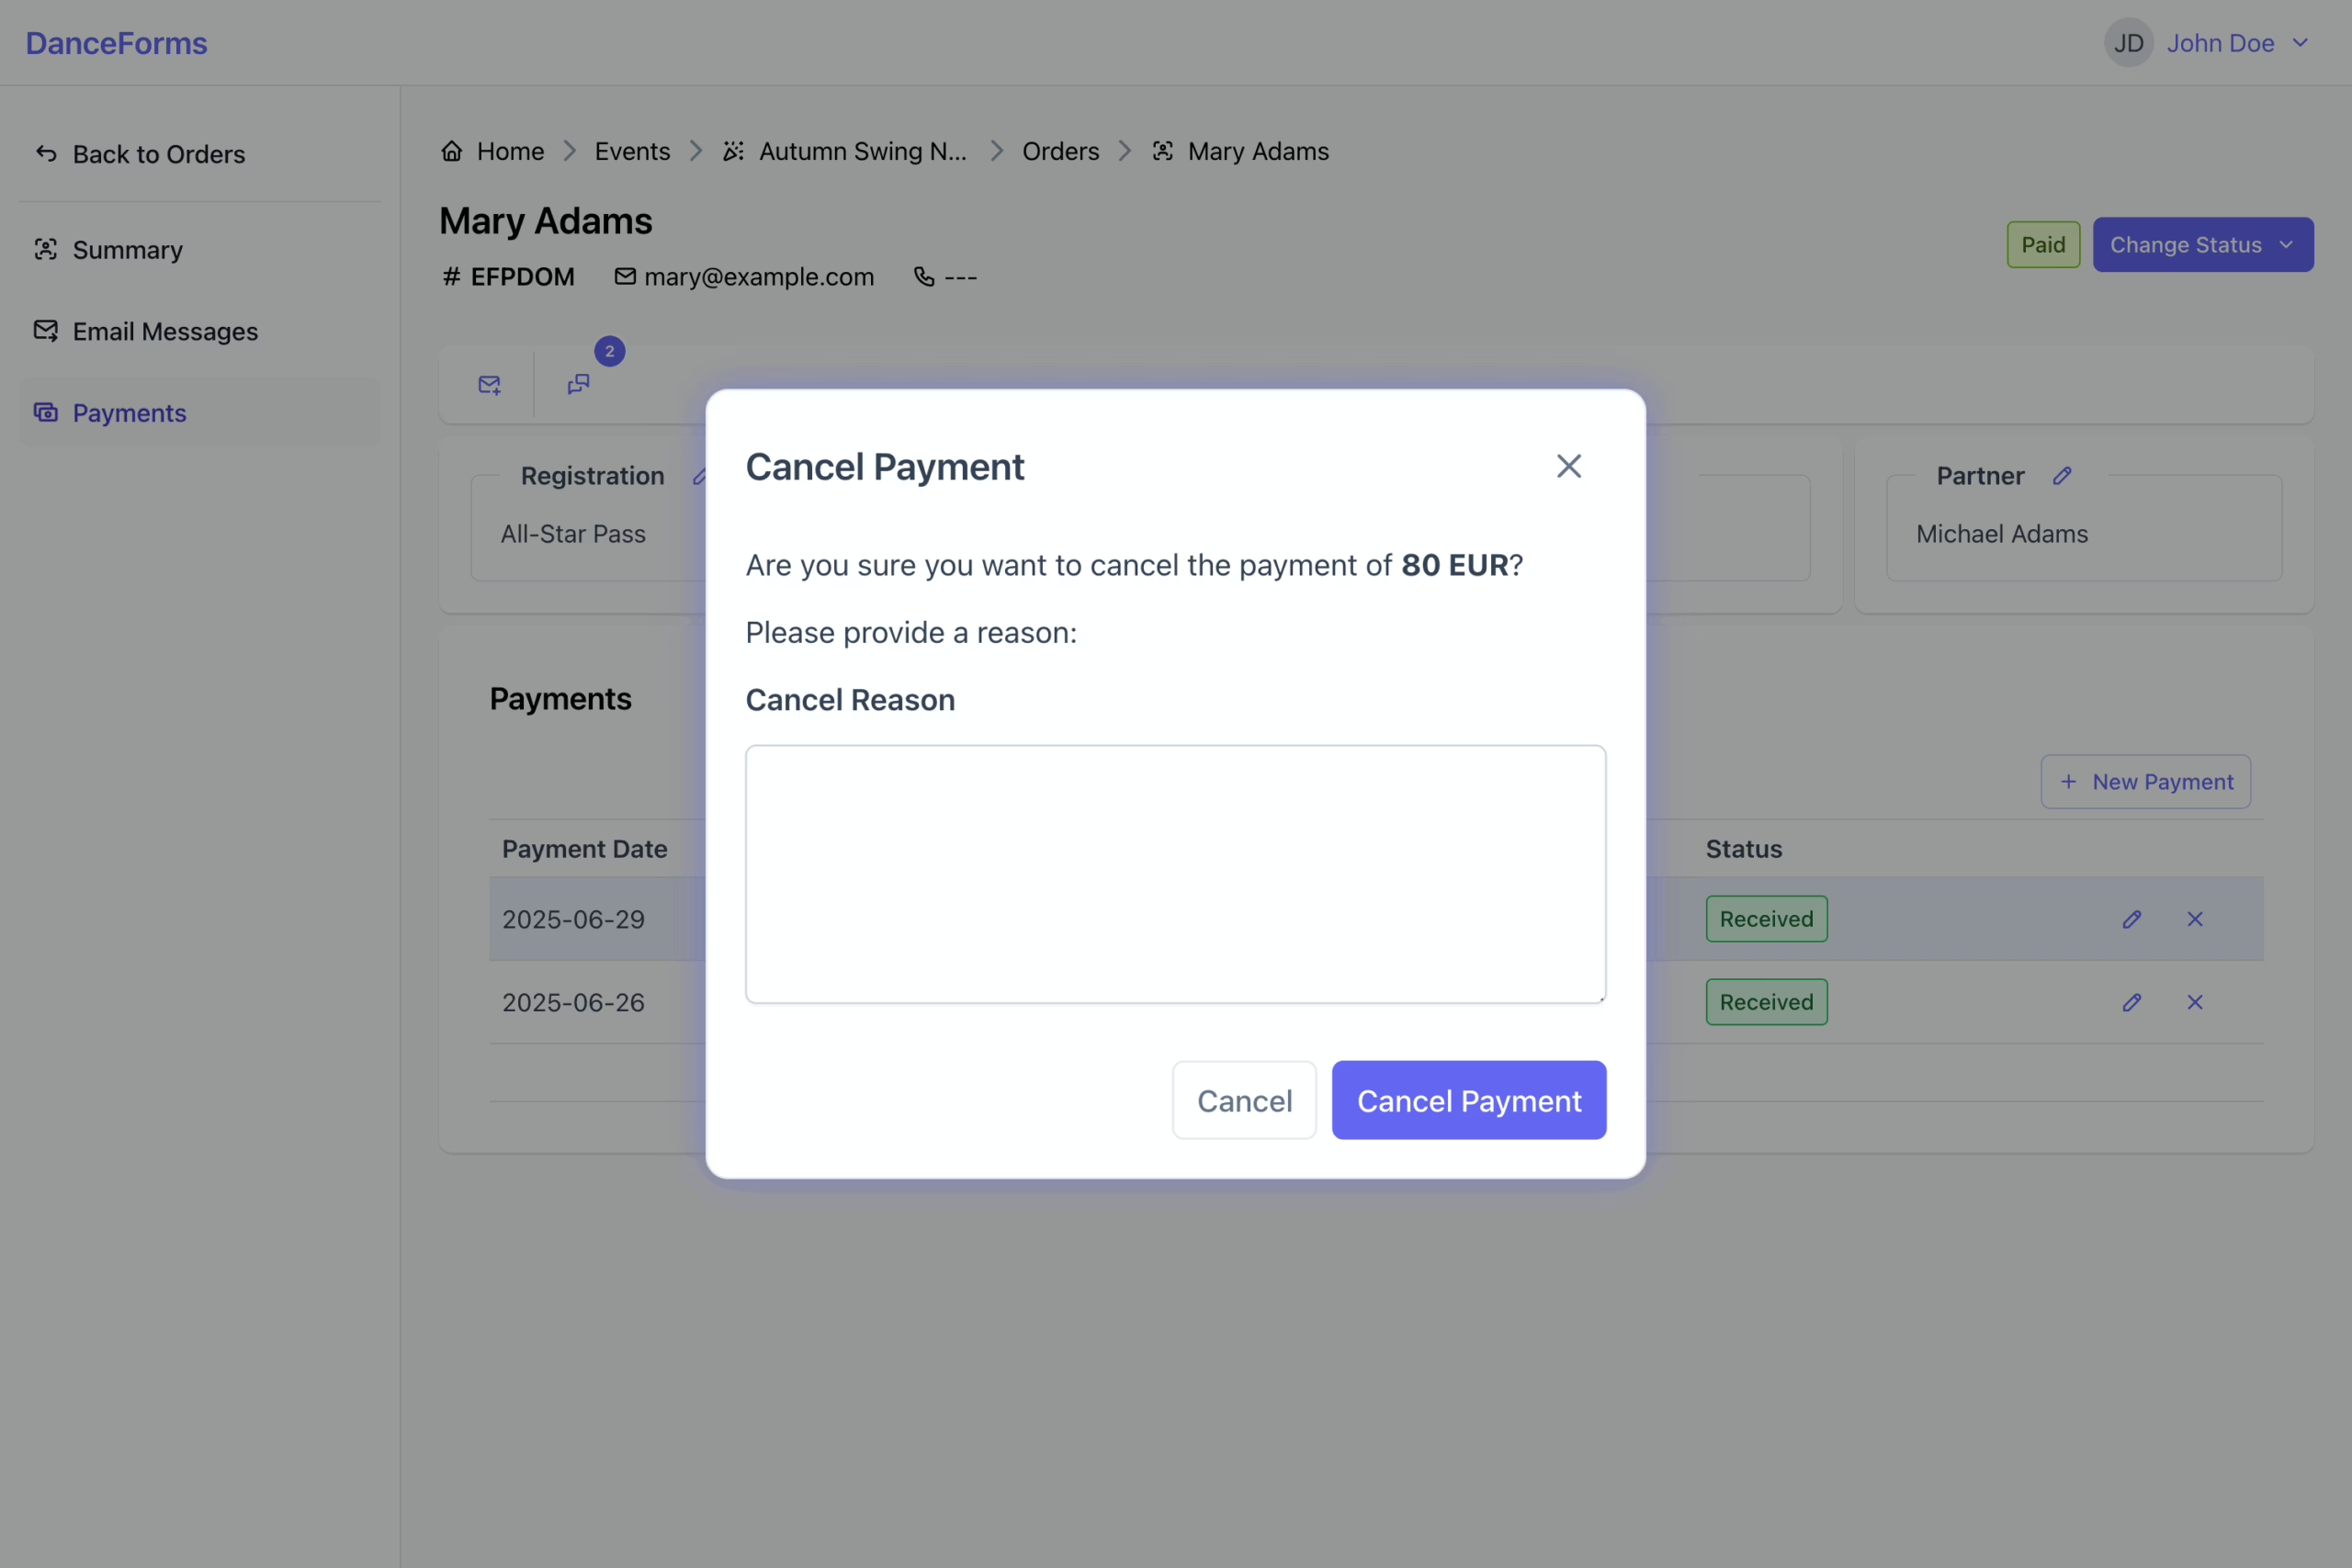
To cancel a payment:
- Click the Cancel icon in the payment row.
- Provide a cancellation reason for clarity.
- Click Cancel Payment to complete the process.
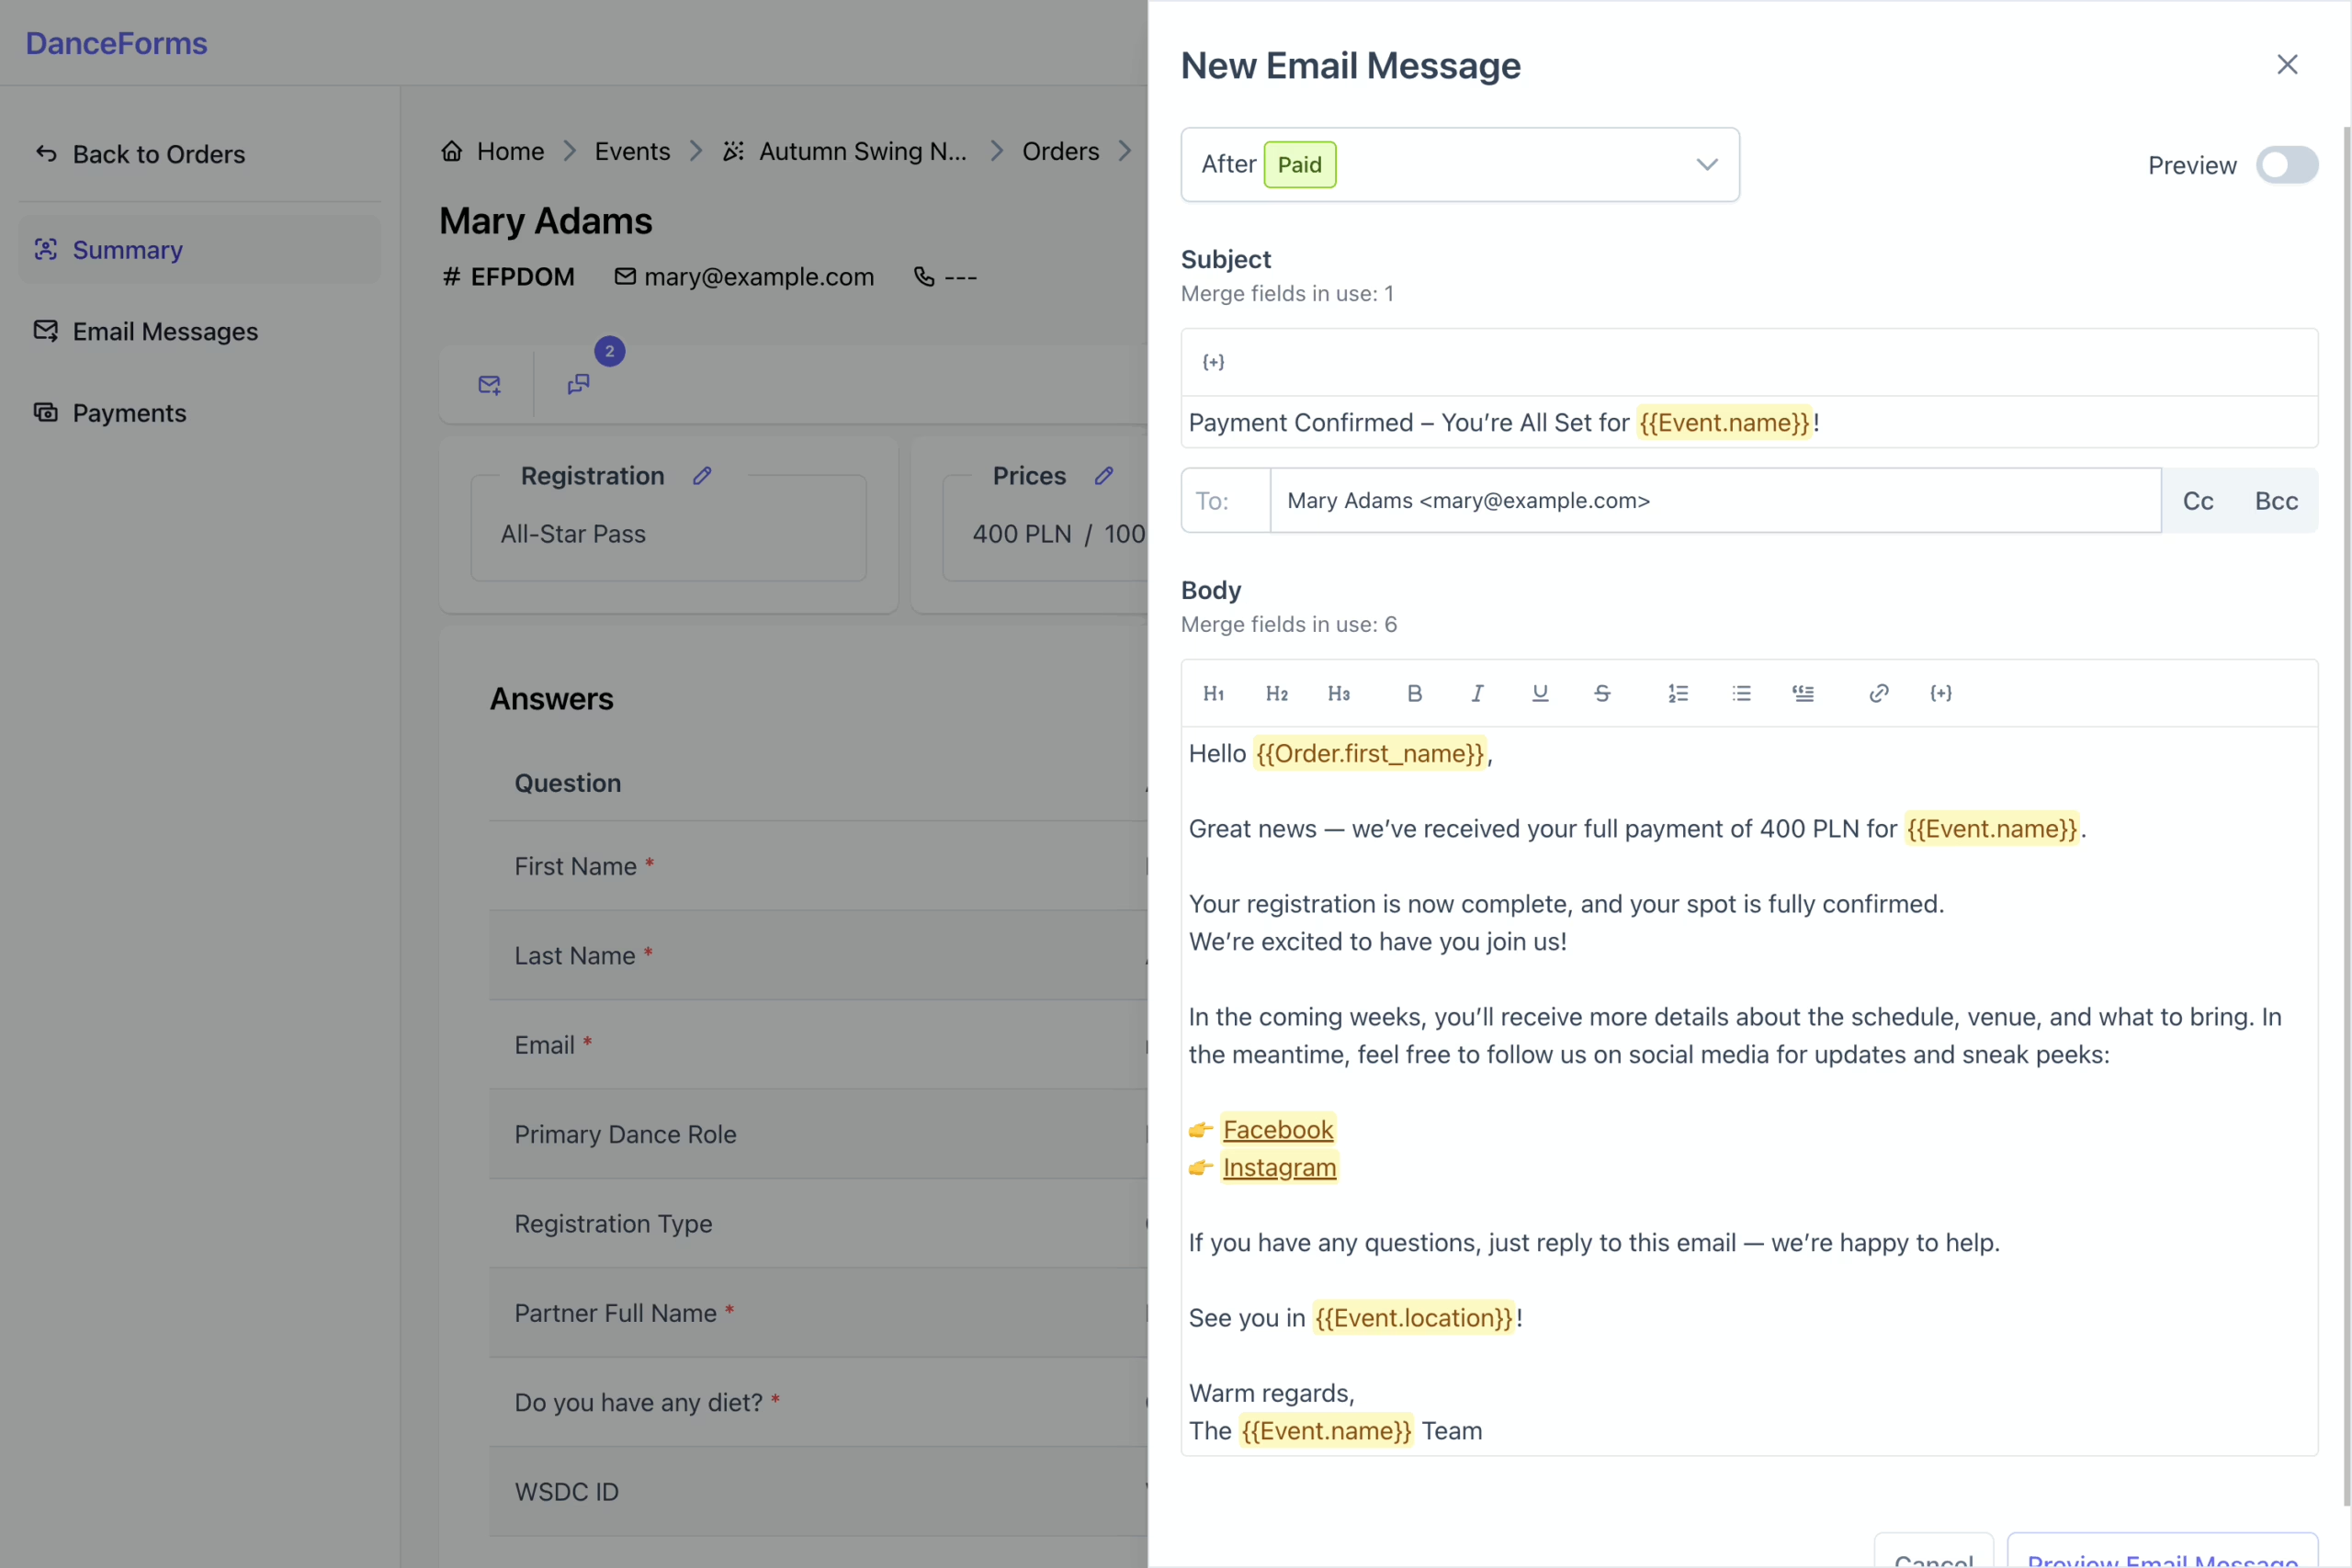
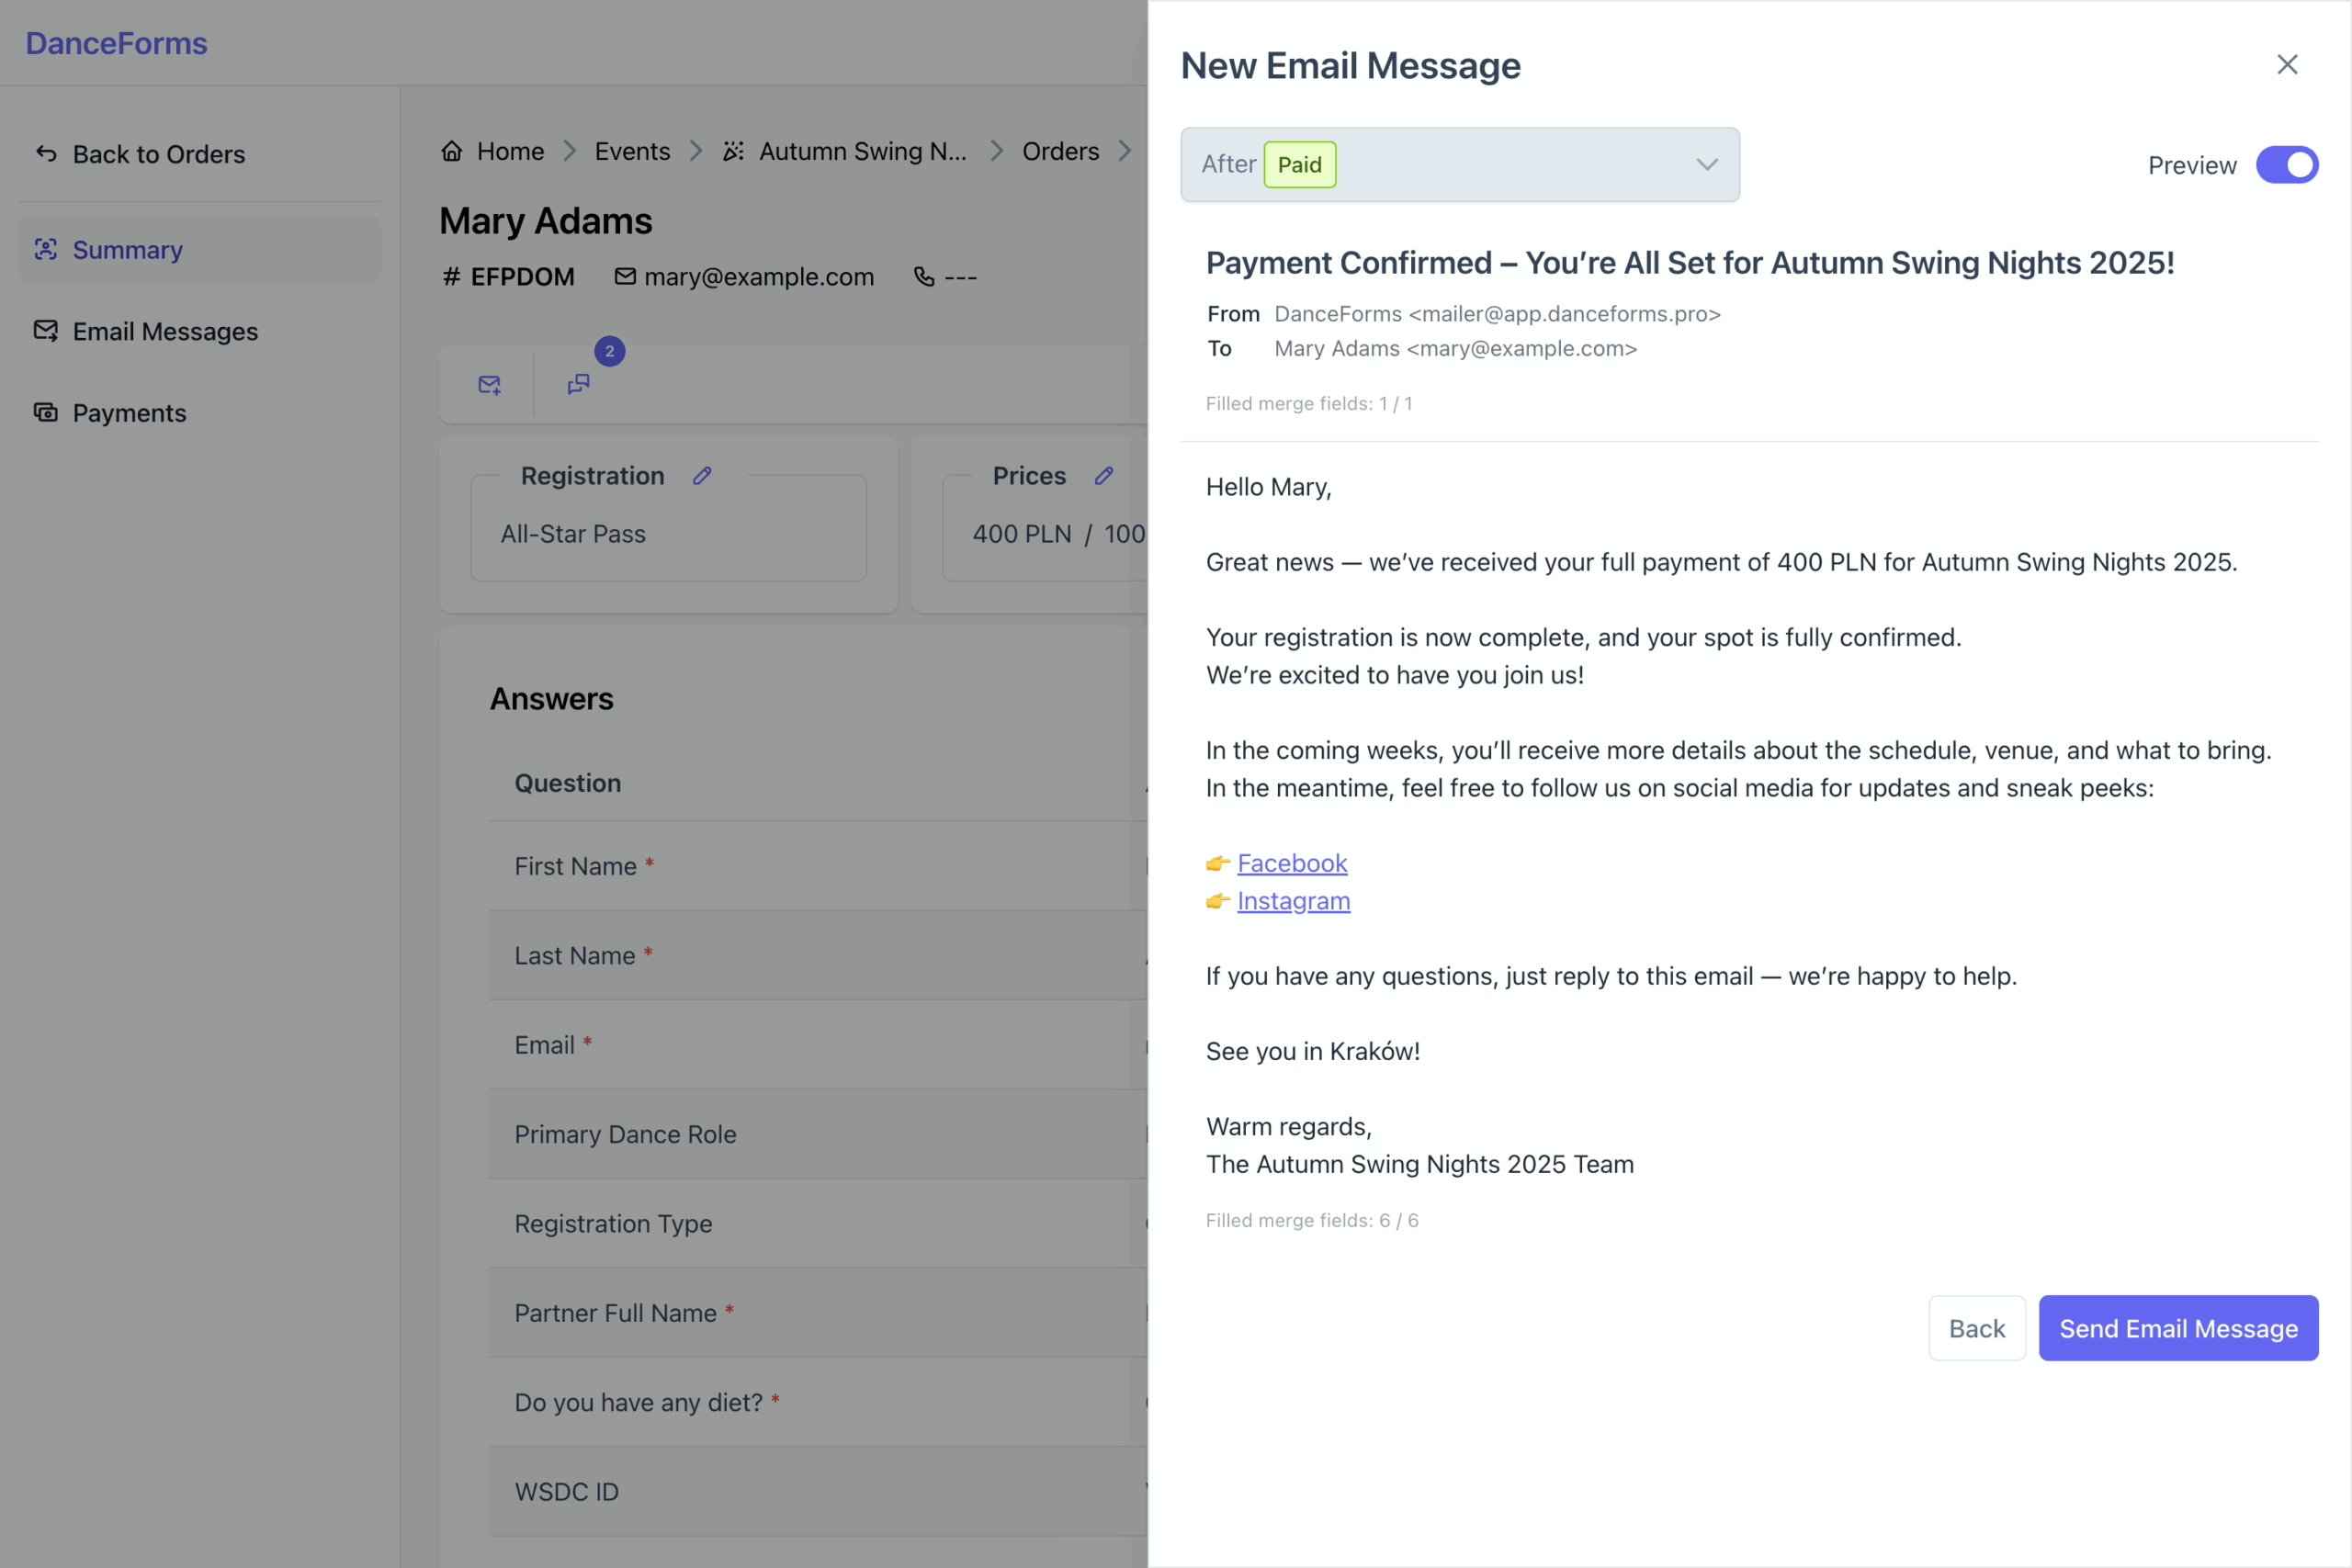
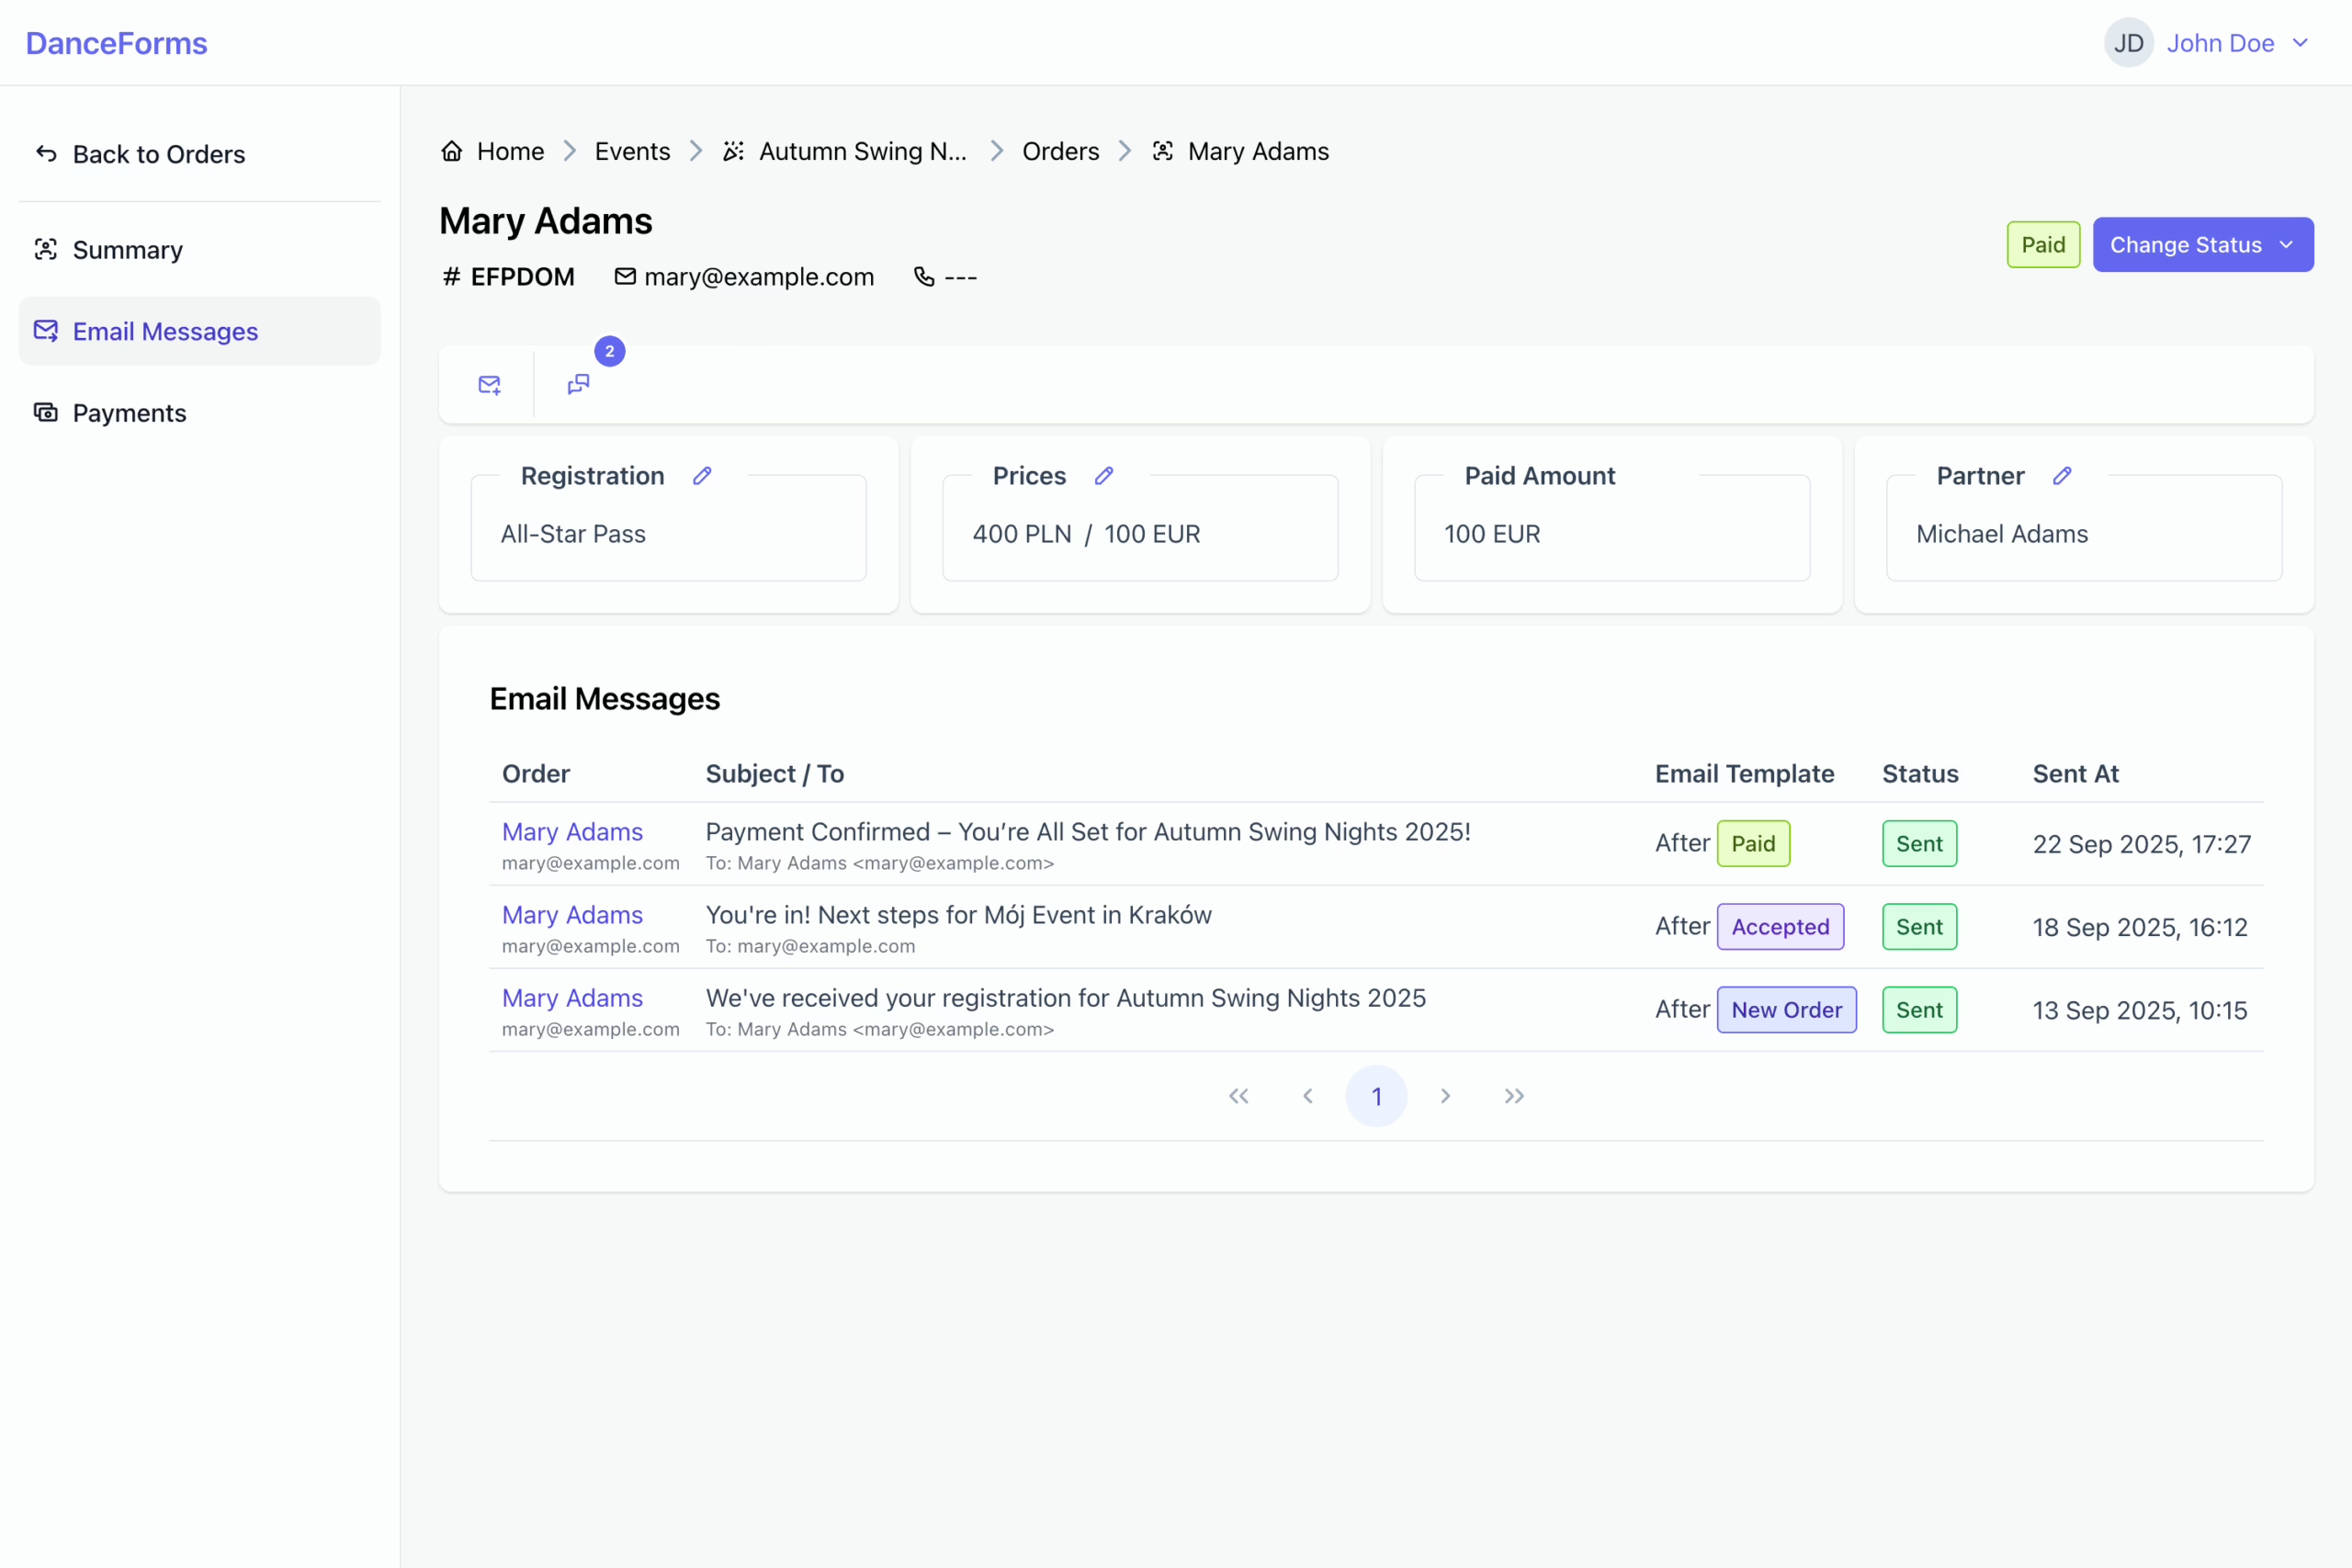
This section explains how to send email messages to participants using predefined templates or custom content.
To send an email message:
- Click the Email icon to open the email editor sidebar.
- Select a predefined email template, or provide a custom subject and message body.
- Click Preview Email Template to review the content before sending.
- Click Send Email Template to send the email.
Then, navigate to the Email Messages view to review the message history.
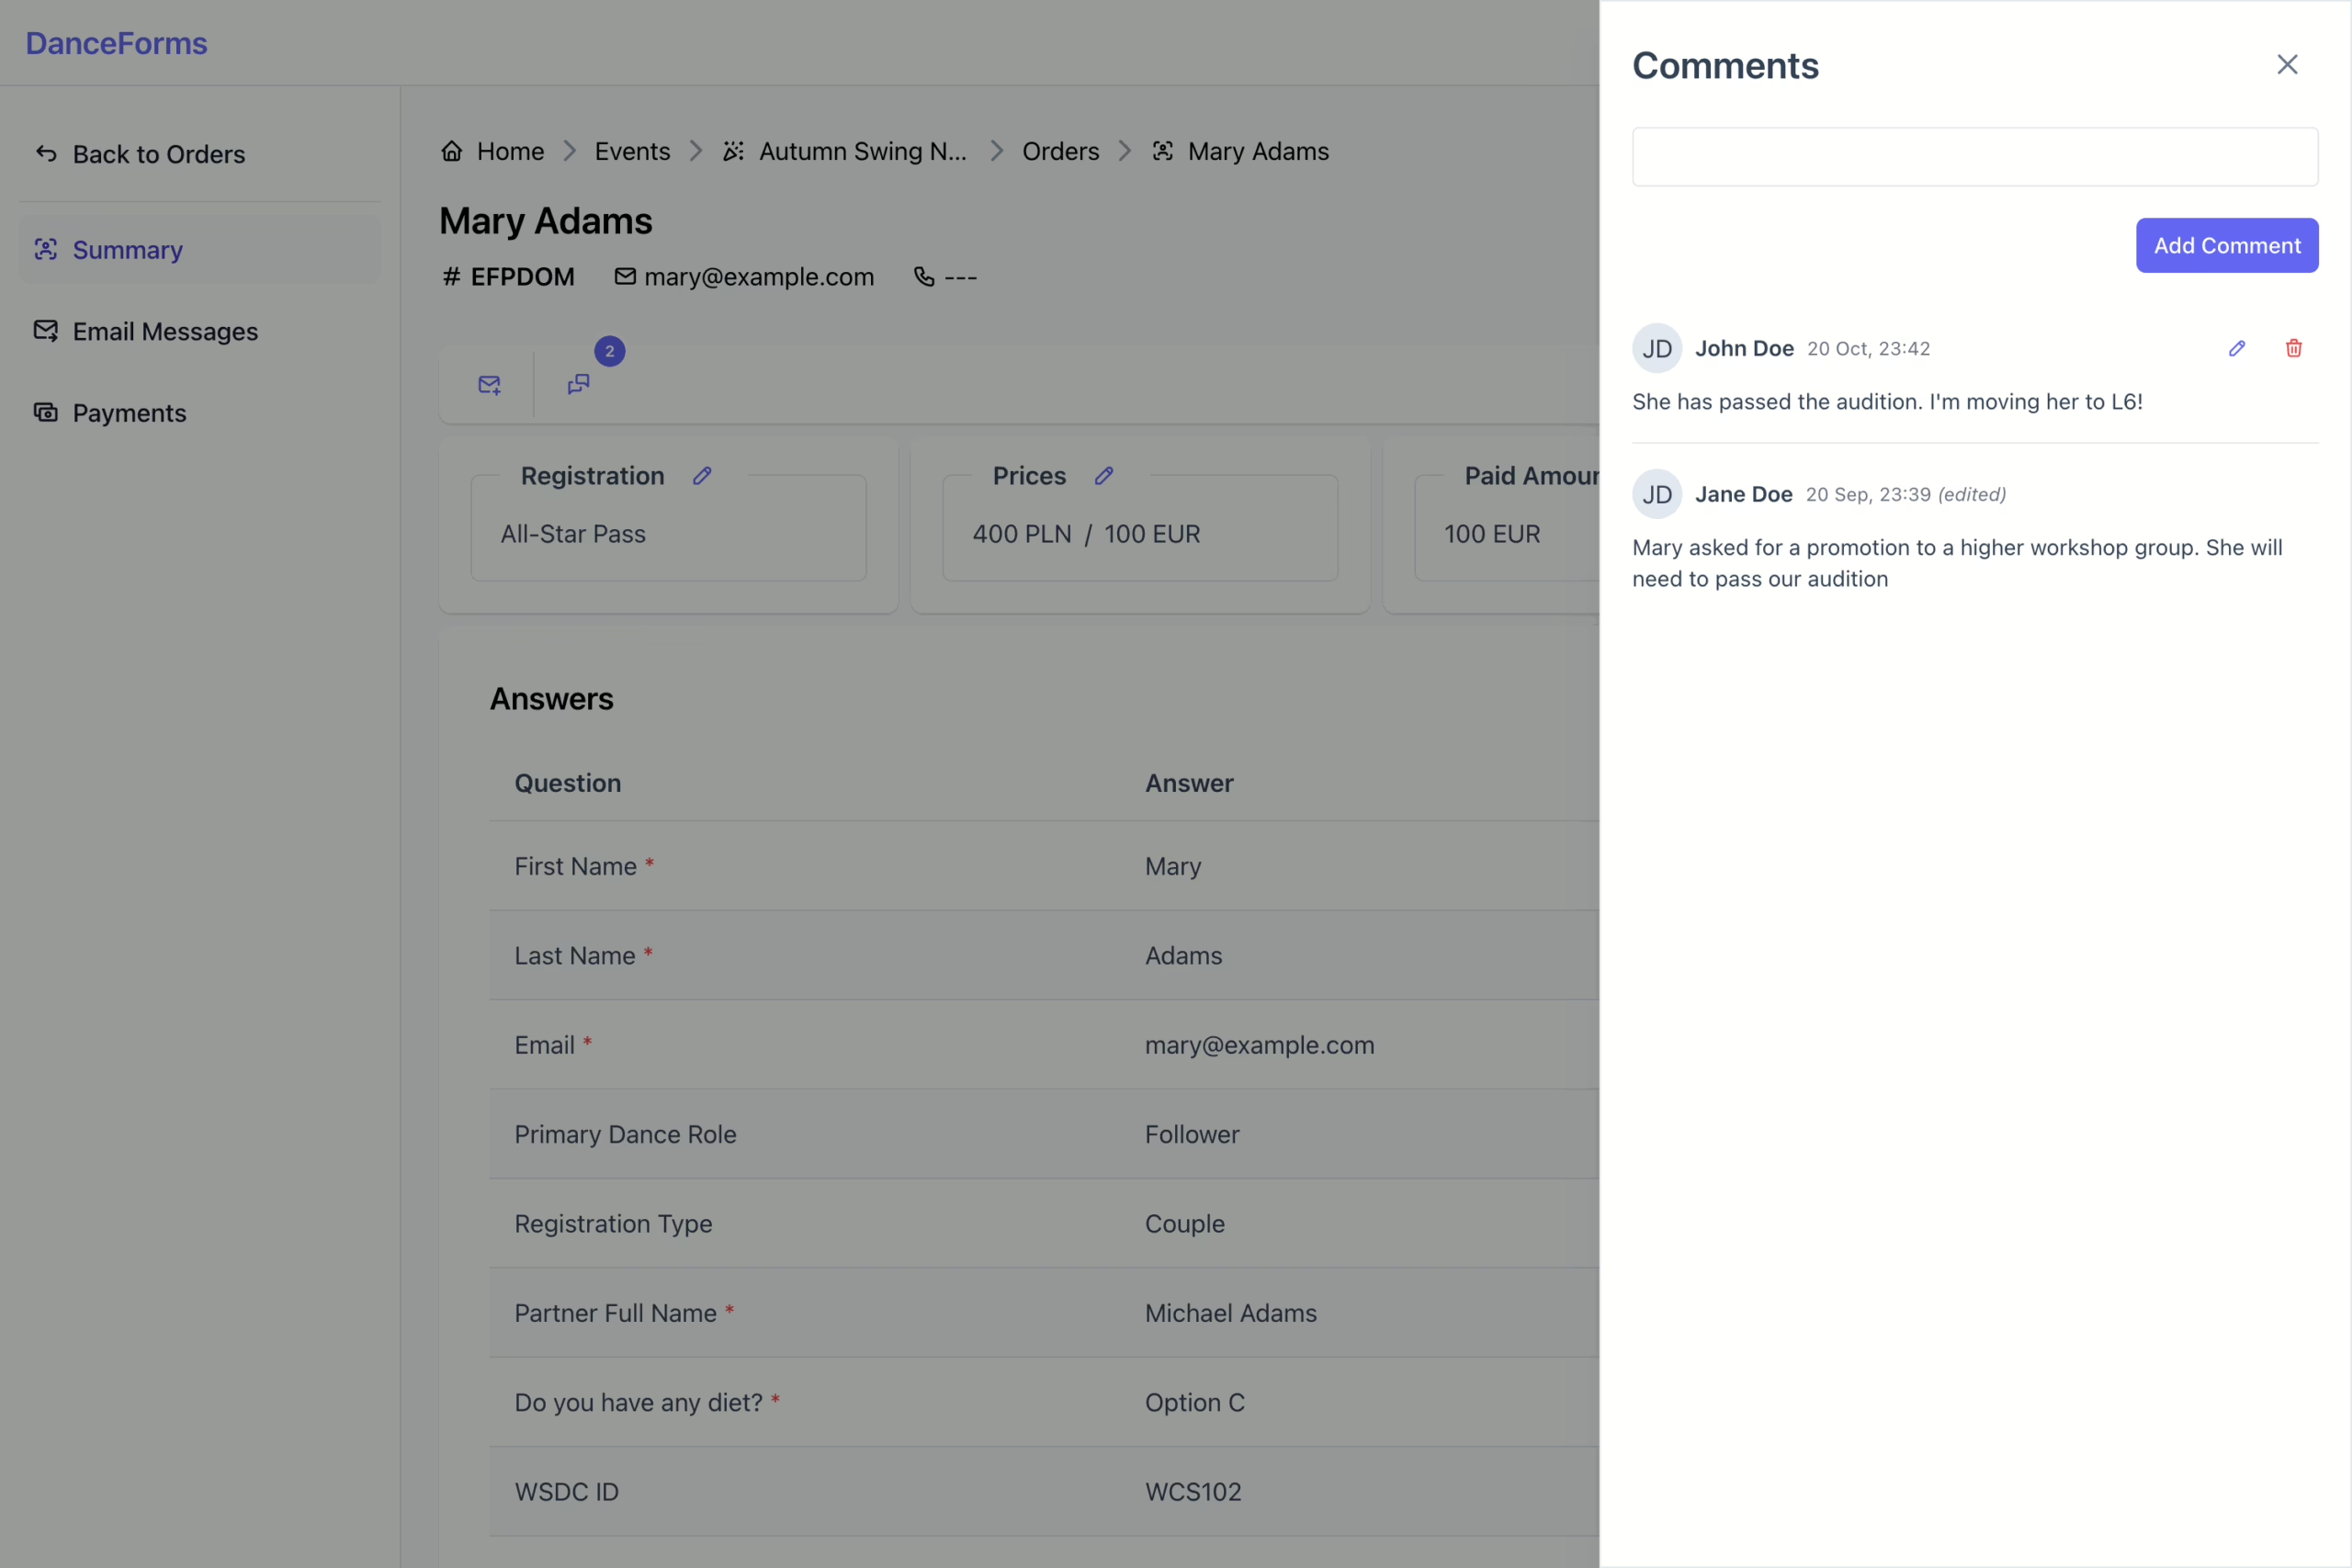
Use comments to leave internal notes and review information added by other team members.
- Click the Comment icon to open the comments sidebar.
- Read existing comments or add a new one as needed.